メインコンテンツにスキップ

Microsoft Surface Pro 4 Heat Sink Replacement

必要な工具と部品

  1. Microsoft Surface Pro 4 Heat Sink  Replacement, Heat Sink: 手順 1、 3の画像 1 Microsoft Surface Pro 4 Heat Sink  Replacement, Heat Sink: 手順 1、 3の画像 2 Microsoft Surface Pro 4 Heat Sink  Replacement, Heat Sink: 手順 1、 3の画像 3
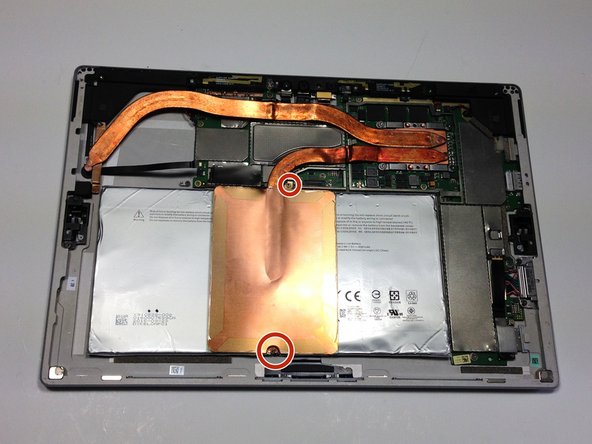
    • Both sections of the heat sink are connected to the motherboard via a panel which is covered by a metal casing.

    • Remove the casing by prying around the edges and then lifting the entire piece once it is loose.

  2. Microsoft Surface Pro 4 Heat Sink  Replacement: 手順 2、 3の画像 1 Microsoft Surface Pro 4 Heat Sink  Replacement: 手順 2、 3の画像 2 Microsoft Surface Pro 4 Heat Sink  Replacement: 手順 2、 3の画像 3
    • Remove the four 1.5mm Torx T4 screws holding the main body of the heat sink to the motherboard

  3. Microsoft Surface Pro 4 Heat Sink  Replacement: 手順 3、 2の画像 1 Microsoft Surface Pro 4 Heat Sink  Replacement: 手順 3、 2の画像 2
    • Remove the two 1.5mm Torx T3 screw holding the copper plate near the middle of the device.

  4. Microsoft Surface Pro 4 Heat Sink  Replacement: 手順 4、 2の画像 1 Microsoft Surface Pro 4 Heat Sink  Replacement: 手順 4、 2の画像 2
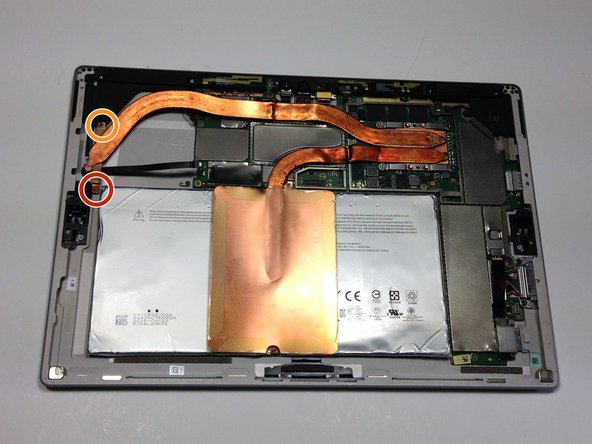
    • Remove the 1.5mm Torx T4 screw holding the heat sink tubing to the frame of the device.

    • Remove the 3.0mm Torx T4 screw.

  5. Microsoft Surface Pro 4 Heat Sink  Replacement: 手順 5、 3の画像 1 Microsoft Surface Pro 4 Heat Sink  Replacement: 手順 5、 3の画像 2 Microsoft Surface Pro 4 Heat Sink  Replacement: 手順 5、 3の画像 3
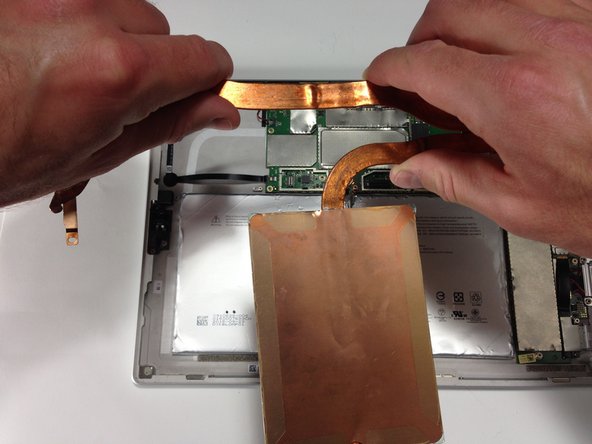
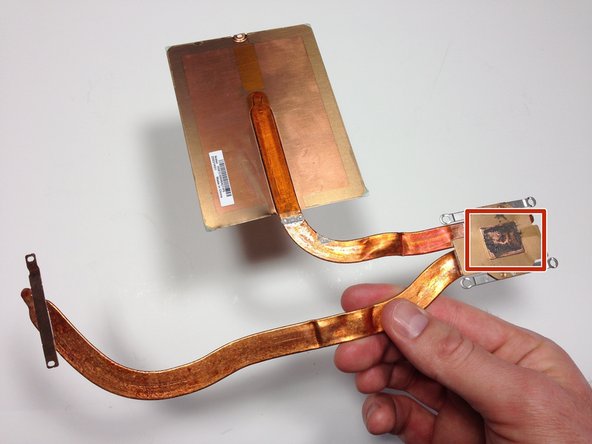
    • You can now remove entire heat sink by lifting it out with your hands.

    • Be sure to replace the thermal paste when installing the heat sink.

終わりに

To reassemble your device, follow these instructions in reverse order.

10 の人々がこのガイドを完成させました。

作成者

10人の作成者と共同で作成されました。

Andrew Prater

メンバー登録日: 02/01/16

5,728 ポイント

4のガイドは作成済み

チーム

Metro State, Team 1-3, Carpenter Spring 2016 Metro State, Team 1-3, Carpenter Spring 2016人のメンバー

MSU-CARPENTER-S16S1G3

2 メンバー

12のガイドは作成済み

0 件のコメント

コメントを追加

統計データ:

過去 24時間: 6

過去 7 日: 58

過去 30 日: 220

今までの合計 18,983