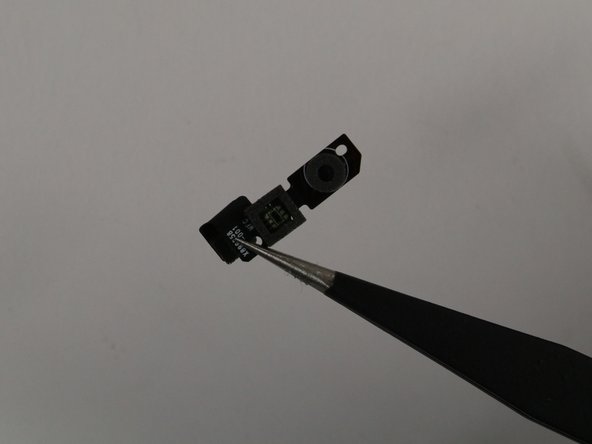
メインコンテンツにスキップ

Microsoft Surface Pro 3 Rear Facing Camera Replacement

必要な工具と部品

  1. Microsoft Surface Pro 3 Rear Facing Camera Replacement, Display: 手順 1、 2の画像 1 Microsoft Surface Pro 3 Rear Facing Camera Replacement, Display: 手順 1、 2の画像 2
    • Before you begin, discharge the Surface Pro's battery below 25%. A charged lithium-ion battery can catch fire and/or explode if accidentally damaged during the repair.

    • The display is strongly glued to the frame of the device.

    • To remove the display, first soften the adhesive by applying heat. You can use a heat pad, heat gun, or iOpener. In a pinch, a hair dryer can also work.

    • Be careful when using a heat gun, as too much heat can permanently damage the display and/or battery.

    • Steadily and evenly heat the perimeter of the display until it's too hot to touch, and try to maintain that temperature for several minutes.

  2. Microsoft Surface Pro 3 Rear Facing Camera Replacement: 手順 2、 2の画像 1 Microsoft Surface Pro 3 Rear Facing Camera Replacement: 手順 2、 2の画像 2
    • Use a suction cup or an iSclack to pull up on the glass and create a slight gap between the glass and the metal frame.

    • If your display is badly cracked, a suction cup may not adhere. It may help to first cover the display with a layer of packing tape. Alternatively, you can superglue your suction cup to the display.

    • Carefully insert an opening pick into the gap between the screen and the device to cut the adhesive.

    • Slide the pick around the sides and bottom of the display to cut the adhesive. Apply more heat as needed.

    • Work carefully—the glass is thin and will crack easily if you try to force it.

    • The wi-fi antennas are glued under the screen border along the top edge (on either side of the camera), and can be damaged easily. Use extra care when separating the top edge, and apply more heat if necessary.

  3. Microsoft Surface Pro 3 Rear Facing Camera Replacement: 手順 3、 3の画像 1 Microsoft Surface Pro 3 Rear Facing Camera Replacement: 手順 3、 3の画像 2 Microsoft Surface Pro 3 Rear Facing Camera Replacement: 手順 3、 3の画像 3
    • Continue to heat sections of the screen with the heat gun.

    • As you make your way around the screen with the heat gun, use the plastic opening tool and the opening picks to pry the screen loose.

    • The screen is extremely thin and very easy to break. Be careful working with broken glass.

  4. Microsoft Surface Pro 3 Rear Facing Camera Replacement: 手順 4、 2の画像 1 Microsoft Surface Pro 3 Rear Facing Camera Replacement: 手順 4、 2の画像 2
    • Lift the screen up carefully so that no wires are torn.

  5. Microsoft Surface Pro 3 Rear Facing Camera Replacement: 手順 5、 2の画像 1 Microsoft Surface Pro 3 Rear Facing Camera Replacement: 手順 5、 2の画像 2
    • Remove the 3 mm T3 Torx screw securing the battery connector, and disconnect the battery connector.

    • Be careful not lose the small, rectangular bridge connector that lies underneath.

  6. Microsoft Surface Pro 3 Rear Facing Camera Replacement: 手順 6、 3の画像 1 Microsoft Surface Pro 3 Rear Facing Camera Replacement: 手順 6、 3の画像 2 Microsoft Surface Pro 3 Rear Facing Camera Replacement: 手順 6、 3の画像 3
    • Remove the single 4 mm T3 Torx screw securing the display cable.

    • Lift the connector to disconnect the cable.

    • Be careful not lose the small, rectangular bridge connector that lies underneath.

  7. Microsoft Surface Pro 3 Rear Facing Camera Replacement: 手順 7、 3の画像 1 Microsoft Surface Pro 3 Rear Facing Camera Replacement: 手順 7、 3の画像 2 Microsoft Surface Pro 3 Rear Facing Camera Replacement: 手順 7、 3の画像 3
    • Grasp the orange cable connected to the silver connecter.

    • Carefully lift the orange cable up until the connecter pops off.

    • The screen will now be completely disconnected.

    • The replacement display may not include all the parts needed for installation. Save all the parts from the original display, and transfer them to the new display as needed.

  8. Microsoft Surface Pro 3 Rear Facing Camera Replacement, Rear Facing Camera: 手順 8、 2の画像 1 Microsoft Surface Pro 3 Rear Facing Camera Replacement, Rear Facing Camera: 手順 8、 2の画像 2
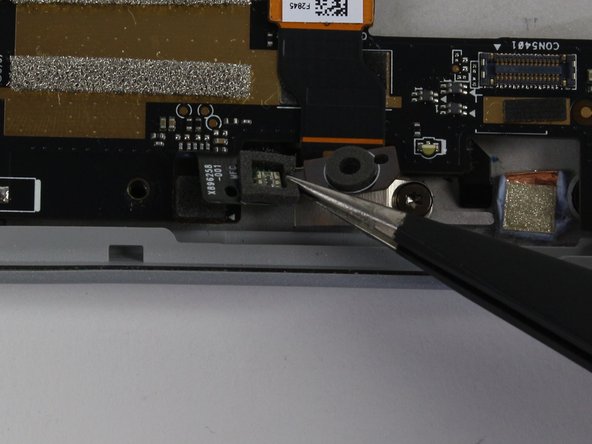
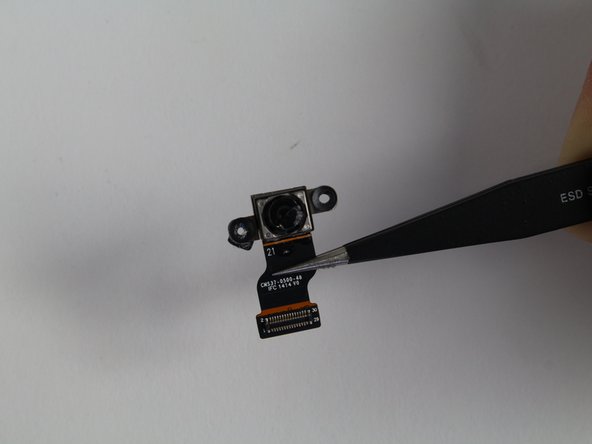
    • Remove the 4mm screw with the T3 Torx Screwdriver.

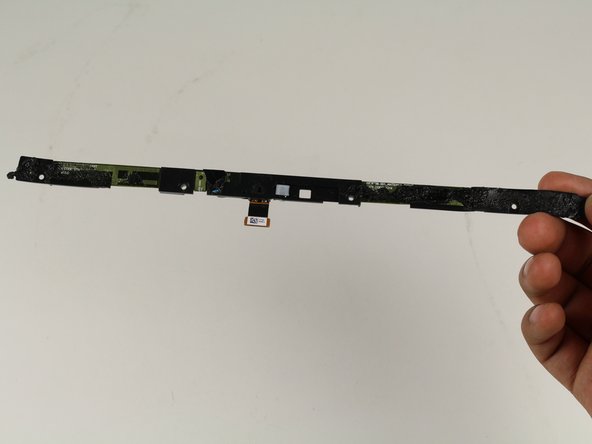
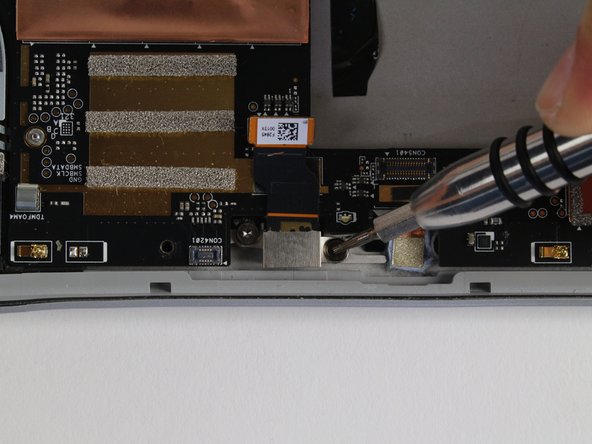
    • Remove the four 7mm screws with the T3 Torx Screwdriver.

  9. Microsoft Surface Pro 3 Rear Facing Camera Replacement: 手順 9、 3の画像 1 Microsoft Surface Pro 3 Rear Facing Camera Replacement: 手順 9、 3の画像 2 Microsoft Surface Pro 3 Rear Facing Camera Replacement: 手順 9、 3の画像 3
    • Locate the black piece shown.

    • Remove this piece by gently lifting it up with the tweezers until it pops off.

  10. Microsoft Surface Pro 3 Rear Facing Camera Replacement: 手順 10、 2の画像 1 Microsoft Surface Pro 3 Rear Facing Camera Replacement: 手順 10、 2の画像 2
    • Remove the two 4mm screws with the T5 Torx Screwdriver.

  11. Microsoft Surface Pro 3 Rear Facing Camera Replacement: 手順 11、 2の画像 1 Microsoft Surface Pro 3 Rear Facing Camera Replacement: 手順 11、 2の画像 2
    • Remove the rear camera with the tweezers.

終わりに

To reassemble your device, follow these instructions in reverse order.

2 の人々がこのガイドを完成させました。

作成者

5人の作成者と共同で作成されました。

Erik Snyder

メンバー登録日: 10/01/15

5,221 ポイント

5のガイドは作成済み

チーム

Cal Poly, Team 12-18, Maness Fall 2015 Cal Poly, Team 12-18, Maness Fall 2015人のメンバー

CPSU-MANESS-F15S12G18

5 メンバー

31のガイドは作成済み

0 件のコメント

コメントを追加

統計データ:

過去 24時間: 0

過去 7 日: 2

過去 30 日: 14

今までの合計 3,392