メインコンテンツにスキップ

Microsoft Surface 3 Kickstand Replacement

必要な工具と部品

  1. Microsoft Surface 3 Kickstand Replacement, Casing: 手順 1、 2の画像 1 Microsoft Surface 3 Kickstand Replacement, Casing: 手順 1、 2の画像 2
    • Warm up an iOpener following the instructions found in the iOpener guide.

    • Place the warm iOpener on top of the edges of the screen. This heat will weaken the strength of the adhesive between the display and body.

    no, I didn't break the screen upon removing batteries.

    Robert Hale - 返信

  2. Microsoft Surface 3 Kickstand Replacement: 手順 2、 2の画像 1 Microsoft Surface 3 Kickstand Replacement: 手順 2、 2の画像 2
    • Use iFixit opening picks to wedge under the edge of the screen at the speaker port.

    • This may take significant force. A fingernail might work better for the initial lift

    • If you push straight down near the edge you will go through the speaker mesh and possibly end up damaging your speaker; try to push the pick in at a shallow angle.

  3. Microsoft Surface 3 Kickstand Replacement: 手順 3、 2の画像 1 Microsoft Surface 3 Kickstand Replacement: 手順 3、 2の画像 2
    • Carefully try to work your way around the device using the picks, reapplications of the heated iOpener, and luck.

    • If you break the glass on one side you might want to try again starting from the other side so that you have a clean, unbroken, edge on that side.

    • While the glass on this display is not particularly sharp when broken, it is still broken glass and you should be careful with it.

    Be very careful on the top edge where the front-facing camera is. The antenna’s for all wireless components are pressed into the adhesive on both the right and left of the camera. I tore off a piece of my wifi antenna here.

    Adam Pyle - 返信

  4. Microsoft Surface 3 Kickstand Replacement: 手順 4、 1の画像 1
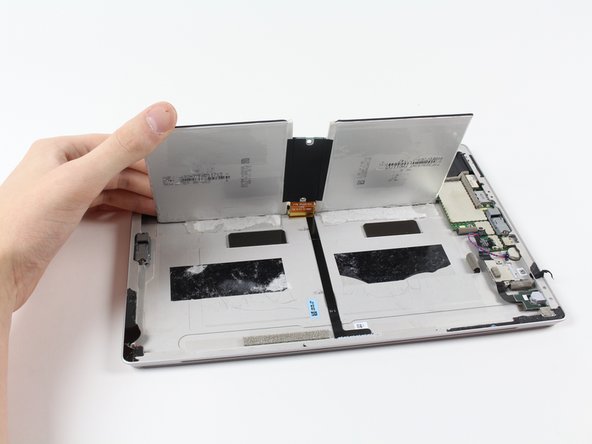
    • Flip the display over so that parts underneath it are easily accessible.

    • Do not pull out the display as it is still attached to the motherboard.

    • If you are replacing the display, or want it out of the way, continue with the display replacement guide steps.

    Please note that the WIFI antenna can become stuck to the display. It is located on the black plastic to the right of the camera and can be easily disconnected accidentally. Excellent guide otherwise.

    Gary Gleeson - 返信

    I second this comment. Didn’t know it was there. The surface 3 pro guide clearly warns of this in the takeapart.

    Brian Carlson - 返信

  5. Microsoft Surface 3 Kickstand Replacement, Battery: 手順 5、 1の画像 1
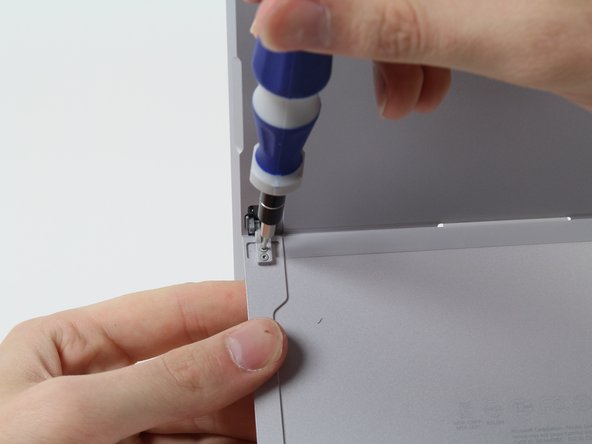
    • Now that you've gotten the casing off of the Surface 3, you can start removing the battery pack.

  6. Microsoft Surface 3 Kickstand Replacement: 手順 6、 3の画像 1 Microsoft Surface 3 Kickstand Replacement: 手順 6、 3の画像 2 Microsoft Surface 3 Kickstand Replacement: 手順 6、 3の画像 3
    この手順で使用する道具:
    Plastic Cards
    $2.99
    購入する
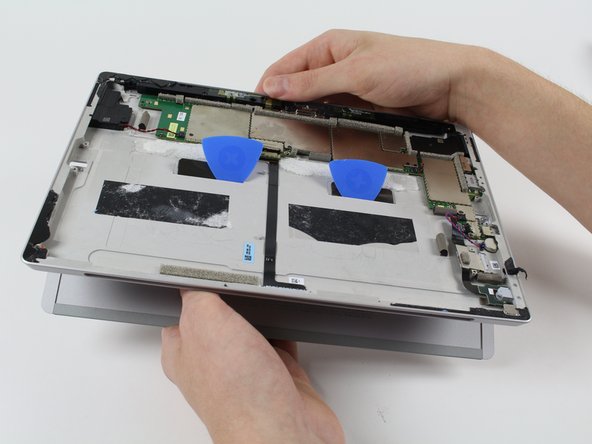
    • Slide the iFixit plastic cards under the compartments of the battery pack.

    • Slide the card around to undo the adhesive under the battery pack

  7. Microsoft Surface 3 Kickstand Replacement: 手順 7、 3の画像 1 Microsoft Surface 3 Kickstand Replacement: 手順 7、 3の画像 2 Microsoft Surface 3 Kickstand Replacement: 手順 7、 3の画像 3
    • Carefully slide the battery's flat power and data connector from its insert.

    • You may now switch out the battery pack for a new one.

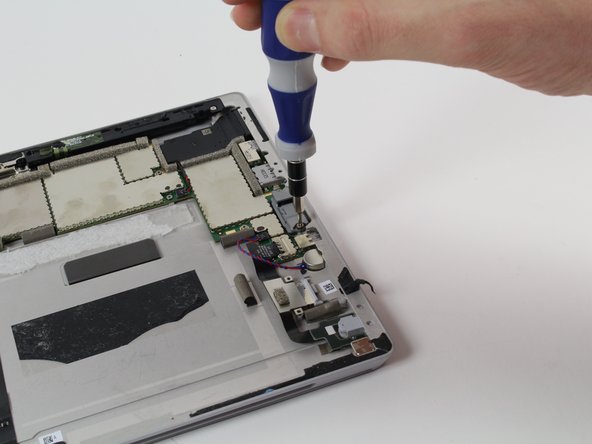
    When replacing the battery, the connector will not slide back in where it came from easily. There are small “fingers” that press down on the top of the connector from the bottom of the logic board, they are pressed down against the back of the casing so firmly that the connector will not slide under them, instead the cable will ride up them and jam into the back of the logic board. I’ve found the best solution is to remove the screws from the logic board and use a spudger to gently lift the logic board to make a space under the fingers to allow the connector to slip back in.

    Brad Perkins - 返信

    Be aware of the fragility of the battery connector and ensure that the replacement has got the cut out on the leading edge. I’ve managed to break / snap the connecting cable on the replacement battery :-( so will have to order another and try again (at £25 its worth trying again IMHO).

    Gary Gleeson - 返信

    If one of this pins holding the ribbon breaks does the mother board still work, with a new battery. Do i need to remove motherboard to instsll battery ribbon. Its hard not to break.

    Ana Rios - 返信

    I took out the six (torx 3) and two (torx 2) screws near the battery terminal. Then used a spudger on the left side of the logic board to get it high enough off the frame to sneak in the battery connector. Worked great. Helps to have an extra hand too.

    Corey S - 返信

    I want to ask that do I need to fold the battery's flat power and data connector first before I slide connector into its insert?

    It does not work when I slide it in, or I just not slide it deep enough?

    tsengkt - 返信

    I installed the battery but it was shorting. Examine a picture of the backside of the motherboard (ebay). There are THREE rows of connector pins to the battery, not just the row you see, and you’ve got to get under all the rows it’s supposed to connect to or it shorts. Only way to do this is to get some screws out and lift the motherboard enough to get it under.

    kevin messerschmidt - 返信

    It’s a very important point mentioned a couple of times above concerning the contact fingers. As the top edge of the circuit board seems to be stuck into the back case you have to prise up the bottom of the circuit board enough to slide the connector under and over a plastic stud. The problem is that there are three rows of fingers on the circuit board which connect to the battery connector and it’s very easy to lift the connector over the plastic stud and then not get it down again to get under the third row of fingers.

    maytrees webmaster - 返信

  8. Microsoft Surface 3 Kickstand Replacement, Kickstand: 手順 8、 2の画像 1 Microsoft Surface 3 Kickstand Replacement, Kickstand: 手順 8、 2の画像 2
    • Remove these four 3/32" Torx #3 screws.

    • If you do not need to remove the hinges, skip to the step that handles the retaining tabs.

  9. Microsoft Surface 3 Kickstand Replacement: 手順 9、 2の画像 1 Microsoft Surface 3 Kickstand Replacement: 手順 9、 2の画像 2
    • Remove these four 3/16" Torx #5 screws that hold in the hinges to replace the hinges.

  10. Microsoft Surface 3 Kickstand Replacement: 手順 10、 3の画像 1 Microsoft Surface 3 Kickstand Replacement: 手順 10、 3の画像 2 Microsoft Surface 3 Kickstand Replacement: 手順 10、 3の画像 3
    • These two retaining tabs need to be fed through the slots in the case to release the kickstand.

    • Use picks to make the tab slide through the slot then simply pull out the kickstand,

終わりに

To reassemble your device, follow these instructions in reverse order.

4 の人々がこのガイドを完成させました。

作成者

1人の作成者と共同作成されました。

Harold Hall

メンバー登録日: 10/08/15

1,320 ポイント

3のガイドは作成済み

チーム

Cal Poly, Team 5-12, Maness Fall 2015 Cal Poly, Team 5-12, Maness Fall 2015人のメンバー

CPSU-MANESS-F15S5G12

4 メンバー

18のガイドは作成済み

2 件のコメント

I think I will NOT be trying to do this. To many potentials for something to go wrong beyond your control, even when being extra careful. I do not feel like replacing someone’s device if that happens.

QuickTech - 返信

Please can you tell me which kickstand the surface pro 3 64 GB (2013) needs? Is it the same as the surface pro 4 ? I have broken the stand and am trying yo source a replacement.

Tilly Mortimore - 返信

コメントを追加

統計データ:

過去 24時間: 4

過去 7 日: 10

過去 30 日: 29

今までの合計 8,845