メインコンテンツにスキップ

Meizu MX3 Screen Replacement

必要な工具と部品

  1. Meizu MX3 Screen Replacement, Screen: 手順 1、 1の画像 1
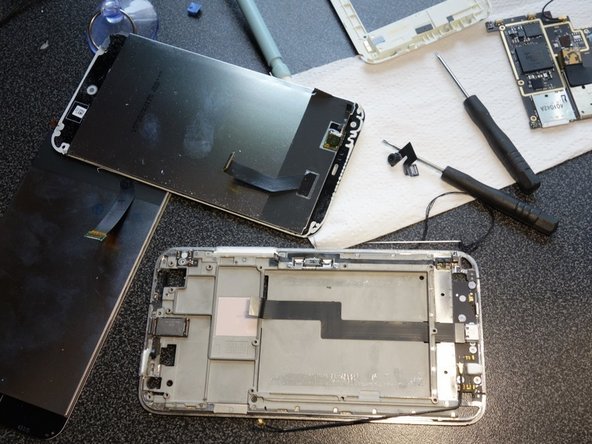
    • Remove the back panel, and unscrew everything to remove the second back panel. Some screw are longer than other. But I mixed them without issue. Here I saw the solution for the network issue: the little contacts between motherboard and screen were bended.

    • I removed the battery, but I think it's not mandatory. If you do, be careful, it's very well glued, and there is some wires behind.

  2. Meizu MX3 Screen Replacement: 手順 2、 1の画像 1
    • Unplug all the connectors to the motherboard, included the two antennas The small flat ribbon in the corner is a little tricky, you have to switch the black part of the connector, not the white one like some other similar I saw before.

  3. Meizu MX3 Screen Replacement: 手順 3、 1の画像 1
    • Remove the jack connector, removes the lasts screws (mark the placement for later)

    • Remove the motherboard, starting by the upper part: There is a last connector to unplug at the bottom, behind.

  4. Meizu MX3 Screen Replacement: 手順 4、 2の画像 1 Meizu MX3 Screen Replacement: 手順 4、 2の画像 2
    • Now, remove the old screen. It's glued, try to lift a corner, then with a plastic tool, unglue everything.

    • Clean the glue inside the metal part.

  5. Meizu MX3 Screen Replacement: 手順 5、 1の画像 1
    • Put some adhesive (or some glue?) I used thin double-sided tape I had cut the right shape. the side of the screen are less than 1mm wide, it's hard to do here...

    • Put the screen in the frame, and put everything back in place.

    • Voila!

終わりに

To reassemble your device, follow these instructions in reverse order.

5 の人々がこのガイドを完成させました。

作成者

2人の作成者と共同で作成されました。

Feyris

メンバー登録日: 04/10/15

135 ポイント

1ガイドが承認済み

0 件のコメント

コメントを追加

統計データ:

過去 24時間: 0

過去 7 日: 1

過去 30 日: 8

今までの合計 3,436