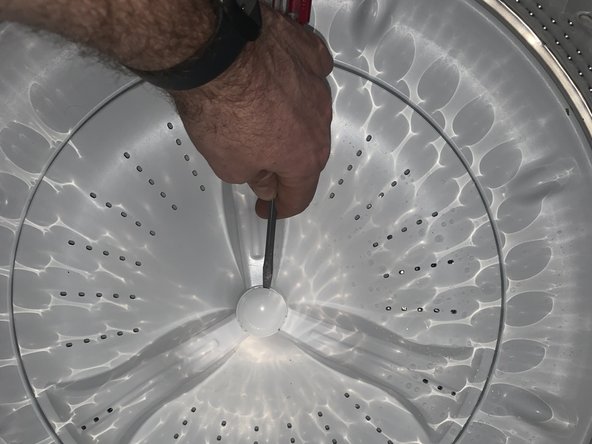
メインコンテンツにスキップ

Maytag MVWX655DW1 Washer Basket Hub Replacement

必要な工具と部品

  1. Maytag MVWX655DW1 Washer Basket Hub Replacement, Washer Basket Hub: 手順 1、 1の画像 1
    • Use a 1/4-in Flathead screwdriver to remove the three 5mm screws behind the washing machine.

  2. Maytag MVWX655DW1 Washer Basket Hub Replacement: 手順 2、 3の画像 1 Maytag MVWX655DW1 Washer Basket Hub Replacement: 手順 2、 3の画像 2 Maytag MVWX655DW1 Washer Basket Hub Replacement: 手順 2、 3の画像 3
    • Tape the lid down so it does not open when removing.

    • Pull the lid forward with your thumbs while pushing against the washer with your fingers.

    • Lift the lid up and place on the slots located where you removed the screws from the back.

  3. Maytag MVWX655DW1 Washer Basket Hub Replacement: 手順 3、 3の画像 1 Maytag MVWX655DW1 Washer Basket Hub Replacement: 手順 3、 3の画像 2 Maytag MVWX655DW1 Washer Basket Hub Replacement: 手順 3、 3の画像 3
    • Remove the cap from the agitator with your flat head screwdriver. It should pop right off.

    • Using your 7/16 socket, unscrew the bolt attaching the agitator to the motor shaft.

  4. Maytag MVWX655DW1 Washer Basket Hub Replacement: 手順 4、 3の画像 1 Maytag MVWX655DW1 Washer Basket Hub Replacement: 手順 4、 3の画像 2 Maytag MVWX655DW1 Washer Basket Hub Replacement: 手順 4、 3の画像 3
    • Lift up on the agitator and it should slide off the motor shaft exposing the washer hub underneath.

    • If it is stuck, put bolt back in halfway. Tap the bolt with a hammer while pulling up on the agitator to jog it loose.

  5. Maytag MVWX655DW1 Washer Basket Hub Replacement: 手順 5、 3の画像 1 Maytag MVWX655DW1 Washer Basket Hub Replacement: 手順 5、 3の画像 2 Maytag MVWX655DW1 Washer Basket Hub Replacement: 手順 5、 3の画像 3
    • Use your Phillips #3 screwdriver to pull the retaining slip out.

    • Unscrew the six screws with the same Phillips #3 screwdriver to remove the hub.

  6. Maytag MVWX655DW1 Washer Basket Hub Replacement: 手順 6、 2の画像 1 Maytag MVWX655DW1 Washer Basket Hub Replacement: 手順 6、 2の画像 2
    • Take the new hub and slide it over the motor shaft.

    • Align the holes by only slightly screwing in each screw and turning the hub until all holes are aligned and screws are in.

    • Tighten all screws and then put new retaining clip into hub.

終わりに

To reassemble your device, follow these instructions in reverse order.

作成者

2人の作成者と共同で作成されました。

Kyle

メンバー登録日: 02/18/21

133 ポイント

1ガイドが承認済み

チーム

University of Memphis, Team S51-G13, Willis Winter 2021 University of Memphis, Team S51-G13, Willis Winter 2021人のメンバー

UM-WILLIS-W21S51G13

1 メンバー

1のガイドは作成済み

0 件のコメント

コメントを追加

統計データ:

過去 24時間: 6

過去 7 日: 58

過去 30 日: 251

今までの合計 8,176