メインコンテンツにスキップ

Matsunichi MarquisPad MP977 Front Facing Camera Replacement

必要な工具と部品

  1. Matsunichi MarquisPad MP977 Front Facing Camera Replacement, Front Facing Camera: 手順 1、 1の画像 1
    • Using the PH #00 Phillips head screwdriver, unscrew the two screws.

  2. Matsunichi MarquisPad MP977 Front Facing Camera Replacement: 手順 2、 3の画像 1 Matsunichi MarquisPad MP977 Front Facing Camera Replacement: 手順 2、 3の画像 2 Matsunichi MarquisPad MP977 Front Facing Camera Replacement: 手順 2、 3の画像 3
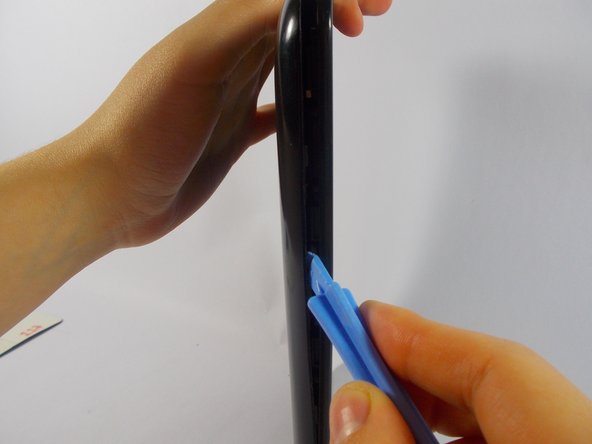
    • Place the device face down on a flat surface.

    • Insert the wide-tipped plastic opening tool into the top of the left speaker slot.

    • Be sure not to puncture the covering of the speaker.

    • Pry the back plate open and slide the tool in a clockwise direction, moving it along the opening between the device and the back plate until you reach the power button.

  3. Matsunichi MarquisPad MP977 Front Facing Camera Replacement: 手順 3、 2の画像 1 Matsunichi MarquisPad MP977 Front Facing Camera Replacement: 手順 3、 2の画像 2
    • Insert the opening tool into the slot located to the right of the speaker, at the top edge of the device.

    • Then, pry open the back plate of the device , and slide the tool counter clockwise along the device until you reach the charging port.

  4. Matsunichi MarquisPad MP977 Front Facing Camera Replacement: 手順 4、 1の画像 1
    • Remove the back plate and place it to the side of the device.

  5. Matsunichi MarquisPad MP977 Front Facing Camera Replacement: 手順 5、 1の画像 1
    • With the same screw driver, PH #00 Phillips head, remove the seven screws holding in the motherboard.

    • Place the screws somewhere safe where they wont fall.

  6. Matsunichi MarquisPad MP977 Front Facing Camera Replacement: 手順 6、 2の画像 1 Matsunichi MarquisPad MP977 Front Facing Camera Replacement: 手順 6、 2の画像 2
    • Gently pull the camera optic fiber out of it's slot to release the flap. This will allow the flap to open easily.

    • Be sure not to damage the camera port.

  7. Matsunichi MarquisPad MP977 Front Facing Camera Replacement: 手順 7、 2の画像 1 Matsunichi MarquisPad MP977 Front Facing Camera Replacement: 手順 7、 2の画像 2
    • Last, Insert the new camera into the pinhole camera slot.

終わりに

To reassemble your device, follow these instructions in reverse order.

作成者

11人の作成者と共同で作成されました。

Kathryn Sherlock

メンバー登録日: 03/24/15

127 ポイント

1ガイドが承認済み

チーム

UMass Dartmouth, Team 4-1, Vijaybhaskar Spring 2015 UMass Dartmouth, Team 4-1, Vijaybhaskar Spring 2015人のメンバー

UMASSD-VIJAYBHASKAR-S15S4G1

3 メンバー

6のガイドは作成済み

0 件のコメント

コメントを追加

統計データ:

過去 24時間: 0

過去 7 日: 1

過去 30 日: 2

今までの合計 216