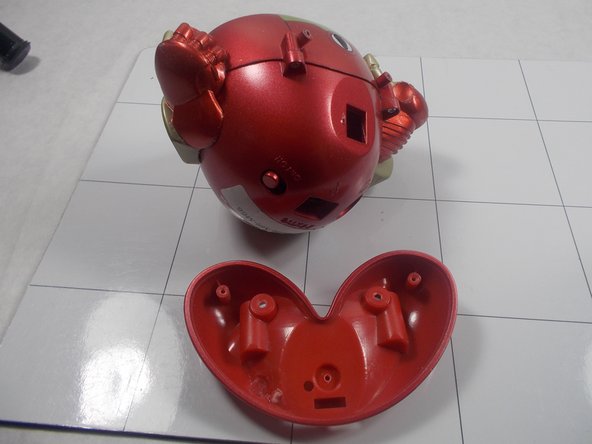
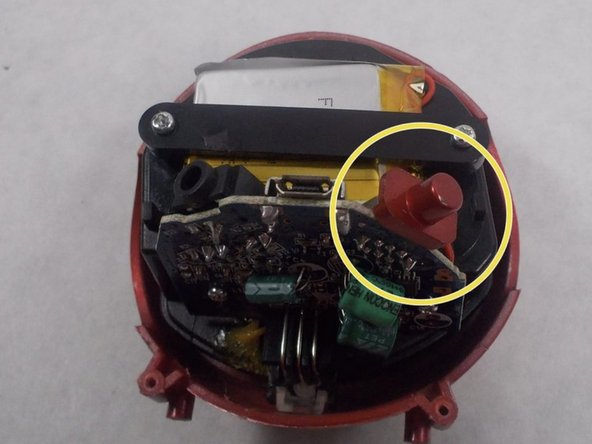
メインコンテンツにスキップ

Marvel iHome MR-M66 Power Switch Cover Replacement

必要な工具と部品

  1. Marvel iHome MR-M66 Power Switch Cover Replacement, Back Cover: 手順 1、 2の画像 1 Marvel iHome MR-M66 Power Switch Cover Replacement, Back Cover: 手順 1、 2の画像 2
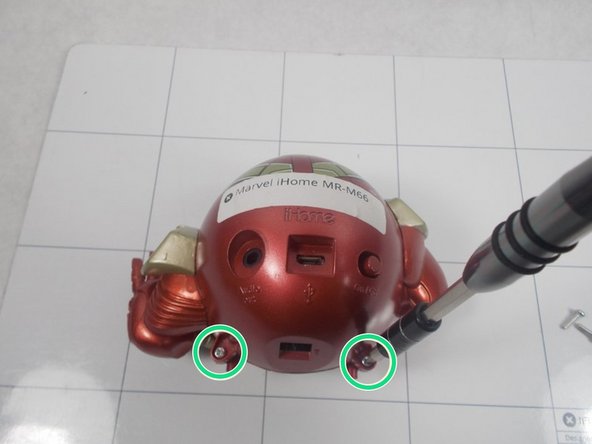
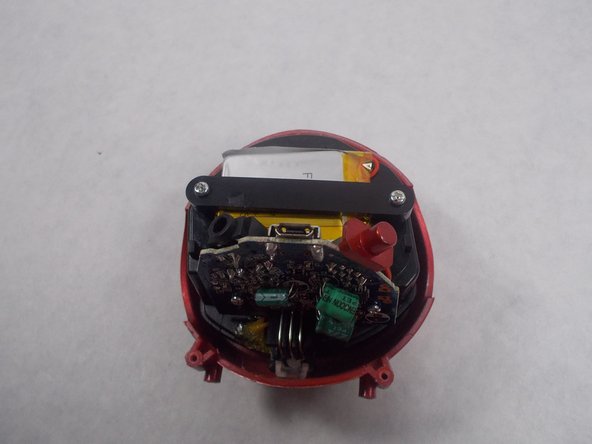
    • Remove two of the three screws shown on the bottom of the device.

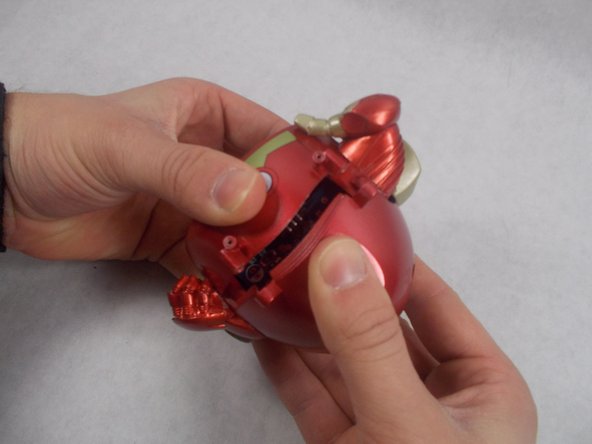
    • Begin removing the last screw, but leave it partially in the socket to remove the bottom cover easier.

  2. Marvel iHome MR-M66 Power Switch Cover Replacement: 手順 2、 3の画像 1 Marvel iHome MR-M66 Power Switch Cover Replacement: 手順 2、 3の画像 2 Marvel iHome MR-M66 Power Switch Cover Replacement: 手順 2、 3の画像 3
    • Remove the bottom cover by either pulling on the screw or using a plastic opening tool to pry the cover off.

    • After removing the bottom cover, remove the two screws.

  3. Marvel iHome MR-M66 Power Switch Cover Replacement: 手順 3、 3の画像 1 Marvel iHome MR-M66 Power Switch Cover Replacement: 手順 3、 3の画像 2 Marvel iHome MR-M66 Power Switch Cover Replacement: 手順 3、 3の画像 3
    • Use a spudger to release the small retaining clip that holds the feet to the bottom of the device.

    • Be careful here, as too much force can break the clip.

    • Remove the two screws from the back of the device.

  4. Marvel iHome MR-M66 Power Switch Cover Replacement: 手順 4、 3の画像 1 Marvel iHome MR-M66 Power Switch Cover Replacement: 手順 4、 3の画像 2 Marvel iHome MR-M66 Power Switch Cover Replacement: 手順 4、 3の画像 3
    • Using a plastic opening tool and your hand, separate the front and back covers from each other.

    • Starting from the bottom, use the plastic opening tool to create the initial separation and continue along the seam to the top of the device.

    • This step requires the most time and patience, so be careful.

    • The power switch will most likely come loose during this step and you will hear something rattling inside the device.

  5. Marvel iHome MR-M66 Power Switch Cover Replacement: 手順 5、 3の画像 1 Marvel iHome MR-M66 Power Switch Cover Replacement: 手順 5、 3の画像 2 Marvel iHome MR-M66 Power Switch Cover Replacement: 手順 5、 3の画像 3
    • Remove the two arms from either side of the device once a significant separation has been created.

    • They are not fixed to the body itself so you should be able to wiggle them free.

    • Continue pulling the back cover off the device.

    • Remove the red cover for the on/off switch from the device.

終わりに

To reassemble your device, follow these instructions in reverse order.

作成者

2人の作成者と共同で作成されました。

Aaram Williams

メンバー登録日: 03/08/17

201 ポイント

3のガイドは作成済み

チーム

UMass Dartmouth, Team S5-G3, Botvin Spring 2017 UMass Dartmouth, Team S5-G3, Botvin Spring 2017人のメンバー

UMASSD-BOTVIN-S17S5G3

3 メンバー

6のガイドは作成済み

0 件のコメント

コメントを追加

統計データ:

過去 24時間: 0

過去 7 日: 1

過去 30 日: 1

今までの合計 75