メインコンテンツにスキップ

Marvel iHome MR-M66 Auxiliary Port Replacement

必要な工具と部品

  1. Marvel iHome MR-M66 Auxiliary Port Replacement, Back Cover: 手順 1、 2の画像 1 Marvel iHome MR-M66 Auxiliary Port Replacement, Back Cover: 手順 1、 2の画像 2
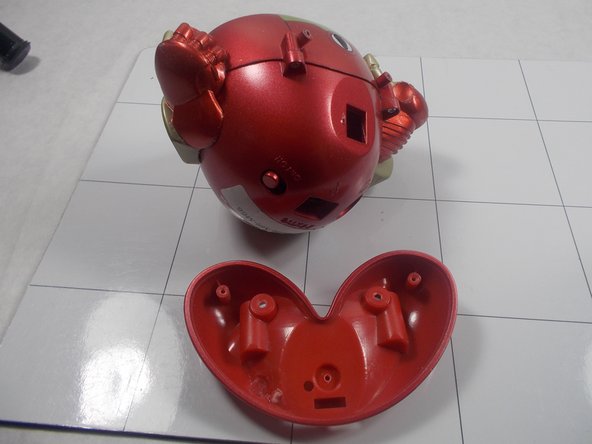
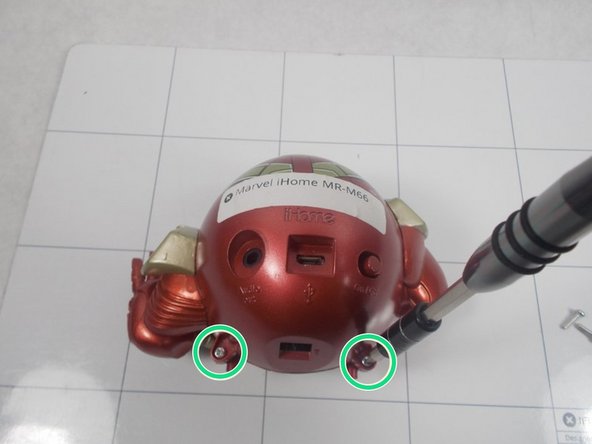
    • Remove two of the three screws shown on the bottom of the device.

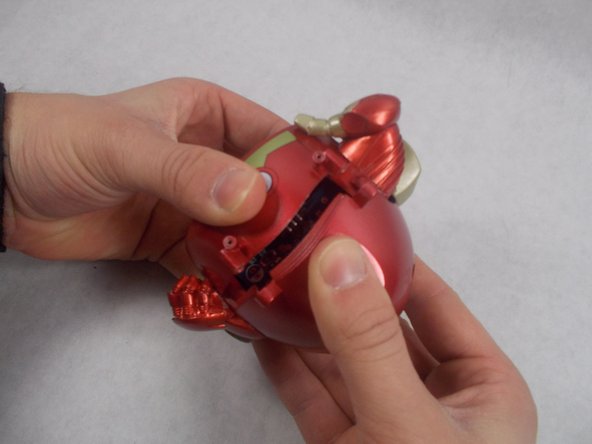
    • Begin removing the last screw, but leave it partially in the socket to remove the bottom cover easier.

  2. Marvel iHome MR-M66 Auxiliary Port Replacement: 手順 2、 3の画像 1 Marvel iHome MR-M66 Auxiliary Port Replacement: 手順 2、 3の画像 2 Marvel iHome MR-M66 Auxiliary Port Replacement: 手順 2、 3の画像 3
    • Remove the bottom cover by either pulling on the screw or using a plastic opening tool to pry the cover off.

    • After removing the bottom cover, remove the two screws.

  3. Marvel iHome MR-M66 Auxiliary Port Replacement: 手順 3、 3の画像 1 Marvel iHome MR-M66 Auxiliary Port Replacement: 手順 3、 3の画像 2 Marvel iHome MR-M66 Auxiliary Port Replacement: 手順 3、 3の画像 3
    • Use a spudger to release the small retaining clip that holds the feet to the bottom of the device.

    • Be careful here, as too much force can break the clip.

    • Remove the two screws from the back of the device.

  4. Marvel iHome MR-M66 Auxiliary Port Replacement: 手順 4、 3の画像 1 Marvel iHome MR-M66 Auxiliary Port Replacement: 手順 4、 3の画像 2 Marvel iHome MR-M66 Auxiliary Port Replacement: 手順 4、 3の画像 3
    • Using a plastic opening tool and your hand, separate the front and back covers from each other.

    • Starting from the bottom, use the plastic opening tool to create the initial separation and continue along the seam to the top of the device.

    • This step requires the most time and patience, so be careful.

    • The power switch will most likely come loose during this step and you will hear something rattling inside the device.

  5. Marvel iHome MR-M66 Auxiliary Port Replacement: 手順 5、 3の画像 1 Marvel iHome MR-M66 Auxiliary Port Replacement: 手順 5、 3の画像 2 Marvel iHome MR-M66 Auxiliary Port Replacement: 手順 5、 3の画像 3
    • Remove the two arms from either side of the device once a significant separation has been created.

    • They are not fixed to the body itself so you should be able to wiggle them free.

    • Continue pulling the back cover off the device.

    • Remove the red cover for the on/off switch from the device.

  6. Marvel iHome MR-M66 Auxiliary Port Replacement, Auxiliary Port: 手順 6、 1の画像 1
    • Remove the two screws shown to access the battery.

  7. Marvel iHome MR-M66 Auxiliary Port Replacement: 手順 7、 2の画像 1 Marvel iHome MR-M66 Auxiliary Port Replacement: 手順 7、 2の画像 2
    • Remove the two screws shown to release the circuitboard.

    • Gently remove both the battery and circuitboard.

    • They will be attached together by the battery's wires.

  8. Marvel iHome MR-M66 Auxiliary Port Replacement: 手順 8、 3の画像 1 Marvel iHome MR-M66 Auxiliary Port Replacement: 手順 8、 3の画像 2 Marvel iHome MR-M66 Auxiliary Port Replacement: 手順 8、 3の画像 3
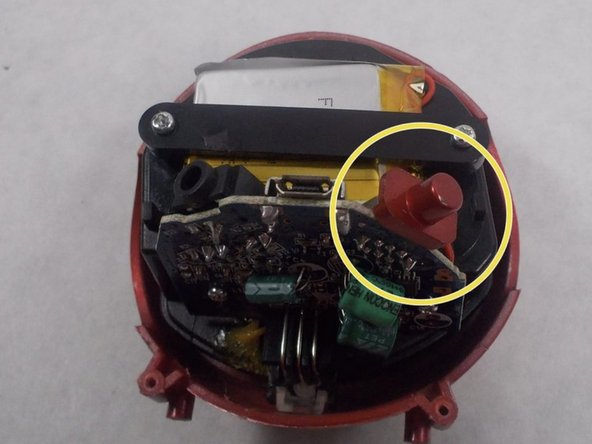
    • Locate the auxiliary port on the top side of the circuitboard.

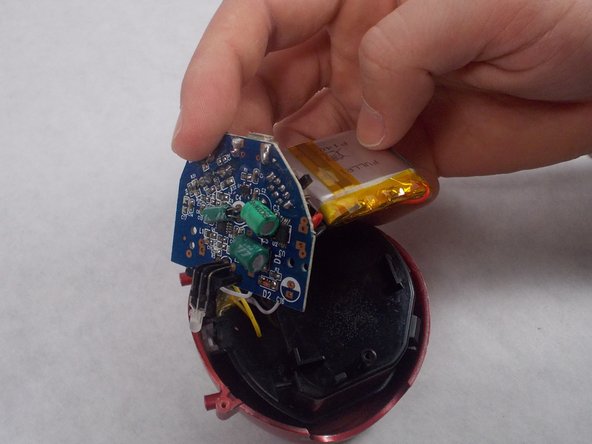
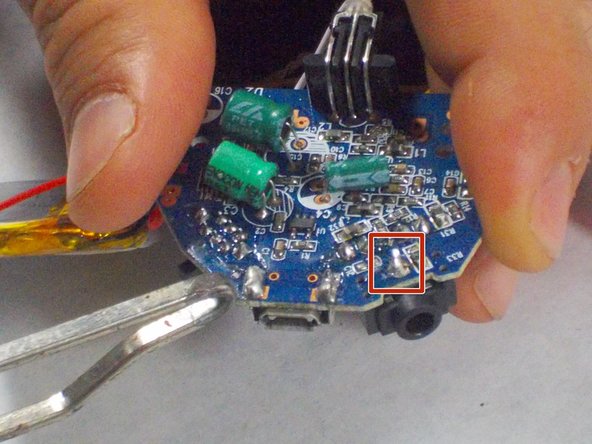
    • On the bottom of the circuitboard, locate the metal pin connecting the auxiliary port to the circuitboard.

    • Use the soldering iron to disconnect the pin.

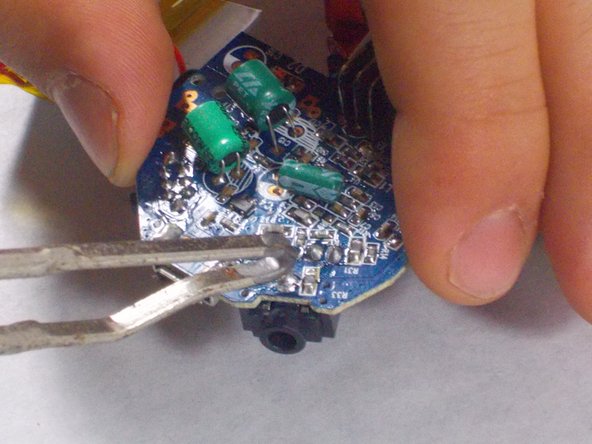
    • Use a pair of tweezers to remove the old auxiliary port.

    • Place the new auxiliary port in the same spot and solder the port to the circuitboard.

終わりに

To reassemble your device, follow these instructions in reverse order.

作成者

3人の作成者と共同で作成されました。

Tyler Jacob

メンバー登録日: 03/08/17

201 ポイント

3のガイドは作成済み

チーム

UMass Dartmouth, Team S5-G3, Botvin Spring 2017 UMass Dartmouth, Team S5-G3, Botvin Spring 2017人のメンバー

UMASSD-BOTVIN-S17S5G3

3 メンバー

6のガイドは作成済み

0 件のコメント

コメントを追加

統計データ:

過去 24時間: 0

過去 7 日: 1

過去 30 日: 1

今までの合計 78