はじめに
This guide will show you how to properly disassemble the speaker in order to safely remove and replace the crossover.
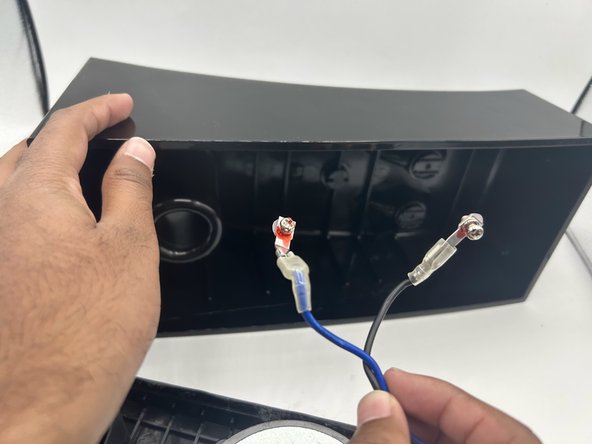
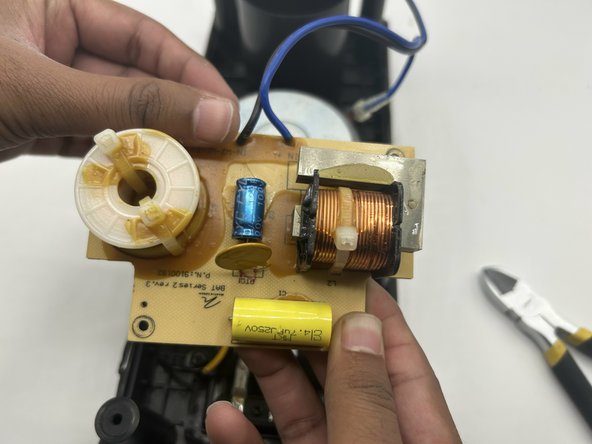
The crossover is an integral part of the speaker, as it divides the frequencies put out by the speaker and sends them to the right output. Damage to this part can disrupt where the frequencies are sent and further damage other parts of the speaker. An indicator of a worn out crossover is a dip in sound quality from the speaker.
While following this guide, ensure that you know how to properly handle a soldering iron as it is required in later steps. The hot iron can damage other internals if it makes contact with them, but it can also burn the user.
必要な工具と部品
-
-
Remove the speaker grill from the face of the speaker by using both hands to grip both ends of the speaker grill and pulling up to release the magnetic ends.
-
-


To reassemble your device, follow these instructions in reverse order.
To reassemble your device, follow these instructions in reverse order.

チーム

University of North Texas, Team 1-3, Kilpatrick Fall 2023 University of North Texas, Team 1-3, Kilpatrick Fall 2023人のメンバー
UNT-KILPATRICK-F23S1G3
4 メンバー
5のガイドは作成済み