メインコンテンツにスキップ

Marshall Emberton Charging Port Bay Replacement

必要な工具と部品

  1. Marshall Emberton Charging Port Bay Replacement, Charging Port Bay: 手順 1、 1の画像 1
    • In order to start uncrewing any of the screws off the speaker we have to take off the protective cover.

  2. Marshall Emberton Charging Port Bay Replacement: 手順 2、 1の画像 1
    • In order to get inside the speaker you will have to unscrew the screws on the side.

  3. Marshall Emberton Charging Port Bay Replacement: 手順 3、 1の画像 1
    • Prying the front of the speaker where it says "Marshall" in order to get into the insides of the speaker.

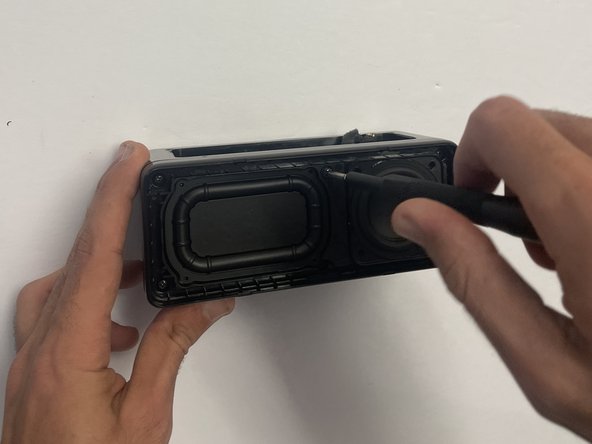
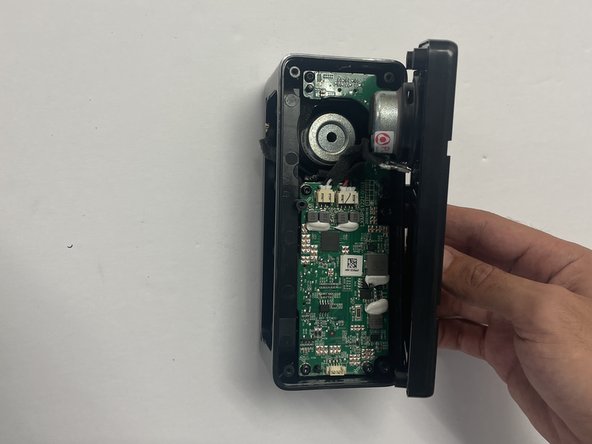
  4. Marshall Emberton Charging Port Bay Replacement: 手順 4、 3の画像 1 Marshall Emberton Charging Port Bay Replacement: 手順 4、 3の画像 2 Marshall Emberton Charging Port Bay Replacement: 手順 4、 3の画像 3
    • Once the "Marshall" part of the speaker is off this is how it will look. It's another protective layer that needs to be removed.

    • When removing all of the eight 1cm screws that are on the protective layer, will give us access to the insides of the speaker.

  5. Marshall Emberton Charging Port Bay Replacement: 手順 5、 1の画像 1
    • Once speaker is opened the motherboard will be the first thing that is seen. Then you will have to look for the 6 1cm screws (Shown in photograph)

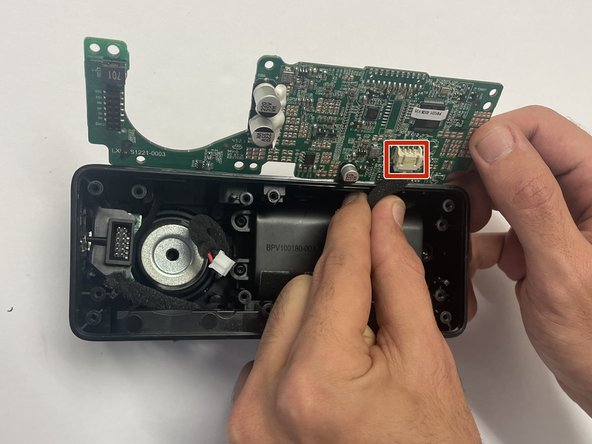
  6. Marshall Emberton Charging Port Bay Replacement: 手順 6、 2の画像 1 Marshall Emberton Charging Port Bay Replacement: 手順 6、 2の画像 2
    • Once screws are all off, there will be a wire (red/black) that will need to be disconnected from the motherboard.

    • Once the first wire is disconnected from the motherboard, you will then have to flip it over and do the same on the bottom side of the motherboard.

    • Once those wires are disconnected from the motherboard it will simply come right out.

  7. Marshall Emberton Charging Port Bay Replacement: 手順 7、 2の画像 1 Marshall Emberton Charging Port Bay Replacement: 手順 7、 2の画像 2
    • Once the motherboard is pulled out, you will be able to locate the charging port on the left side.

    • Once it is located there will be 2 1.2 cm screws that will need to be removed.

    • Once removed the charging port will be out.

終わりに

To reassemble your device, follow these instructions in reverse order.

2 の人々がこのガイドを完成させました。

作成者

4人の作成者と共同で作成されました。

Asia Baldwin

メンバー登録日: 09/26/22

697 ポイント

5のガイドは作成済み

チーム

CSU Los Angeles, Team 5-1, Adachi Fall 2022 CSU Los Angeles, Team 5-1, Adachi Fall 2022人のメンバー

CSULA-ADACHI-F22S5G1

5 メンバー

5のガイドは作成済み

6 件のコメント

Where can i buy that part? In europe. Thank you.

Ricardo - 返信

Where can I purchase a replacement charging port in uk

G-REG - 返信

Where can I buy the usb port in the US?

SLE - 返信

Hello. Nice guide for this. Next question😉 where can i buy a New bay? 🤔 Mine is very boken 😆

/Peter

Peter Lövan Löfqvist - 返信

Hi where can i buy the part?

Ricardo - 返信

コメントを追加

統計データ:

過去 24時間: 6

過去 7 日: 19

過去 30 日: 114

今までの合計 2,026