メインコンテンツにスキップ

Makita GA4030K Disk Cover Removal

必要条件のみ
この修理ガイドは、他のガイドの前提条件として使用されます。それ自体は不完全で、単独で使用されることはありません。

必要な工具と部品

  1. Makita GA4030K Disk Cover Removal, Disk Cover: 手順 1、 1の画像 1
    • Check for the provided lock nut wrench. This is used for loosening the piece that keeps the disk and cover attached.

  2. Makita GA4030K Disk Cover Removal: 手順 2、 1の画像 1
    • Unscrew the handle unit until it is removed completely.

  3. Makita GA4030K Disk Cover Removal: 手順 3、 2の画像 1 Makita GA4030K Disk Cover Removal: 手順 3、 2の画像 2
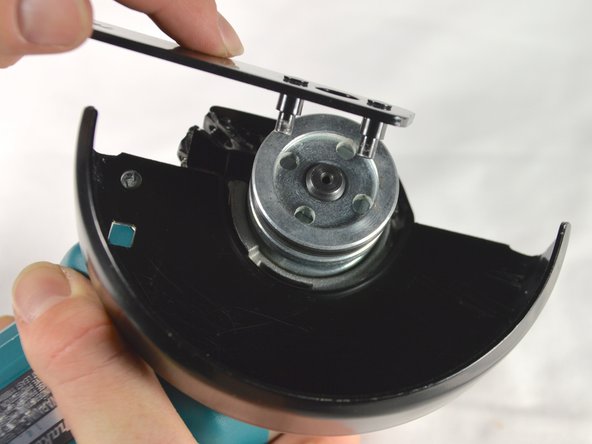
    • Hold the black switch located on the front casing.

    • Still holding the switch, use the lock nut wrench to loosen the silver disk holding everything in place.

    • Once loose, remove the silver disk and/or your grinding disk.

  4. Makita GA4030K Disk Cover Removal: 手順 4、 2の画像 1 Makita GA4030K Disk Cover Removal: 手順 4、 2の画像 2
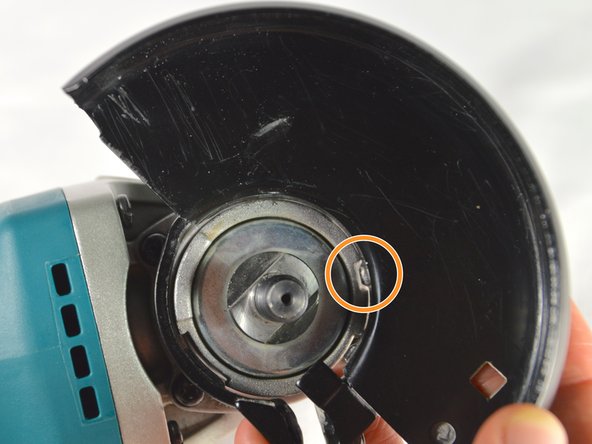
    • Use a Phillips #02 screwdriver to remove the 15 mm pan head screw that holds the cover in place.

    • Remove the cover by lining up the knob on the cover with the notch in face plate.

終わりに

To reassemble your device, follow these instructions in reverse order.

ある他の人がこのガイドを完成しました。

作成者

4人の作成者と共同で作成されました。

Nyssa Backes

メンバー登録日: 04/01/15

467 ポイント

3のガイドは作成済み

チーム

Cal Poly, Team 12-5, Lancaster Spring 2015 Cal Poly, Team 12-5, Lancaster Spring 2015人のメンバー

CPSU-LANCASTER-S15S12G5

4 メンバー

13のガイドは作成済み

0 件のコメント

コメントを追加

統計データ:

過去 24時間: 0

過去 7 日: 0

過去 30 日: 0

今までの合計 48