メインコンテンツにスキップ

Makita GA4030K Armature Replacement

必要な工具と部品

  1. Makita GA4030K Armature Replacement, Disk Cover: 手順 1、 1の画像 1
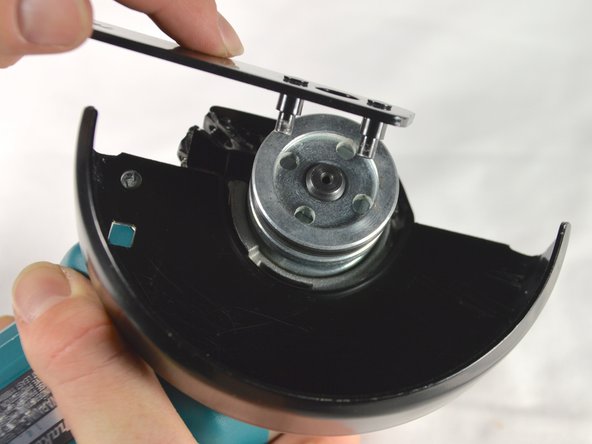
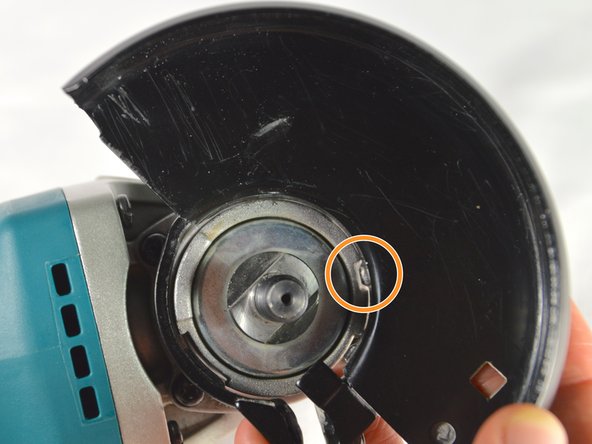
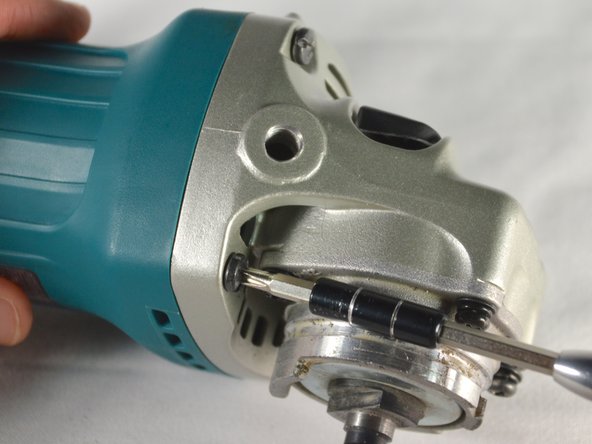
    • Check for the provided lock nut wrench. This is used for loosening the piece that keeps the disk and cover attached.

  2. Makita GA4030K Armature Replacement: 手順 2、 1の画像 1
    • Unscrew the handle unit until it is removed completely.

  3. Makita GA4030K Armature Replacement: 手順 3、 2の画像 1 Makita GA4030K Armature Replacement: 手順 3、 2の画像 2
    • Hold the black switch located on the front casing.

    • Still holding the switch, use the lock nut wrench to loosen the silver disk holding everything in place.

    • Once loose, remove the silver disk and/or your grinding disk.

  4. Makita GA4030K Armature Replacement: 手順 4、 2の画像 1 Makita GA4030K Armature Replacement: 手順 4、 2の画像 2
    • Use a Phillips #02 screwdriver to remove the 15 mm pan head screw that holds the cover in place.

    • Remove the cover by lining up the knob on the cover with the notch in face plate.

  5. Makita GA4030K Armature Replacement, Back Cover: 手順 5、 2の画像 1 Makita GA4030K Armature Replacement, Back Cover: 手順 5、 2の画像 2
    • Unscrew the 20 mm tapping screw using a Philips #02 screwdriver.

  6. Makita GA4030K Armature Replacement: 手順 6、 1の画像 1
    • Slide the back cover down the power cable.

  7. Makita GA4030K Armature Replacement, Armature: 手順 7、 2の画像 1 Makita GA4030K Armature Replacement, Armature: 手順 7、 2の画像 2
    • Use a spudger to gently move the brush holder coil to the side.

    • There are two brushes that are secured by two separate brush holders, one on each side.

  8. Makita GA4030K Armature Replacement: 手順 8、 2の画像 1 Makita GA4030K Armature Replacement: 手順 8、 2の画像 2
    • Using a metal spudger, remove both carbon brushes (one on each side) by their copper cabling.

  9. Makita GA4030K Armature Replacement: 手順 9、 3の画像 1 Makita GA4030K Armature Replacement: 手順 9、 3の画像 2 Makita GA4030K Armature Replacement: 手順 9、 3の画像 3
    • Use a Phillips #2 screwdriver to remove the four 20 mm tapping screws that hold the armature assembly in place.

    • Remove the armature assembly

  10. Makita GA4030K Armature Replacement: 手順 10、 2の画像 1 Makita GA4030K Armature Replacement: 手順 10、 2の画像 2
    • Unscrew the four 10 mm tapping screws holding the faceplate using a Phillips #02 screwdriver.

    • Remove the faceplate.

  11. Makita GA4030K Armature Replacement: 手順 11、 2の画像 1 Makita GA4030K Armature Replacement: 手順 11、 2の画像 2
    • Hold the highlighted nut with a size 10 wrench. Unscrew by turning the armature and holding the nut in place.

    • The nut may be difficult to remove.

  12. Makita GA4030K Armature Replacement: 手順 12、 1の画像 1
    • Remove the armature.

終わりに

To reassemble your device, follow these instructions in reverse order.

5 の人々がこのガイドを完成させました。

作成者

4人の作成者と共同で作成されました。

Laura Ann Jagels

メンバー登録日: 04/01/15

490 ポイント

3のガイドは作成済み

チーム

Cal Poly, Team 12-5, Lancaster Spring 2015 Cal Poly, Team 12-5, Lancaster Spring 2015人のメンバー

CPSU-LANCASTER-S15S12G5

4 メンバー

13のガイドは作成済み

0 件のコメント

コメントを追加

統計データ:

過去 24時間: 1

過去 7 日: 5

過去 30 日: 20

今までの合計 3,398