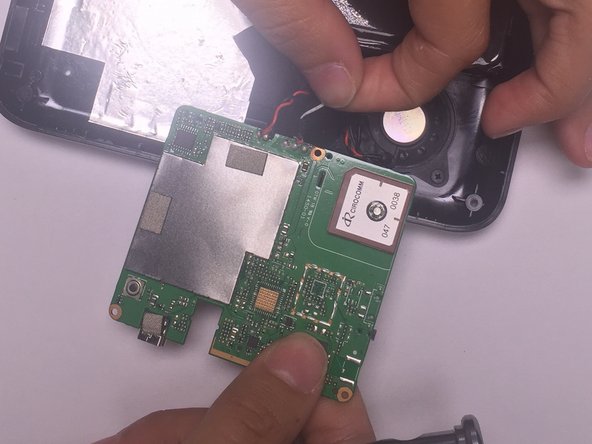
メインコンテンツにスキップ

Magellan RoadMate 5250T-LM Motherboard Replacement

必要な工具と部品

  1. Magellan RoadMate 5250T-LM Motherboard Replacement, Motherboard: 手順 1、 2の画像 1 Magellan RoadMate 5250T-LM Motherboard Replacement, Motherboard: 手順 1、 2の画像 2
    • Remove all four 5mm screws from the back of the device using a Phillips Head screwdriver size 000.

  2. Magellan RoadMate 5250T-LM Motherboard Replacement: 手順 2、 2の画像 1 Magellan RoadMate 5250T-LM Motherboard Replacement: 手順 2、 2の画像 2
    • Open the casing of the device using a plastic spudger.

  3. Magellan RoadMate 5250T-LM Motherboard Replacement: 手順 3、 2の画像 1 Magellan RoadMate 5250T-LM Motherboard Replacement: 手順 3、 2の画像 2
    • Remove the tape covering the display connector on top of the motherboard.

    • Use a nylon spudger to flip up the black tab on the ZIF connector.

    • Pull the ribbon cable out with tweezers.

    • The ribbon cable may fall out once the tape is removed.

  4. Magellan RoadMate 5250T-LM Motherboard Replacement: 手順 4、 2の画像 1 Magellan RoadMate 5250T-LM Motherboard Replacement: 手順 4、 2の画像 2
    • Remove the motherboard from the device by unscrewing all three 4mm screws that are connecting it to the casing with a Phillips Head screwdriver size 000.

  5. Magellan RoadMate 5250T-LM Motherboard Replacement: 手順 5、 1の画像 1
    • Disconnect the original battery from the motherboard and the speaker by desoldering all five wires that attach them to the motherboard.

    • Click here to visit iFixIt's guide on soldering.

終わりに

To reassemble your device, follow these instructions in reverse order.

作成者

2人の作成者と共同で作成されました。

Parker Dunaway

メンバー登録日: 01/29/16

101 ポイント

1ガイドが承認済み

チーム

University of Alabama, Team 1-7, Sydow campbell Spring 2016 University of Alabama, Team 1-7, Sydow campbell Spring 2016人のメンバー

UA-SYDOW CAMPBELL-S16S1G7

4 メンバー

3のガイドは作成済み

0 件のコメント

コメントを追加

統計データ:

過去 24時間: 0

過去 7 日: 0

過去 30 日: 0

今までの合計 300