メインコンテンツにスキップ

Magellan RoadMate 1440 Battery Replacement

必要な工具と部品

  1. Magellan RoadMate 1440 Battery Replacement, Magellan RoadMate 1440 Back Cover Disassembly: 手順 1、 1の画像 1
    • Place the GPS with the screen facing down.

  2. Magellan RoadMate 1440 Battery Replacement: 手順 2、 2の画像 1 Magellan RoadMate 1440 Battery Replacement: 手順 2、 2の画像 2
    • Remove the four 4.2 mm screws on the back cover of the device using a Phillips #0 screwdriver.

  3. Magellan RoadMate 1440 Battery Replacement: 手順 3、 2の画像 1 Magellan RoadMate 1440 Battery Replacement: 手順 3、 2の画像 2
    • Remove the two 4.2mm screws at the bottom of the device using a Phillips #0 screwdriver.

  4. Magellan RoadMate 1440 Battery Replacement: 手順 4、 3の画像 1 Magellan RoadMate 1440 Battery Replacement: 手順 4、 3の画像 2 Magellan RoadMate 1440 Battery Replacement: 手順 4、 3の画像 3
    • Insert the black spudger into the crease in the side of the GPS.

    • Move the end of the spudger down to break the seal between the two plastic shells.

    • Continue doing this along each side of the GPS to ensure a smooth removal.

  5. Magellan RoadMate 1440 Battery Replacement: 手順 5、 3の画像 1 Magellan RoadMate 1440 Battery Replacement: 手順 5、 3の画像 2 Magellan RoadMate 1440 Battery Replacement: 手順 5、 3の画像 3
    • Fully separate the two sides of the case.

    • Remove the tape on the battery wires and the tape on the speaker wires.

  6. Magellan RoadMate 1440 Battery Replacement, Battery: 手順 6、 2の画像 1 Magellan RoadMate 1440 Battery Replacement, Battery: 手順 6、 2の画像 2
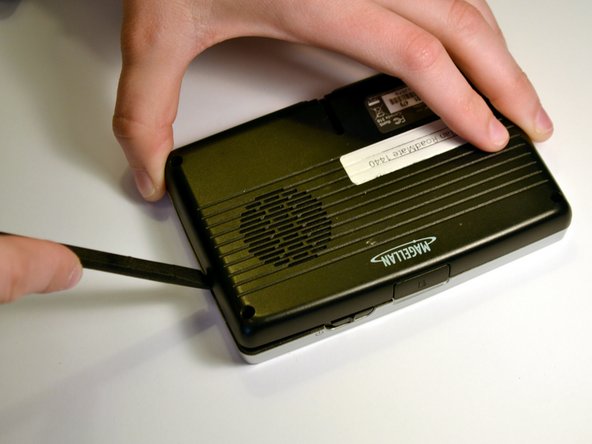
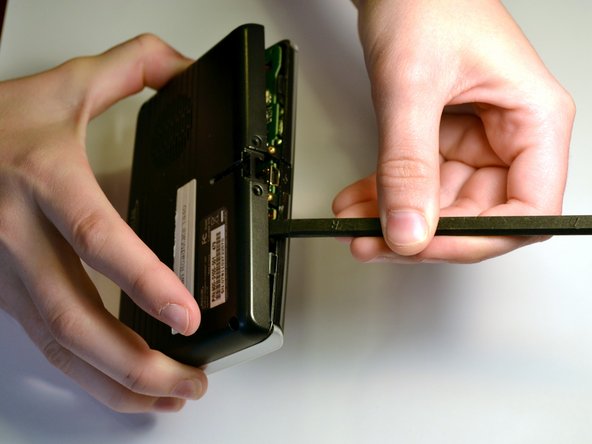
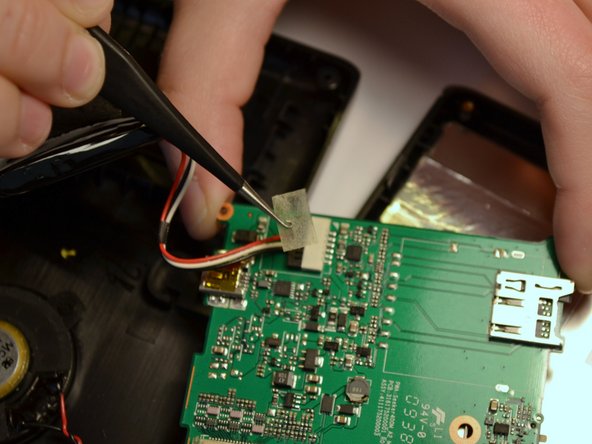
    • Use the black spudger to break the seal between the adhesive and battery. Use the same spudger to continue to pry the battery from the backing

    • This may be a little tough to separate the battery and the adhesive

  7. Magellan RoadMate 1440 Battery Replacement: 手順 7、 2の画像 1 Magellan RoadMate 1440 Battery Replacement: 手順 7、 2の画像 2
    • Lift the battery from the device

    • Once the battery is free from the adhesive, remove the piece of tape with a pair of tweezers that is covering the connection of the battery to the motherboard.

  8. Magellan RoadMate 1440 Battery Replacement: 手順 8、 2の画像 1 Magellan RoadMate 1440 Battery Replacement: 手順 8、 2の画像 2
    • Unplug the battery from the mother board by pulling back the clips and pulling the wires away from the motherboards receptacle

    • It is important for your and the device's safety to remove the battery before continuing with any other part removals.

    • It is not necessary to separate the red and white wires from the battery. A replacement battery pack will come with similar wires already attached.

終わりに

To reassemble your device, follow these instructions in reverse order.

ある他の人がこのガイドを完成しました。

作成者

4人の作成者と共同で作成されました。

Jeremy Johnson

メンバー登録日: 03/21/16

201 ポイント

2のガイドは作成済み

チーム

Clemson, Team 7-3, Benson Spring 2016 Clemson, Team 7-3, Benson Spring 2016人のメンバー

CLEM-BENSON-S16S7G3

4 メンバー

7のガイドは作成済み

0 件のコメント

コメントを追加

統計データ:

過去 24時間: 0

過去 7 日: 1

過去 30 日: 2

今までの合計 796