この翻訳は、ソースガイドの最新の更新を反映していない可能性があります。 翻訳の更新に協力してください。 または ソースガイドを参照してください。
はじめに
このガイドを参照して、壊れたトラックパッドを交換しましょう。
必要な工具と部品
-
-
ケースを閉じたまま、Unibodyを裏返しにして水平に置きます。
-
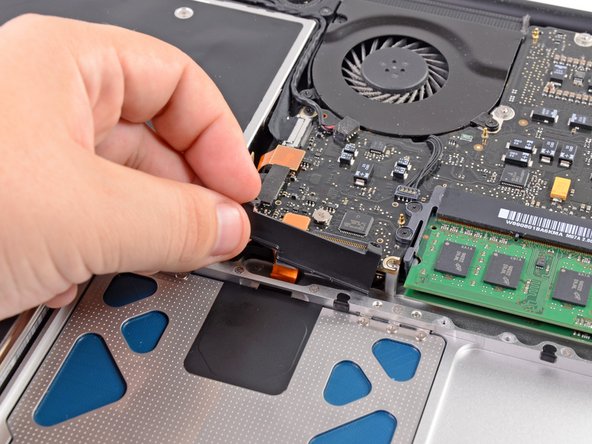
アクセスドアのリリース用ラッチの溝側を押し込んで、出てきた先端をつかみます。 リリース用ラッチが垂直になるまで持ち上げます。
-
-
-
この手順は未翻訳です。 翻訳を手伝う。
-
Carefully insert the cable from your new trackpad through its slot cut into the upper case.
-
Use one hand to hold the trackpad cable in place as you insert the two retaining tabs on the outer edge of the trackpad under the lip on the upper case.
-
Pull the trackpad cable as you seat the trackpad into its void in the upper case.
-
-
この手順は未翻訳です。 翻訳を手伝う。
-
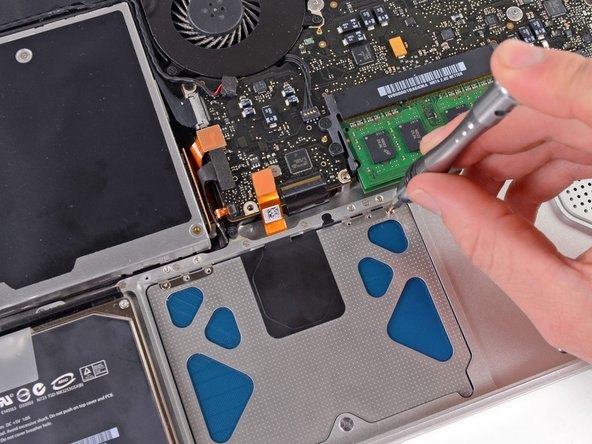
Tighten the outer two screws along the inner edge of the trackpad and check the alignment of it on the outer side of the upper case.
-
If its alignment looks good, install the rest of the Tri-point screws along the inner edge of the trackpad.
-
Before reassembling your machine, verify that the set screw is still installed in a position so the mouse will click correctly.
-


デバイスを再度組み立てるには、この説明書の逆の順番で組み立ててください。
デバイスを再度組み立てるには、この説明書の逆の順番で組み立ててください。
59 の人々がこのガイドを完成させました。

12 件のコメント
Before going to the trouble and expense of removing the trackpad make sure you don't just have a problem with the battery. My trackpad was giving me fits by not responding or needing excessive pressure, etc. The only problem was that the battery was swollen and putting pressure up on the trackpad. Replaced the battery and the problem was solved.
I agree with Rich M - check the battery first! Swollen battery will impede the trackpad.
John Scott - 返信
awesome instructions, thank you!
Fred Oliff - 返信