メインコンテンツにスキップ

このバージョンは誤った内容を含んでいる可能性があります。最新の承認済みスナップショットに切り替えてください。

必要な工具と部品

  1. , 下部ケース: 手順 1、 1の画像 1
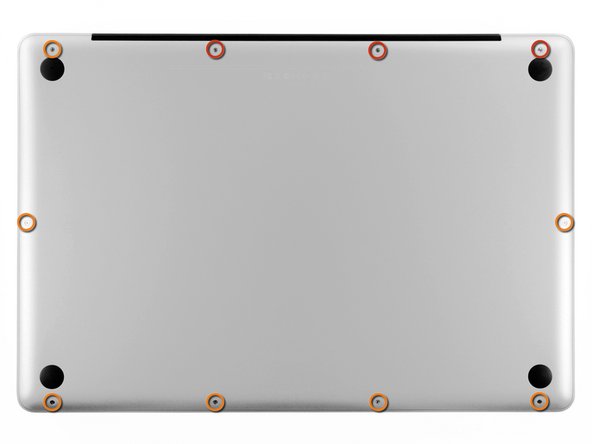
    • 下部ケースを上部ケースに固定している次の10本のネジを外します:

    • 13.5mmプラスネジ 3本

    • 3mmプラスネジ 7本

  2. : 手順 2、 2の画像 1 : 手順 2、 2の画像 2
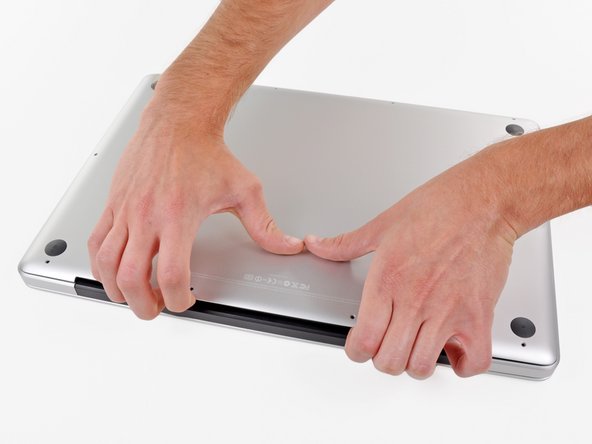
    • 下部ケースとベントの間に指を差し込み、下部ケースと上部ケースを固定している二つのクリップを外しながら持ち上げます。

    • 再組み立ての際には、下部ケースの位置を揃えてください。それからクリップが装着するまでしっかりと押し込みます。

    • 下部ケースを取り外します。

  3. , バッテリー: 手順 3、 3の画像 1 , バッテリー: 手順 3、 3の画像 2 , バッテリー: 手順 3、 3の画像 3
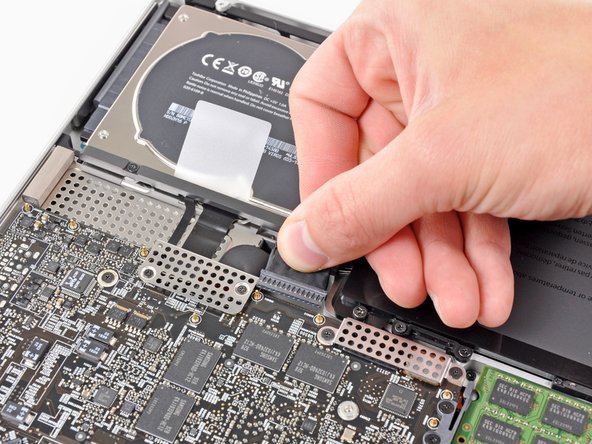
    • ロジックボードの近くで作業するときは、最初にバッテリーを外してください。

    • バッテリーコネクタに取り付けられているプラスチックのタブを掴み、デバイス前端に向けて引っ張ります。 Late 2011モデルでは、バッテリコネクタにタブが付いておらず、差し込み口をマザーボードの内部に取り付けるだけです。そのため、外すにはプラグをまっすぐ持ち上げます。

    • プラスチックのタブが付いてない場合、スパッジャーを使用して、ソケットからコネクタを引き上げます。

    • ロジックボード表面に、タブを並行に引きます。

  4. この手順は未翻訳です。 翻訳を手伝う。

    : 手順 4、 3の画像 1 : 手順 4、 3の画像 2 : 手順 4、 3の画像 3
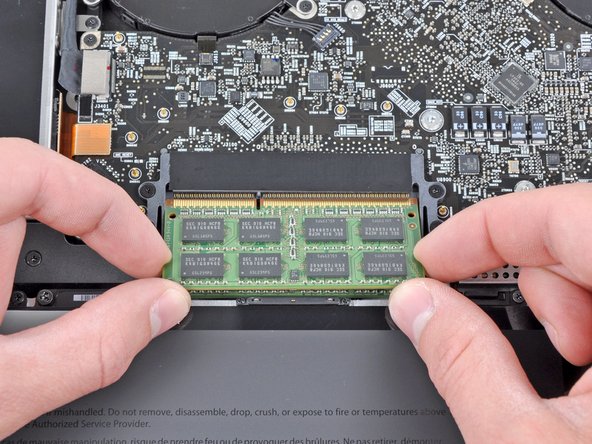
    • Release the tabs on each side of the RAM chip by simultaneously pushing each tab away from the RAM.

    • These tabs lock the chip in place and releasing them will cause the chip to "pop" up.

    • After the RAM chip has popped up, pull it straight out of its socket.

    • Repeat this process if a second RAM chip is installed.

ゴール

132 の人々がこのガイドを完成させました。

作成者

5人の作成者と共同で作成されました。

Andrew Bookholt

586,823 ポイント

619のガイドは作成済み

9 件のコメント

Thank you iFixIt. Your tutorial gave me confidence to move forward and get inside my computer. I agree with bhodges2, a great opportunity to clean. I'd keep a can of compressed air handy next time. I would also use a separate compartment for each screw. I treated the case like a wheel, lightly tightening each first. Still, the 3mm screws do not seem not entirely interchangeable. Mixing them around, not forcing anything, eventually worked out.

paleo5 - 返信

These instructions worked perfectly, thank you!

Ruth H - 返信

Folded masking tape to make two sided.Made rectangle like shape of Mac.Put the screws on the tape in order, so I would not mix screws or loose them.That process took longer than installation. Done in 10 mins..No need to remove battery.Put finger on metal stated by Apple.Now going to add 16gigs more in my IMac.Thanks for the illustrations Andrew !!!!

Gary howarth - 返信

Hi may i know what is the maximum size of GB for RAM that model A1297 MBP 17" Early 2009 can support? can it support 16GB. TIA.

rewtz - 返信

Late 2011 Macbook Pro 17" A1297 2.5GHz i7-2860QM supports 1600MHz DDR3 RAM according to Intel's Ark (http://ark.intel.com/products/53476/Inte...), faster than what Apple suggests. I tried 2x8GB 1600MHz SODIMMs (opposite 2x16GB maximum as supported by Intel, yet cannot find the modules anywhere) and it works. The machine is a lot faster compared to the default 1333MHz RAM.
aramis - 返信

コメントを追加

統計データ:

過去 24時間: 3

過去 7 日: 16

過去 30 日: 111

今までの合計 96,394