はじめに
My speakers made a cracking sound and it was driving me nuts. I hoped it was under warranty. I went to the Apple Store and they said no but could do a repair for €1037. I couldn’t find a single repair guide or video on replacing speakers on a Macbook 16”. It seems like a challenging job but I figured lets give it a try for the sake of helping others in the future.
Turns out it's not complex at all; I was done in 20 minutes. You basically just remove the bottom lid, disconnect the battery, then you disconnect and remove the speakers. The only downside is that the speakers are glued in so the old speakers are likely to break. This also means the process is a bit more sketchy but totally worth it!
I hope this guide helps you :)
必要な工具と部品
ビデオの概要
-
-
First step is opening up the MacBook. This was the most challenging step and maybe because it got me by surprise. The process works a bit different then older MacBooks. Watch this video if you are not aware of the process: https://www.youtube.com/watch?v=mHutSzIk...
-
-
-
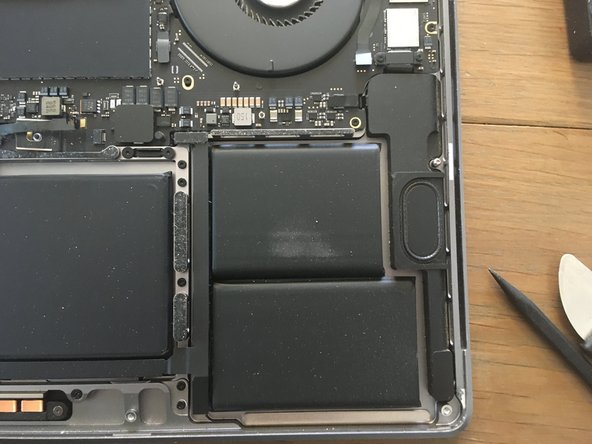
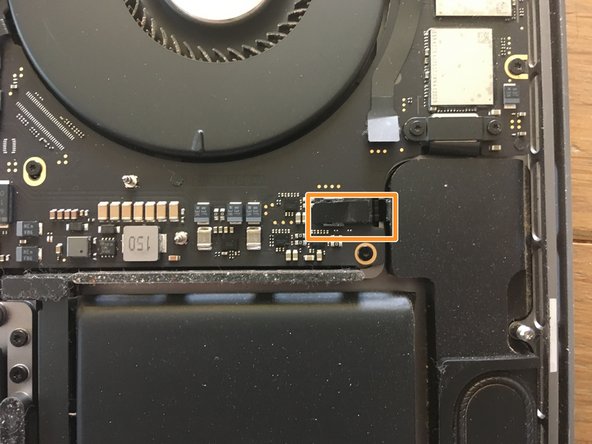
After opening up, disconnect the battery. Remove the cable and take out the big screw; this is to make sure there is no power running through.
-
-
-
I'm going to replace the left and right speaker. I bought a few on AliExpress, since they were sold out on iFixit, however they arrived damaged. Hopefully they work.
-
-
-
-
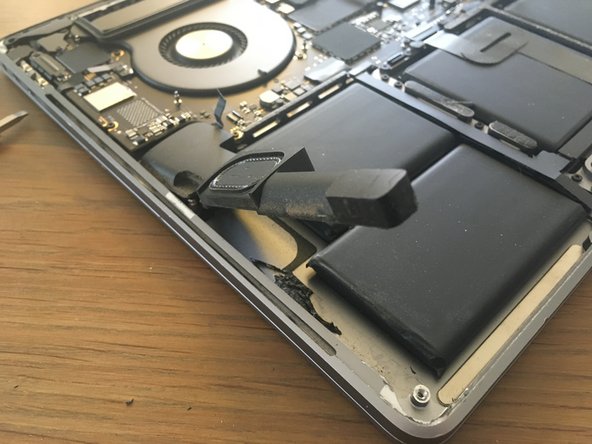
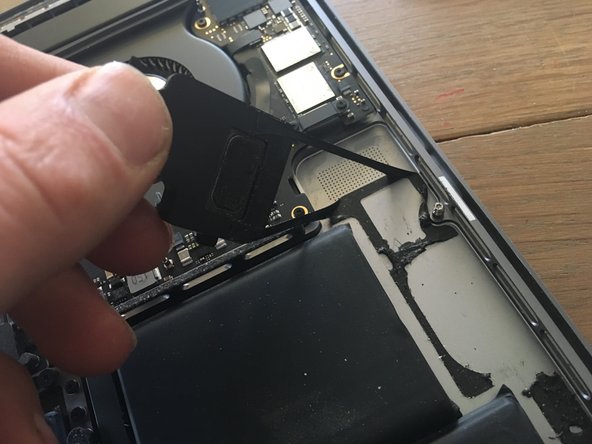
Taking out the speaker is where it gets sketchy. It's hanging in there with VERY strong adhesive. Luckily, I'm going to replace the speakers and am not going to keep them so I can be rough. If you want to keep the speaker, I would advise another approach.
-
-
-
Same story on the other side. Wiggle your tool underneath and force it out.
-
-
-
Removing the adhesive and pulling it out is easy. If you can't pull it out, use a tool to carefully scratch it off the surface.
-
-
-
When cleaning the leftover adhesive, it's best to use an alcohol pad to clean it up as well as the general area.
-
Let the area dry before installing the speaker.
-
-
-
After removing both speakers, your MacBook should look like the one in the photo.
-


To reassemble your device, follow these instructions in reverse order.
To reassemble your device, follow these instructions in reverse order.
6 の人々がこのガイドを完成させました。
7 件のコメント
I just created an account to thank you,
I bought the speakers from ifix it, and I did follow your guide, and it worked perfectly.
so I joined here to thank you.
your guide helped me a lot. I appreciate the effort.
appreciate that. Happy to hear its useful :)
This was very helpful... I managed to successfully replace mine... but unfortunately on step 5 I made the mistake of scuffing the battery, revealing the aluminum layer inside and it gave off a sweet smell (which i now understand is dangerous)
Painfully had to have the battery replaced for about 300$ (I'm in Nairobi, Kenya)
Maybe update the steps to avoid the nearby battery which is really sensitive.
Cheers
Thank you for this! I broke my speaker when following a different iFixIt guide, but your instructions saved the day. $49 is even for the replacement speaker from iFixIt is even cheaper than the deductible on my insurance plan through GetAkko, so this one was a no-brainer. Thank you, internet stranger!