はじめに
このガイドではMacBook Proの亀裂が入ったディスプレイや切断したケーブルを修理します。このアセンブリは、ディスプレイとバックライト用の統合されたリボンケーブルを含みます。
オリジナルのApple交換用ディスプレイを使用してこの手順の結果を正しく検証しましたが、Appleの”T2チップ”により、アフターマーケットディスプレイが正しく機能しない場合があります。つまりMacBookProが起動しない場合があります。
この作業を始める前に、安全上の理由からMacBook Proのバッテリー残量を25%以下まで放電してください。 充電したリチウムイオンバッテリーは、アクシデントで穴を開けてしまうと、危険な火災事故を起こすことがあります。
必要な工具と部品
-
-
Macを起動し、ターミナルを開きます。
-
以下のコマンドをターミナルにコピー(または正確にタイプ)します。
-
sudo nvram AutoBoot=%00
-
[return]キーを押します。パスワードを求められたら、管理者パスワードを入力し、 [return]キーを再度押します。補足: [return]キーは ⏎ や "enter"として印字されている場合もあります。
-
sudo nvram AutoBoot=%03
-
-
-
P5ペンタローブドライバーを使って、下部ケースに留められた次のネジを6本外します。
-
3.7mmネジー4本
-
7.3mmネジー2本
-
-
-
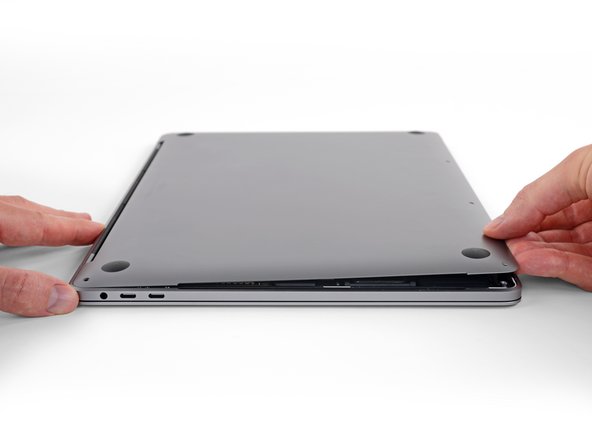
開口ピックのコーナーを隙間の下にスライドして差し込みます。
-
開口ピックを一番近い角に向けてスライドします。それからMacBook Proのサイド側をスライドします。
I recommend being careful while sliding as you can scratch the speaker. The actual clip is about halfway up the side, whereas the speaker is closer to the front (further from the hinge). So stay very shallow with just the tip of the pick until you get halfway up the side.
-
-
-
反対側でも前と同じ手順を繰り返します。2番目のクリップを外すには、同じように開口ピックをスライドします。
Same advice that I gave for the other side — be careful not to scratch the speaker which is close to the bottom. Keep the pick shallow until you get halfway up the side.
-
-
-
下部ケースをMacBook正面端に向けてしっかりとスライドします。(ヒンジのある位置から離すように)下部ケースを固定している最後のクリップを外します。
-
一方の角を先に引き抜いてから、反対側の角を引いてください。
This was made a lot easier by using a lever in the hinge area in combination with pulling. The amount of force required was more than the grip I could get on the metal allowed for my macbook.
Thank you for this comment! 🙏
For me it was the same way, wasn't able to get enough grip to pull sufficiently - but gently levering near the hinge with a spudger to "push" the bottom panel away worked well!There is no pulling required. Use an opening pick or a spudger at the hinge area to gently and easily nudge the bottom panel off the clips. It should be effortless.
If you do pull on the bottom case be careful of where you place the hand supporting the Mac, otherwise you'll make a blood sacrifice to the Mac gods! I placed my other hand too close to the feet on the bottom case and while removing it, the sharp edge of the bottom case sliced into my thumb.
-
-
-
下部ケースを取り出します。
-
所定の位置に載せて、ディスプレイヒンジの近くにスライド式クリップの位置を合わせます。 カバーを押し下げて、ヒンジ側に向けてスライドします。 クリップが装着した時、これ以上スライドできません。
-
スライド式クリップが完全に装着して、下部ケースが正しい位置に合わさっていれば、下部ケースをしっかりと押し下げて、下にある4つの隠しクリップをかみ合わせます。 各クリップが所定の位置に装着したクリップ音を確認してください。
-
-
-
バッテリー付近のロジックボード端にあるバッテリーボードを覆っている絶縁ステッカーを剥がします。
-
カバーが簡単に剥がれない場合は、iOpenerやヘアドライヤーもしくはヒートガンを使って温め、接着剤を柔らかくしてから再試行してください。
-
-
-
バッテリーボードのデータケーブルコネクタを覆っているテープがあれば剥がします。
-
バッテリーボードのデータケーブルの反対側先端にある、コネクタ上の固定フラップの接続を外します。
I’ve seen versions of this battery board that the cable goes around and to the back of the board, so this step is not always necesary.
-
-
-
-
バッテリーボードのデータケーブルをバッテリーボード上のソケットからスライドして、完全に取り出します。
I’ve seen versions of this battery board that the cable goes around and to the back of the board, so this step is not always necesary.
Putting a mark on the cable will be helpful when reinstalling so you don't put it backwards or upside down.
maccentric - 返信
This isn't necessary for many repairs, such as the Screen Replacement. I just lift the cable out of the way enough to do the next few steps and leave it attached.
maccentric - 返信
-
-
-
T3トルクスドライバーを使って、デイスプレイボードフレックスケーブル上のカバーを固定している3.5mm ネジを2本外します。
-
ディスプレイボードのフレックスカバーを外します。
Thats actually T4
Maybe your T4 is worn? I had to use T3. For the next step too.
T3 for me as well.
-
-
-
T3トルクスドライバーを使って、ディスプレイボードケーブルコネクタ用のブラケットを固定している1.7mmネジを2本外します。
-
ディスプレイボードケーブルコネクタのブラケットを外します。
-
-
-
T5トルクスドライバーを使って、アンテナケーブルバンドルを固定している2.9mmネジを1本外します。
-
-
-
T5トルクスドライバーを使って、ディスプレイボードを固定している3.3mmネジを4本外します。
-
ディスプレイボードのフレックスケーブルが、ボードの上に配置されており、挟まれていないか確認してください。
Needed a T4, not T5 on mine. It’s unclear if it’s my bits or my laptop that disagree with this step’s directions. If your T5 doesn’t fit though, don’t force it. See if a T4 fits. If it’s like mine, it will fit perfectly with no play.
It was T5 for me
T4 for mine.
-
-
-
P2ペンタローブドライバーを使って、両側のアンテナアセンブリを固定している1.5mmネジを16本(各8本ずつ)外します。
Before this step, note those two yellow circles (copper) towards the inside of the laptop and next to the red circles around the antenna screws. They are the result of two T4s that were removed.
You can see the black screw heads in Step 24 and they’re just copper rings with no screw in Step 25.
There are two additional screws along this row which will need to be removed. Once done, the assembly they were holding down will be loose and your antenna assembly will also feel more free. Gently pry it upwards. It will not require much force. Significantly less than I was trying to apply to it before realizing the instructions were wrong.
If your antenna assembly won’t budge after following the directions, this is what’s missing.
Hey James! I'm not sure which screws you’re talking about. Are these screws in addition to the four already marked in Step 24?
The instruction is correct, these strip easily! Use a lot of light and care!
I stripped one of the 16 screws and that was the end of that fastening point, I had to use physical force to break it off the assembly. Miraculously, the assembly appears to be still functional
-
-
-
アンテナアセンブリを慎重に取り出しながら、同時にアンテナケーブルバンドルをヒートシンクの下から解いて外します。
When reassembling this, don't forget to have the display board's cables that go to the display be under the antenna assembly. I screwed in 16 screws before realizing this!
-
-
-
T3トルクスドライバーを使って、Touch Barデジタイザとフタ角度センサーのコネクタ用のカバーブラケットを固定している1.5mmネジを2 本外します。
-
-
-
スクリーンを再利用する場合は、スクリーンを開いて、各ヒンジの真上のガラスにテープを貼ります。 これは、次の手順でガラスが傷つかないよう保護してくれます。
-
MacBook Proのスクリーンを全開して、画像のように配置します。
-
-
-
T8トルクスドライバーを使って、残りの5.0mmヒンジネジを2本(両側から1本ずつ)取り出します。
-
最後に一番上のネジを外し、片手でMacBook Proの両方の半分を固定して、それらが分離した際に、アクシデントで倒れないようにします。
I perform this step, with all my MacBook screen replacements, with the main body keyboard down on my workbench, and the screen assembly hanging off and supported by my legs. This way, when I take the screws out, I don't need to worry about the main body of the laptop, and the screen assembly does not go anywhere. I have much finer control over lifting and removing the screen assembly. This prevents any instability and prevents the hinges from accidentally hitting any components on the logic board, which can cause severe damage on some models.
-
-
-
MacBook Proの両方の半分を同時に押して、ヒンジを持ち上げてシャーシのくぼみから離します。
-
MacBook Proの本体を手前に押しながら、スクリーンを手前側に引いて離します。
-


オリジナルのパーツと交換用パーツをよく見比べてください。交換用パーツに付いていない残りのコンポーネントや接着シールなどは、インストールする前に新パーツに移植する必要があります。
このデバイスを再組み立てするには、インストラクションを逆の順番に従って作業を進めてください。
e-wasteを処理する場合は、認可済みリサイクルセンターR2を通じて廃棄してください。
修理が上手く進みませんか?ベーシックなトラブルシューティングのページを参照するか、このモデルのアンサーコミュニティに尋ねてみましょう。
オリジナルのパーツと交換用パーツをよく見比べてください。交換用パーツに付いていない残りのコンポーネントや接着シールなどは、インストールする前に新パーツに移植する必要があります。
このデバイスを再組み立てするには、インストラクションを逆の順番に従って作業を進めてください。
e-wasteを処理する場合は、認可済みリサイクルセンターR2を通じて廃棄してください。
修理が上手く進みませんか?ベーシックなトラブルシューティングのページを参照するか、このモデルのアンサーコミュニティに尋ねてみましょう。
41 の人々がこのガイドを完成させました。
以下の翻訳者の皆さんにお礼を申し上げます:
100%

Midori Doiさんは世界中で修理する私たちを助けてくれています! あなたも貢献してみませんか?
翻訳を始める ›


20 件のコメント
Anybody know the screen part# or where to find it?
Ou est ce qu’on trouve l’écran ?
Ou est ce qu’on trouve l’écran ?
Is it possible to boot up the machine without the screen attached (and use external displays only)?
yes USBC to HDMI
jim -
Great guide, covers the details nicely. I would add that the nvram command no longer works as of firmware in Big Sur. We don’t have too much trouble with that, however. Shut down the machine, and make sure to not open the lid or do anything else until the battery is disconnected.
I will also note that we’ve never had a T3 screwdriver not strip unless we cut the tip off the torx; the screws Apple uses never seem to be happy until that is done. Haven’t see anyone else complain about that, though, so maybe it’s just us!
In case anyone is wondering: as long as your part is OEM, it shouldn’t give any issues with the T2 chip. Most assemblies are not sold with the screen angle sensor, however, so that needs to be transferred to the new assembly. That’s just a matter of unscrewing the one screw that holds it to the clutch and then attaching it to the new one in the same way.
My screen gets glitch lines but only if I open it up past 25-30 degrees. So I’m thinking it is something mechanical with the hinge and the connecting wires. any insight?
I started getting horizontal lines 2 mm apart on my screen. Lines would vanish when screen was closed to a smaller angle (30 degrees) and then reappear, when opening wider. Also experienced occasions ghosting of images or overlapping app windows. Took the MBP 16 to the Apple Store for further diagnosis. Techs indicated that it could be a loose display cable. They offered to check for a possible loose display cable and re-seat it. If not resolved, said display would have to be replaced. For what it’s worth. (Apple offline and online diagnostics performed all indicated no other hardware problems, with the GPU, etc. Problem seemed to be diagnosed. Attaching an external display is also helpful in diagnostic of the GPU. The Apple Store near me, quoted $599 for the Apple display and $79 for install.
freaman -
Great guide. It doesn't include the replacement of the lid angle sensor. I had to disconnect it from the old screen and re-attach it to the new one. I also got really worried because it didn't turn on when I first tried to restart. I had to plug it in and hold the power button for a few seconds before it came back on. Definitely gave me a freight.
Good morning all !
the screen of my Macbook Pro 16 "from 2019 has just given up. The screen remains black despite all the attempts by Apple technicians. I would like to use it without the original one, leaving it hanging as I used to habit on my two external screens. Do you think it is possible to start it without its screen connected and at the same time take advantage of the speakers, the USB C sockets, the touch bar, and the trackpad Thank you in advance!
Good repair guide! I just swapped out my display with no issues. I'd consider adding the step to swap out the screen angle sensor, as mine (and most replacement displays, apparently) didn't come with a new one and it had to be swapped over. FWIW my screen was showing as over-saturated with blown-out highlights, some ghosting of background windows through the front window, strange shadows from smaller windows--tilting the screen to mostly closed would make it better, but not fix it entirely. Brand New display sourced from Ebay ($550) fixed it right up. Thanks for the great guide!
Are there any apple boobytraps like they have done with the serialization of the iPhone parts?
I followed the guide to the letter but now the machine won’t turn on. Obviously I think somethings wrong with the battery connect but I have no idea what. Any suggestions?
When I finished mine I had the same issue, and was very worried that I would have to take it apart again. But I held the power button down for a bit longer than usual, and it eventually turned on. Maybe yours will do the same.
I bought the "Apple MacBook Pro A2141 16" 2019 LCD Screen" on EBay for $300 USD.
I bought the "GogoFix Precision Pro Aluminum Alloy Screwdriver Tool Kit" on Amazon for $20 USD. (ALL the tools you need).
You do NOT need the "TR8 Torx Security Screwdriver". The regular "T8 Torx" screwdriver in the kit above is what you need.
These instructions are truly amazing, and I want to thank the author very much! <3
My only advice is buy 15 small baggies, and label them with the step number of the instructions as you place screws in the bags.
Paul Wiens - 返信
An ice cube tray or bead sorting tray is an easy way to keep track of the screws.
Is this step necessary? I can’t perform this step as I am attempting to repair water damage and need to remove logic board & most likely replace the battery.
Macrepair SF - 返信
@mac_medic You definitely don’t want the power coming on while the board is wet. In your case, I think powering on the machine to disable Auto Boot would do more damage than it prevents. I agree, skip this step and be prepared to disconnect the battery quickly if the laptop automatically powers on. Good luck!
Jeff Suovanen -
Thats right! You don't want power running while working on your logic board.
Dan -
This did not work when running High Sierra.
Kyle B - 返信
Tried this on a 2018 MBP 13” Touchbar (there’s no iFixit guide for this model yet). Need to replace a broken screen.
Luckily I managed to connect to an external screen (Cmd-Down Brightness to switch displays) and enter above command. Seems to work, but there’s another problem with this model - it powers up as soon as any key is pressed……. ffs <gnashes teeth>
Cool_Breeze - 返信
I unscrew the battery first and wrap electrical tape over the logic board battery connector before attempting any repairs to the board. Haven’t had any problems yet and I’ve worked on about 10 of these models already. Also when you open the bottom case use a suction cup at the bottom and pull up then run a plastic spudger along the edges to disconnect the clips. Also only use a plastic spudger on the board. Saw a youtube video from a repair shop and he did not disconnect the power and used all metal tools during the entire process of removing the board. His last step was to disconnect the battery terminal.
Brian - 返信
Is this step necessary if my mac can turn on? Battery fully dead(
Nursat b - 返信
BEFORE YOU START: The included torx head stripped off before I was done (and you might need an additional T4) so stop now and go buy a good one. Also they fail to warn you above to get some blue threadlocker ahead of time.
Jason Sherron - 返信
This command did not work for me and I read that sometime in later 2020 Apple stopped this command from working…any ideas on a work around?
Patrick Machacek - 返信
Not able to do that with damaged screen
richardjgreen - 返信
If you have a damaged screen you can still use a converter from thunderbolt (USB 3) to HDMI and plug your Macbook Pro to your TV as monitor display. Just make sure to chose the right Source (HDMI IN) in your TV. I did it and to make it work I unplug and plug again in my Macbook and so I could disable the Auto boot
Roberto Sanchez Bustos -
Hi. This does not work on 2018 13” MacBook Pro with Touch Bar. I did exactly this to disable auto boot. But when I check by using nvram -p it says: auto-boot true. Am I doing something incorrectly? I did everything step by step. Copied and pasted the sudo command, pressed enter and then entered my password. I have Big Sur 11.1 installed. Is there any other way since I need to replace the screen. Thank you. Adrian
Adrian Vizik - 返信
Hi everyone. This is also a little pointless if you can’t see anything on the screen, and you don’t have a display adapter to USB C to display it. I agree with Brian about removing the back and disconnecting the battery cable before you even think about opening the lid of the MacBook. Applying the insulation tape is also a handy little tip that just makes sure there is no way to discharge from either the board or battery.
Roberto Enrieu - 返信
running `nvram -p | grep 'AutoBoot'` in terminal verifies that it was accepted
result: `AutoBoot %00`
Marek Polák - 返信
Running Big Sur 11.6.7 on a 2019 16" MBP, it's "auto-boot". So it's:
nvram -p | grep 'auto-boot'to display the current state, the default istrue- and then to change it,sudo nvram auto-boot=falsewhich turns it off.Ed Mechem -
This step is completely unnecessary if you follow the guide to disconnect the battery properly. Just put some tape between the battery and logic board connection to prevent it from accidentally touching and therefore powering on the laptop.
Grant Ormsby - 返信
It took me a few tries to make this command work, as I was able to copy and paste the command into Terminal, but could not type in my laptop’s password. I finally typed my password into a text document, copied it (command C), and then pasted it into Terminal and it worked.
tommy404 - 返信
I didn’t do this. Mine never auto-booted before I replaced the battery. Now it does.
hatuxka - 返信
BEFORE YOU DO ANYTHING - CHECK THE BATTERY!
I-fixit sent me a bad battery, which I didn’t realize until it was already install. They sent me a new one, but I wasted hours uninstalling and reinstalled.
Get a volt meter and measure the voltage on the output of the battery pack. If it reads 0 V, SEND IT BACK. It should read over 2 V.
bcardanha - 返信
I've just received my replacement battery and it reads 0,042V between the two main connectors. Do you think it's dead?
peter sussex -
When I did this from Terminal.app within Recovery Mode, the “sudo” was not recognized but I could invoke it without the sudo part. It seems to have been accepted when looking at “nvram -p”
johann beda - 返信
When in Recovery Mode, you already have superuser powers. So you don't need to prefix commands with the sudo command to invoke them with root privileges; you already have them. Do a
pwd(print working directory) after opening Terminal in Recovery Mode, and you'll see that you're in the root user's directory.Ed Mechem -
I received the battery kit for my 2018 MacBook Pro and as per the above comment from bcardanha - Oct 12, 2021, I checked the voltage on the pads marked + and - . It was zero volts so I panicked a bit.
I sent a message on the iFixiT Facebook page and I got no reply. I finally found the customer service email for Ifixit Europe and sent them an email voicing my concern as I was not keen to work for couple of hours just to discover that the battery is faulty. I had an almost instant reply on the email (kudos to them) and they adviced me to go ahead and install the new battery as the voltage measured when battery is not connected is not relevant.
I took a leap of faith and after two hours… the new battery showed 50% charge and everything seems to be working just fine. I am happy it worked.
Mircea Comanici - 返信
After removing the old battery and installing the new battery I powered up the MBP before screwing the bottom on. I discovered the my keyboard would not function. It took a few hours of investigation and frustration that I discovered the track pad power ribbon had become partially dislodged from the trackpad. I was able to see that this through the little machined slot where the battery sat. I had to remove the trackpad to reinsert the power ribbon back into the connector in the trackpad. after reassembling and reinstalling the battery etc the keyboard worked. Just food for thought if your run into the keyboard issue.
Ed Mease - 返信
This should be the default. IMO I tell you to power on - not the lid.
G Sena - 返信
Est ce que cela fonctionne sur un macbook pro 2017 sans touchbar ?
maël muzelet - 返信
Bonjour Maël, oui, ce tutoriel concerne "les MacBook Pro 2016 (et plus récents) et les MacBook Retina 12" 2017 (et plus récents)"
Claire Miesch -
Excellent instructions. I was able to follow and install the new screen. I recommend that you get a good set of tools before you begin. I started with an inexpensive repair kit bought online. The Penta and torx bits failed. I bought an IFIXIT kit with quality bits and I was able to do everything I needed.
Tom Markham - 返信
If you're not running an admin account the sudo command won't work (which honestly, you should not be running admin). Rather than logging in to your admin amount via the OS, in the terminal type "login [admin username]," then the password and you'll be able to do the sudo command as described above. Once you're complete, type "logout [admin username]" and you'll be good to go. Obviously replace [admin username] with whatever the account name for your admin user is.
arichard2401 - 返信
For those unable to complete this step because the screen is too damaged I recommend leaving your macbook on until the battery dies.
Nicholas R Licato - 返信
Just replaced my 2018 15" MBP battery. Running Sonoma.
I found no way to disable AutoBoot (The status can be checked in the Power section of system report).
Anyway, i left my battery completely drain before opening the MBP, and had no issues during the process.
Cédric Bontems - 返信
After sending this command in terminal when I checked what happens if I now open the lid, instead the screen lit slightly up (still black) then a battery symbol showing the charging state showed up.
Now, after replacement of the battery, this is all I get to see.
No reset of NVRAM nor PRAM helped.
Currently the new battery charges (58% atm) and it feels like it‘s mocking me.
webrockers - 返信
I suspected the keyboard or TouchID sensor wouldn’t work, so I went on and checked every connector.
I missed connecting the left TouchID sensor from step 31.
webrockers -