メインコンテンツにスキップ

MacBook Pro 15" Unibody Mid 2012 Right Fan Replacement

必要な工具と部品

  1. MacBook Pro 15" Unibody Mid 2012 Right Fan Replacement, Lower Case: 手順 1、 1の画像 1
    • Remove the following ten screws securing the lower case to the upper case:

    • Three 13.5 mm (14.1 mm) Phillips screws.

    • Seven 3 mm Phillips screws.

    • When removing these screws, note how they come out at a slight angle. They must be reinstalled the same way.

  2. MacBook Pro 15" Unibody Mid 2012 Right Fan Replacement: 手順 2、 1の画像 1
    • Using both hands, lift the lower case near the vent to pop it off two clips securing it to the upper case.

    • Remove the lower case and set it aside.

  3. MacBook Pro 15" Unibody Mid 2012 Right Fan Replacement, Battery Connector: 手順 3、 2の画像 1 MacBook Pro 15" Unibody Mid 2012 Right Fan Replacement, Battery Connector: 手順 3、 2の画像 2
    • For certain repairs (e.g. hard drive), disconnecting the battery connector is not necessary but is recommended as it prevents any accidental shorting of electronics on the motherboard. If you do not disconnect the battery connector, please be careful as parts of the motherboard might be electrified.

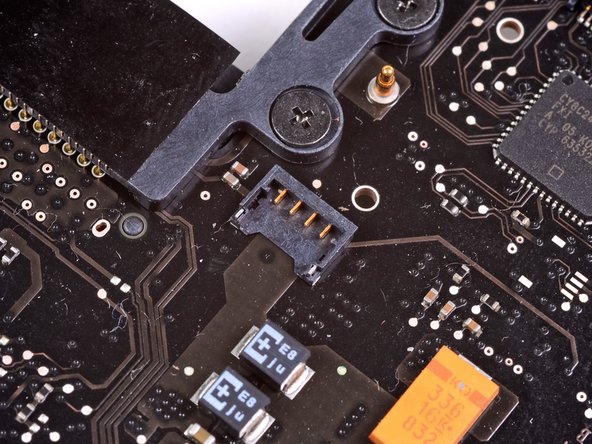
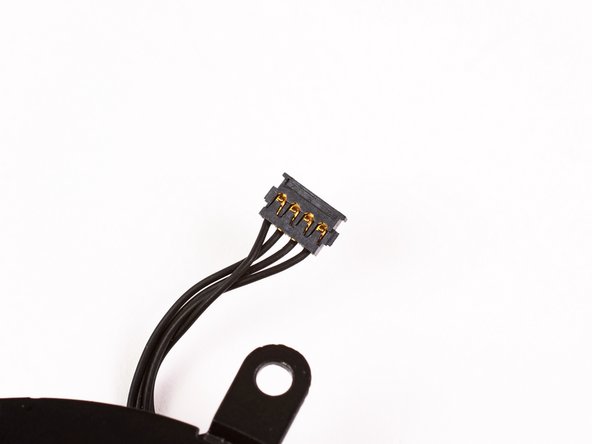
    • Use the edge of a spudger to pry the battery connector upwards from its socket on the logic board.

    • It is useful to pry upward on both short sides of the connector to "walk" it out of its socket.

  4. MacBook Pro 15" Unibody Mid 2012 Right Fan Replacement: 手順 4、 1の画像 1
    • Bend the battery cable slightly away from its socket on the logic board so it does not accidentally connect itself while you work.

  5. MacBook Pro 15" Unibody Mid 2012 Right Fan Replacement, Right Fan: 手順 5、 3の画像 1 MacBook Pro 15" Unibody Mid 2012 Right Fan Replacement, Right Fan: 手順 5、 3の画像 2 MacBook Pro 15" Unibody Mid 2012 Right Fan Replacement, Right Fan: 手順 5、 3の画像 3
    • Use a spudger to pry the fan connector straight up off the logic board.

    • It is useful to twist the spudger axially from beneath the fan cable wires to release the connector.

    • The fan socket and the fan connector can be seen in the second and third pictures. Be careful not to break the plastic fan socket off the logic board as you use your spudger to lift the fan connector straight up and out of its socket. The layout of the logic board shown in the second picture may look slightly different than your machine but the fan socket is the same.

  6. MacBook Pro 15" Unibody Mid 2012 Right Fan Replacement: 手順 6、 1の画像 1
    • Remove three T6 Torx screws securing the right fan to the logic board and upper case.

  7. MacBook Pro 15" Unibody Mid 2012 Right Fan Replacement: 手順 7、 1の画像 1
    • Lift the right fan out of the upper case.

終わりに

To reassemble your device, follow these instructions in reverse order.

31 の人々がこのガイドを完成させました。

作成者

3人の作成者と共同で作成されました。

Andrew Optimus Goldheart

メンバー登録日: 10/17/09

502,755 ポイント

407のガイドは作成済み

チーム

iFixit iFixit人のメンバー

Staff

135 メンバー

16,757のガイドは作成済み

0 件のコメント

コメントを追加

統計データ:

過去 24時間: 1

過去 7 日: 13

過去 30 日: 51

今までの合計 10,679