次の手順に進む前に、アクセスドアの取り外しラッチが垂直になっているか確認してください。
半透明のプラスチックタブを掴んで、バッテリーをUnibodyから引き上げます。
ラッチが押されると、バッテリーが所定の位置にロックされます。
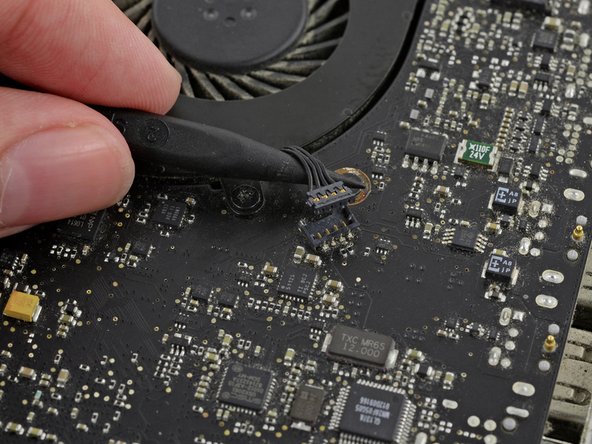
スパッジャーの先端を使って、右側ファンのコネクタを基板上のソケットからまっすぐ引き上げます。
ソケットではなく、コネクタ自体を引き上げてください。ソケットに接触すると、デバイスにダメージを与えてしまいます。
コネクタを解放するには、ファンケーブルワイヤの下からスパッジャーを捻りながら差し込むと作業がしやすくなります。
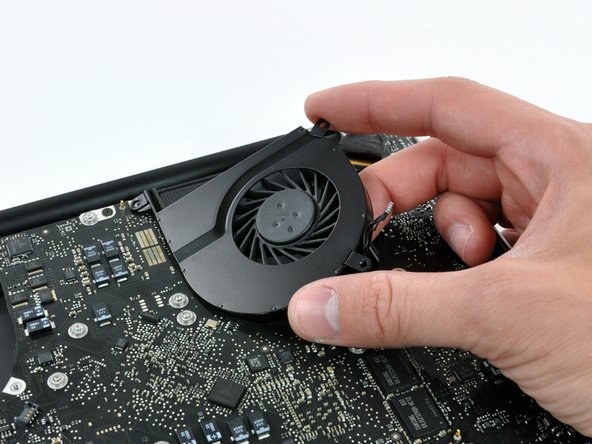
ケースから右側ファンを取り出します。
スパッジャーの先端を使って、基板上のソケットから左側ファンのコネクタをまっすぐ引き抜きます。
コネクタ自体を引き抜いてください。ソケットには接触しないでください 。デバイスにダメージを与えてしまうことがあります。
コネクタを解放するには、ファンケーブルワイヤの下からスパッジャーを差し込み、捻りながら外すと便利です。
ケースから左側ファンを取り出します。
必要に応じて、サブウーファーのコネクタを覆っているフォーム製のバンパーカバーを剥がします。
スパッジャーの平面側先端を使って、基板上のソケットからサブウーファーのコネクタをまっすぐ引き抜きます。
作業にはご注意ください。このコネクタはデリケートで、ソケットは基板から簡単に壊れてしまいます。
スパッジャーの先端を使って、キーボードのリボンケーブルの固定フラップを裏返します。
キーボードのリボンケーブルをソケットからまっすぐ引き抜きます。
再組み立ての際には、キーボードのリボンケーブルがZIFソケットにしっかりと装着されているか確認してください。
ディスプレイのデータケーブルのロックに付けられたプラスチックのプルタブを掴み、コンピューターのDC-in側に向けて回転させます。
ディスプレイデータケーブルコネクタをソケットからまっすぐ引き抜きます。
ディスプレイデータケーブルの接続を外す際は、ケーブルのロックに付けられた黒色のタブを引っ張らないでください。コネクターをソケットからゆっくりと伸ばしながら、ケーブルを振ってみることをおすすめします。
ディスプレイのデータケーブルが正しくソケットに装着されているか確認してください。きちんと装着できていなければ、ディスプレイ上の表示が半分もしくは全く表示されないという状態になります。
キーボードのバックライトリボンケーブル(左側ファンのスペース付近)を確認します。
スパッジャーの先端を使って、キーボードのバックライトリボンケーブルの固定フラップを裏返します。
キーボードのバックライトリボンケーブルをソケットからまっすぐ引き抜きます。
上部ケースに下部ケースのクリップを固定している3.5 mプラスネジを2本外します。
上部ケースから下部ケースのクリップを持ち上げて取り出します。
あるモデルのMacBook Pro Unibodyにはこのクリップがついていない場合があります。その場合は、この手順は不要です。
左側から基板アセンブリを持ち上げて、上部ケースから取り出します。側にある端子が絡まないようご注意ください。
まだ基板を完全に取り出さないでください!
次の手順に進む前に(バッテリコネクタ以外)、基板から上部ケースに接続された全てのコネクタを外しているか確認してください。
再組み立ての際には、全てのコネクタとケーブルが基板の下に残されていないか確認してください。あるリボンケーブルは大変薄く、壊れやすいものがあります。
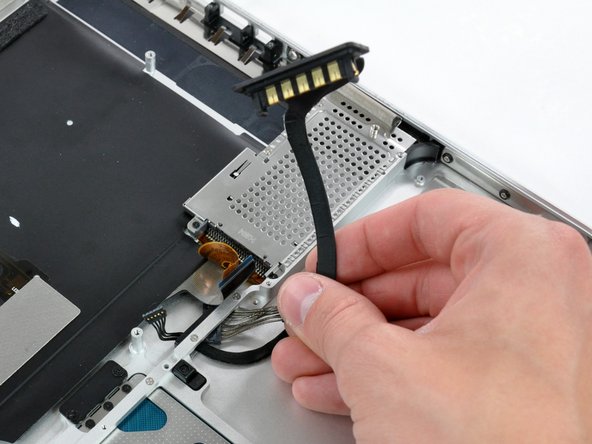
Remove the following screws securing the ExpressCard Cage to the upper case:
Two 4 mm Phillips screws.
Two 1.9 mm Phillips screws.
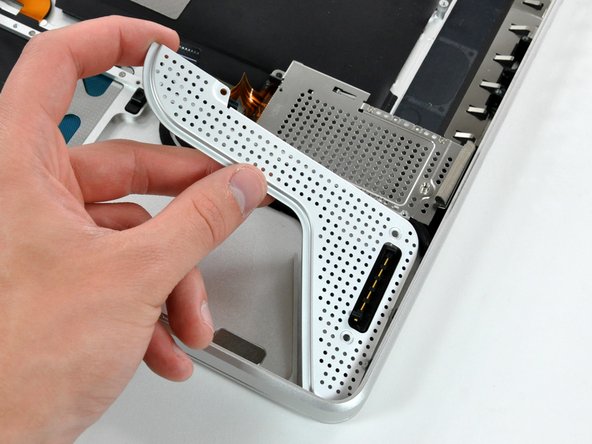
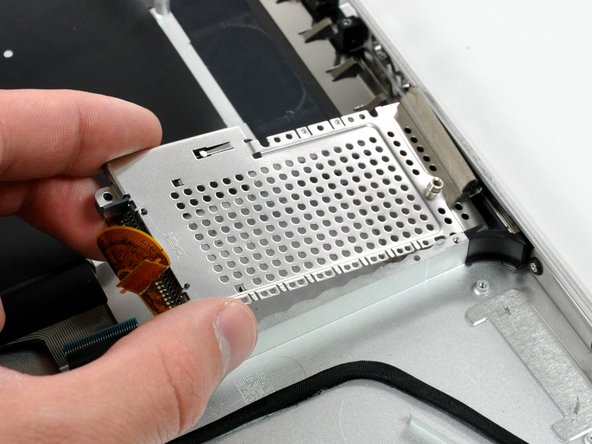
Lift the the ExpressCard Cage out of the upper case.
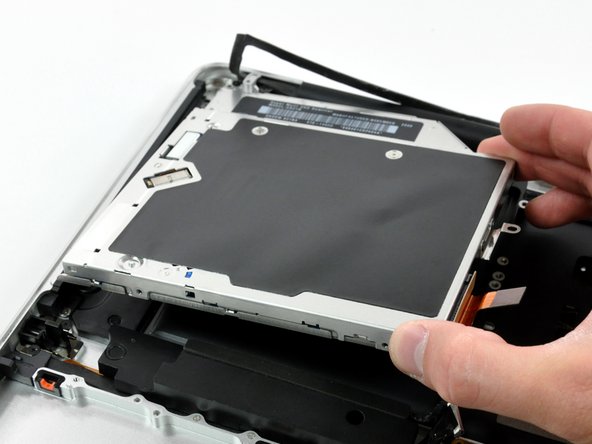
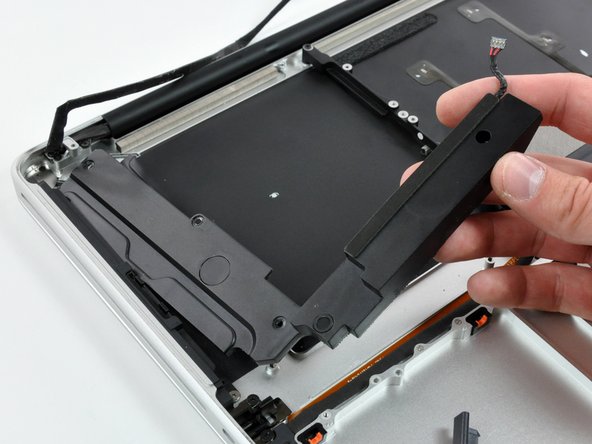
Lift the hard drive by its pull tab enough to grab and remove the retaining bracket.
Lift the hard drive out of the upper case, minding the cable attaching it to the computer.
Remove the following three Phillips screws securing the optical drive to the upper case:
One 3.5 mm Phillips screw.
Two 2.5 mm Phillips screws.
Lift the optical drive from its right edge and pull it out of the computer.
Remove the following four screws securing the subwoofer and right speaker to the upper case:
Two 3.2 mm Phillips screws.
One 2.6 mm Phillips screw.
One 5.0 mm Phillips screw.
Lift the subwoofer and right speaker assembly out of the upper case.
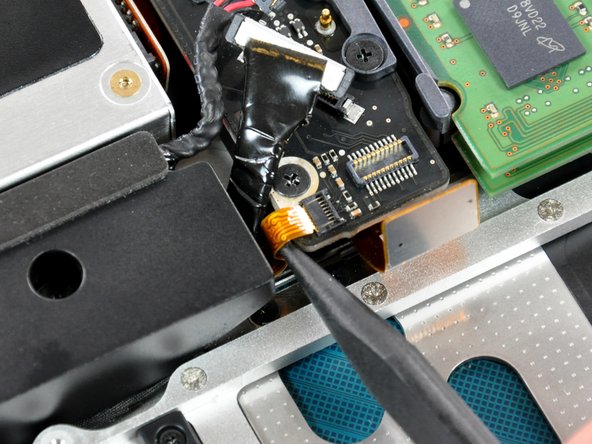
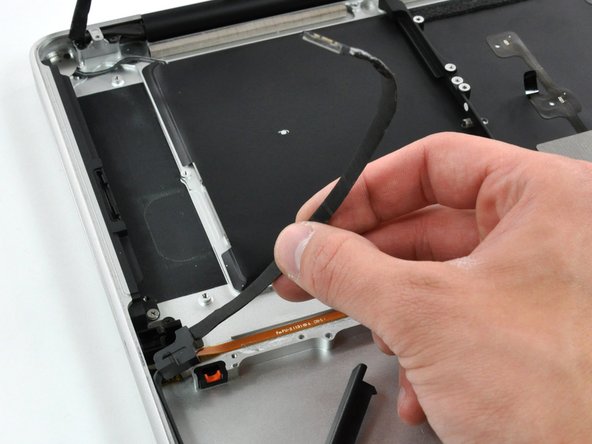
Remove two 8 mm Phillips screws securing the camera cable bracket to the upper case.
The rightmost screw may remain captive in the camera cable.
Seperate the camera cable bracket from the camera cable and remove it from the computer.
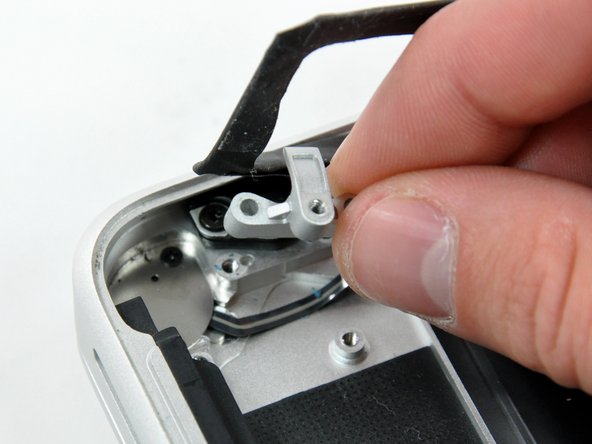
Remove the 7 mm Phillips screw from the LVDS cable bracket.
This screw may remain captive in the LVDS cable.
Lift the LVDS cable bracket out of the upper case.
Open your MacBook Pro so the display is perpendicular to the upper case.
Place your opened MacBook Pro on a table as pictured.
While holding the display and upper case together with your other hand, remove the 6 mm Torx screw from the lower display bracket.
Be sure to hold the display and upper case together with your other hand. Failure to do so may cause the freed display/upper case to fall, potentially damaging each component.
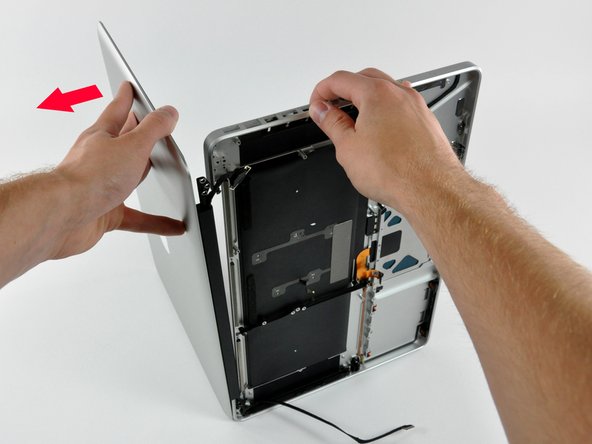
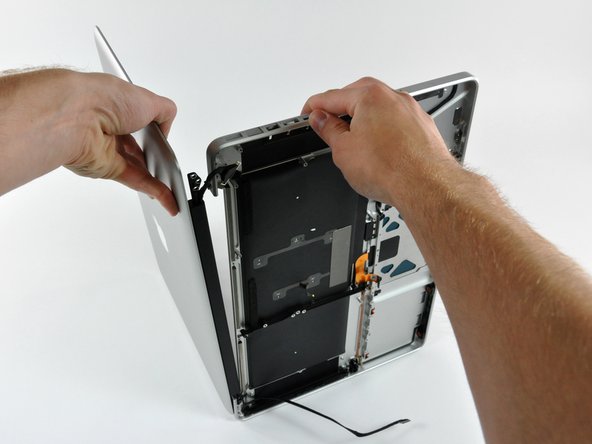
Remove the last remaining 6 mm Torx screw securing the display to the upper case.
Grab the upper case with your right hand and rotate it slightly toward the top of the display so the upper display bracket clears the edge of the upper case.
Rotate the display slightly away from the upper case.
Lift the display away from the upper case, minding any brackets or cables that may get caught.
このガイドを埋め込む
サイズを選択し、以下のコードをコピーして、このガイドを小さなウィジェットとしてサイト/フォーラムに埋め込みます。
1つの手順
全ガイド
小サイズ - 600px
中サイズ - 800px
大サイズ - 1200px
プレビュー