はじめに
ディスプレイアセンブリ全体ではなく、LCDだけを交換すると、経費の節約にも繋がります。この修理ガイドは防眩ディスプレイには適用されません。
必要な工具と部品
-
-
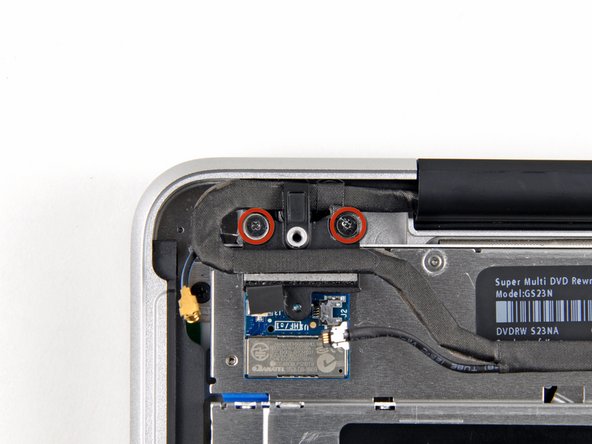
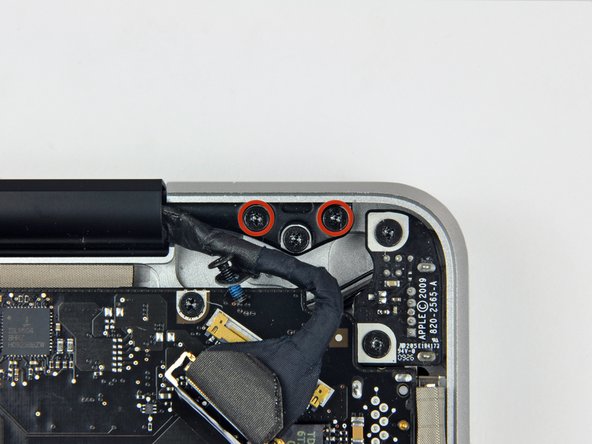
上部ケースとバッテリーを固定している3本のペンタローブネジを外します。このスペシャルドライバーで対応できます。
-
くぼみがドライバーの先端より大きい場合は、より大きなビットのドライバーを探してください。ドライバーを回す前に、ぴったりとくぼみにフィットするか再度確認してください。
-
-
-
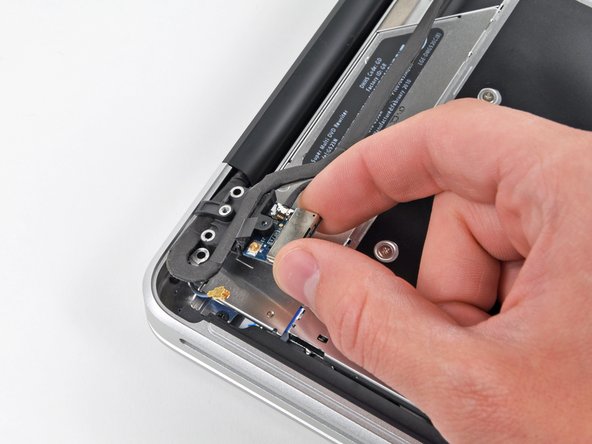
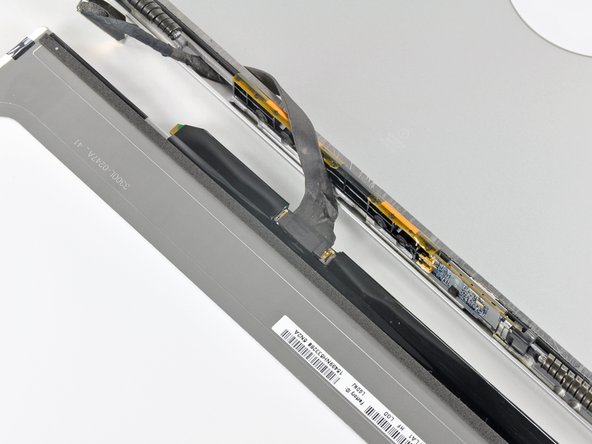
スパッジャー先端を使用して、もう一方の端をわずかに持ち上げ、カメラケーブルコネクタから離すように回転させながら、1本の指でケーブルのリテイナー先端を押し込みます。
-
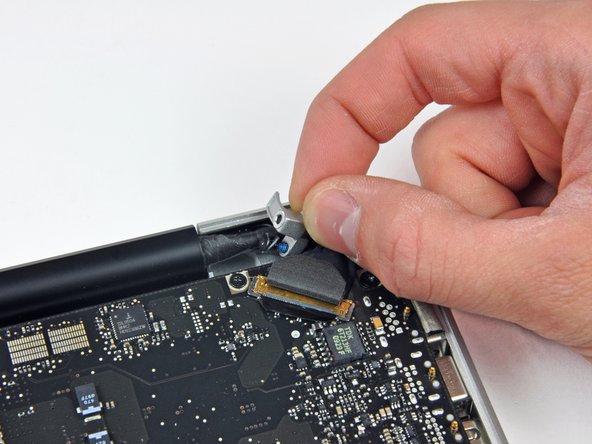
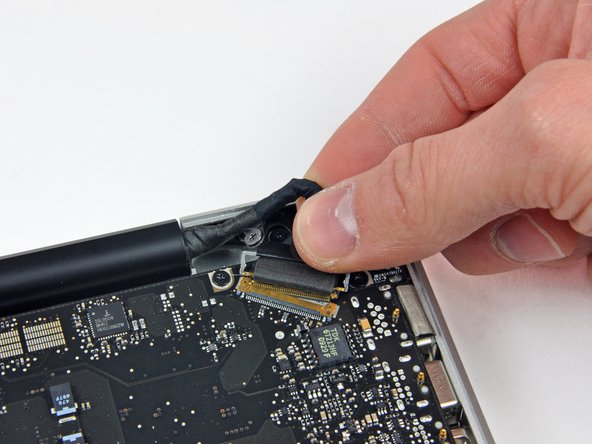
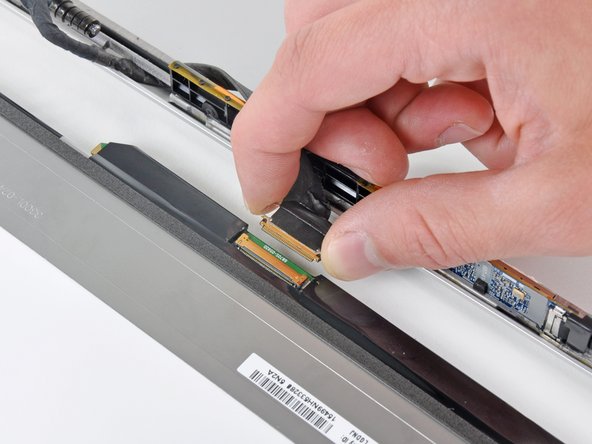
カメラケーブルをロジックボード上のソケットから引き抜きます。
-
-
-
-
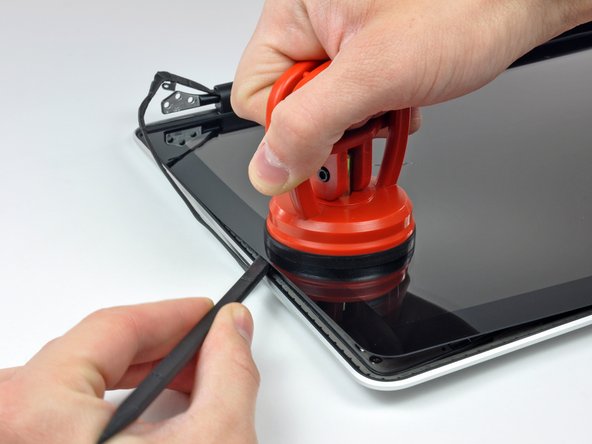
作業を始める前に、ディスプレイガラスを湿らせたリントフリーの布で綺麗に拭き取ってください。こうすることで、吸盤カップが装着しやすくなり、再組み立ての際、汚れチェックが簡単になります。
-
ヒートガンを弱にして、ガラスパネルの上部右側端附近の黒色ボーダーの外側から温めます。
-


デバイスを再組み立てする際は、これらの手順を逆の順番に従って作業を進めてください。
デバイスを再組み立てする際は、これらの手順を逆の順番に従って作業を進めてください。
35 の人々がこのガイドを完成させました。
以下の翻訳者の皆さんにお礼を申し上げます:
100%

Midori Doiさんは世界中で修理する私たちを助けてくれています! あなたも貢献してみませんか?
翻訳を始める ›

2 件のコメント
4/4/2020 - I replaced the battery to my mid-2009 MacbookPro earlier, and so was comfortable with the early steps. Removing the battery and all the screws went well. Detaching cables was easy, but reattaching them was tough. Specifically, step 32 in reverse was the most difficult part. I recommend applying a new piece of electrical tape once you reattach the cable to keep them together. Otherwise trying to reassemble the lcd was impossible for me. I also had to extract the cable and re-thread it, attached to the lcd, clip side through the metal case. Once it was through there, I spent a few minutes delicately cleaning the lcd and the top screen. Ensuring everything was clean was also challenging. Re-assembly afterwards went well. Right away I turned on my computer and my screen was perfect. Coupled with the new battery and a round of Clean my Mac, and everything works perfectly. All the steps are correct, and this took a couple hours to complete.