はじめに
このガイドを使って、MacBook Proのディスプレイアセンブリを交換します。
必要な工具と部品
-
-
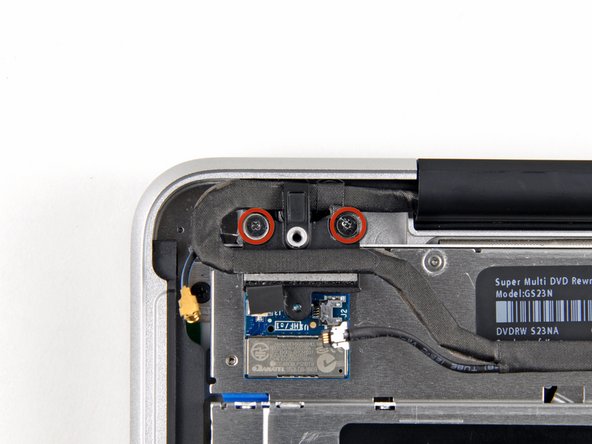
上部ケースとバッテリーを固定している3本のペンタローブネジを外します。このスペシャルドライバーで対応できます。
-
くぼみがドライバーの先端より大きい場合は、より大きなビットのドライバーを探してください。ドライバーを回す前に、ぴったりとくぼみにフィットするか再度確認してください。
-
-
-
-
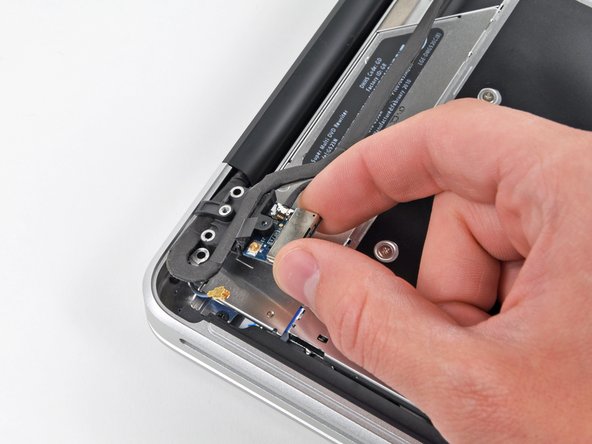
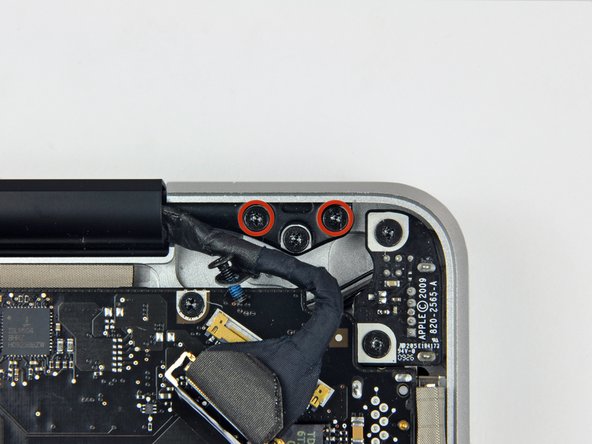
スパッジャー先端を使用して、もう一方の端をわずかに持ち上げ、カメラケーブルコネクタから離すように回転させながら、1本の指でケーブルのリテイナー先端を押し込みます。
-
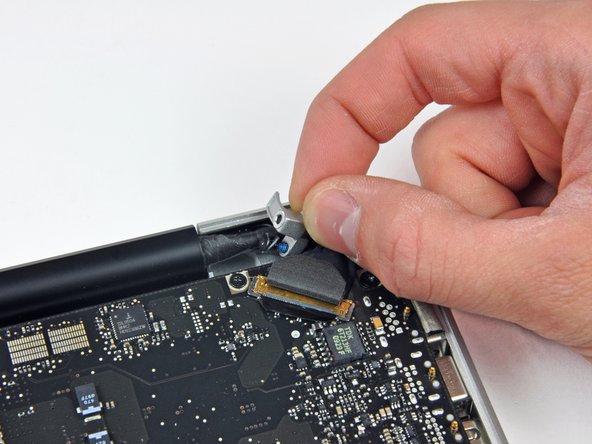
カメラケーブルをロジックボード上のソケットから引き抜きます。
-


デバイスを再組み立てする際は、これらの手順を逆の順番に従って作業を進めてください。
デバイスを再組み立てする際は、これらの手順を逆の順番に従って作業を進めてください。
27 の人々がこのガイドを完成させました。
以下の翻訳者の皆さんにお礼を申し上げます:
100%

Midori Doiさんは世界中で修理する私たちを助けてくれています! あなたも貢献してみませんか?
翻訳を始める ›

3 件のコメント
Will a 2010 A1286 Display assembly fit a 2009 A1286 Macbook Pro?
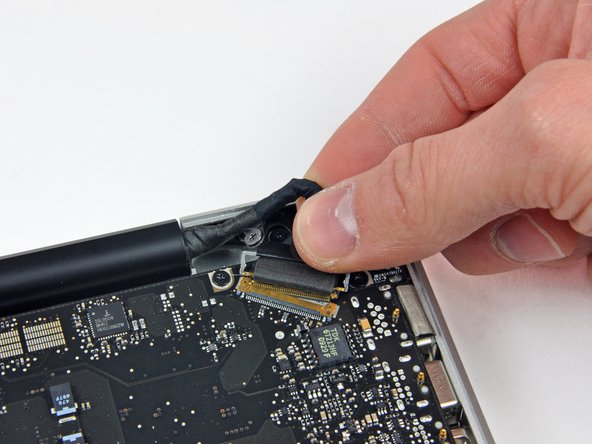
I greatly appreciated your comment in Step 8 saying: “Apple sticks a small strip of clear plastic with adhesive applied to one side to the logic board behind the camera cable connector to keep it in its socket“.
My problem was that I had an old Macbook Pro whose camera cable was out of its socket and I could not get it in because this piece of plastic was in the way. I had no idea what it was. It was not clear to me if it was an IC or some other important component. Your comment clarified what it was and its purpose.
Pushing down on it at one end did not achieve anything, so I have just lifted it up and off the board using a small scalpel blade.
I will use some tape to hold the cable connector in its socket.
Thank you