メインコンテンツにスキップ

MacBook Pro 15" Retina Display Mid 2015 Display Assembly Replacement

必要な工具と部品

  1. MacBook Pro 15" Retina Display Mid 2015 Display Assembly Replacement, Lower Case: 手順 1、 1の画像 1
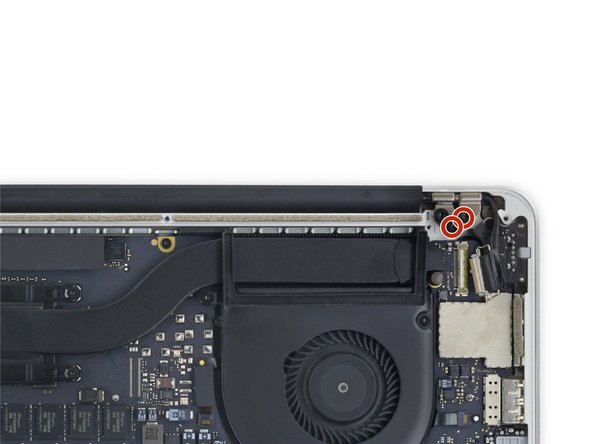
    • Remove the following P5 pentalobe screws securing the lower case to the MacBook Pro:

    • Eight 3.1 mm

    • Two 2.3 mm

  2. MacBook Pro 15" Retina Display Mid 2015 Display Assembly Replacement: 手順 2、 2の画像 1 MacBook Pro 15" Retina Display Mid 2015 Display Assembly Replacement: 手順 2、 2の画像 2
    • Lifting from the edge nearest the clutch cover, lift the lower case off the MacBook Pro.

  3. MacBook Pro 15" Retina Display Mid 2015 Display Assembly Replacement: 手順 3、 3の画像 1 MacBook Pro 15" Retina Display Mid 2015 Display Assembly Replacement: 手順 3、 3の画像 2 MacBook Pro 15" Retina Display Mid 2015 Display Assembly Replacement: 手順 3、 3の画像 3
    • The lower case has two plastic pegs (red) that fit into plastic clips in the upper case (orange).

    • During reassembly, gently push down the center of the lower case to reattach the case to its two plastic clips.

  4. MacBook Pro 15" Retina Display Mid 2015 Display Assembly Replacement, Battery Connector: 手順 4、 1の画像 1
    • Peel back the sticker covering the battery connector.

  5. MacBook Pro 15" Retina Display Mid 2015 Display Assembly Replacement: 手順 5、 3の画像 1 MacBook Pro 15" Retina Display Mid 2015 Display Assembly Replacement: 手順 5、 3の画像 2 MacBook Pro 15" Retina Display Mid 2015 Display Assembly Replacement: 手順 5、 3の画像 3
    • Gently lift each side of the battery connector to pry the connector out of its socket on the logic board.

    • Bend the connector back toward the battery, ensuring that the battery connector doesn't accidentally make contact with the logic board.

  6. MacBook Pro 15" Retina Display Mid 2015 Display Assembly Replacement, AirPort/Camera Cables: 手順 6、 3の画像 1 MacBook Pro 15" Retina Display Mid 2015 Display Assembly Replacement, AirPort/Camera Cables: 手順 6、 3の画像 2 MacBook Pro 15" Retina Display Mid 2015 Display Assembly Replacement, AirPort/Camera Cables: 手順 6、 3の画像 3
    • Use a spudger or tweezers to pry the three AirPort antenna cables straight up off of their sockets on the AirPort board, and bend them up and out of the way.

    • The cable connection points are very fragile. Be careful to lift only on the connector, and not on the socket or cable.

    • To reconnect, align the connector carefully into position over the socket, and press it down firmly with the flat of your spudger.

  7. MacBook Pro 15" Retina Display Mid 2015 Display Assembly Replacement: 手順 7、 2の画像 1 MacBook Pro 15" Retina Display Mid 2015 Display Assembly Replacement: 手順 7、 2の画像 2
    • Peel the right rubber cover up off the fan and fold it out of the way.

  8. MacBook Pro 15" Retina Display Mid 2015 Display Assembly Replacement: 手順 8、 2の画像 1 MacBook Pro 15" Retina Display Mid 2015 Display Assembly Replacement: 手順 8、 2の画像 2
    • Use the tip of a spudger to push the camera cable connector out of its socket on the logic board.

    • Be sure to push parallel to the board, pushing first on one side, then the other to "walk" the connector out of its socket.

  9. MacBook Pro 15" Retina Display Mid 2015 Display Assembly Replacement: 手順 9、 3の画像 1 MacBook Pro 15" Retina Display Mid 2015 Display Assembly Replacement: 手順 9、 3の画像 2 MacBook Pro 15" Retina Display Mid 2015 Display Assembly Replacement: 手順 9、 3の画像 3
    • Use your fingers to pull the AirPort/Camera cables up off the fan.

    • The cables are adhered to the fan, so peel them up carefully to avoid damaging them.

    • Carefully de-route the cables from the plastic cable guide.

    • On reassembly, there should be enough adhesive still on these cables to stick them back down to the fan.

  10. MacBook Pro 15" Retina Display Mid 2015 Display Assembly Replacement, Display Assembly: 手順 10、 3の画像 1 MacBook Pro 15" Retina Display Mid 2015 Display Assembly Replacement, Display Assembly: 手順 10、 3の画像 2 MacBook Pro 15" Retina Display Mid 2015 Display Assembly Replacement, Display Assembly: 手順 10、 3の画像 3
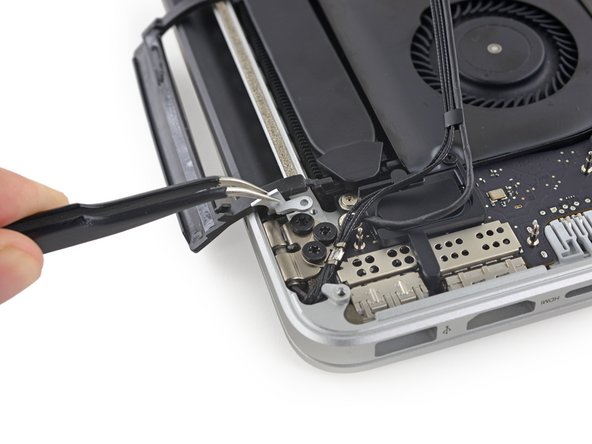
    • Use the tip of a spudger to flip up the display data cable lock and rotate it toward the MagSafe 2 power port side of the computer.

    • Pull the display data cable straight out of its socket on the logic board.

    • Do not lift up on the display data cable, as its socket is very fragile. Pull the cable parallel to the face of the logic board.

    • Do not touch the contacts on the data connector or its socket with your fingers or any tools, as you may deposit oils or damage the pins.

  11. MacBook Pro 15" Retina Display Mid 2015 Display Assembly Replacement: 手順 11、 2の画像 1 MacBook Pro 15" Retina Display Mid 2015 Display Assembly Replacement: 手順 11、 2の画像 2
    • Remove the two rubber hinge covers.

  12. MacBook Pro 15" Retina Display Mid 2015 Display Assembly Replacement: 手順 12、 2の画像 1 MacBook Pro 15" Retina Display Mid 2015 Display Assembly Replacement: 手順 12、 2の画像 2
    • Remove the two 3.2 mm T5 Torx screws securing the aluminum hinge covers to the upper case.

  13. MacBook Pro 15" Retina Display Mid 2015 Display Assembly Replacement: 手順 13、 3の画像 1 MacBook Pro 15" Retina Display Mid 2015 Display Assembly Replacement: 手順 13、 3の画像 2 MacBook Pro 15" Retina Display Mid 2015 Display Assembly Replacement: 手順 13、 3の画像 3
    • Remove the two aluminum hinge covers from the MacBook Pro.

  14. MacBook Pro 15" Retina Display Mid 2015 Display Assembly Replacement: 手順 14、 2の画像 1 MacBook Pro 15" Retina Display Mid 2015 Display Assembly Replacement: 手順 14、 2の画像 2
    • Remove four out of the six 5.3 mm T8 Torx screws securing the display to the upper case.

    • Leave the innermost screws (one from each hinge) in place.

    • When reassembling, be sure the two screws going back into the hinge on the left go back through the webcam/AirPort cable bracket.

  15. MacBook Pro 15" Retina Display Mid 2015 Display Assembly Replacement: 手順 15、 1の画像 1
    • Open the MacBook Pro approximately 110 degrees, and place it sideways on the table, as shown.

  16. MacBook Pro 15" Retina Display Mid 2015 Display Assembly Replacement: 手順 16、 1の画像 1
    • While holding the display and upper case together with your left hand, remove the remaining T8 Torx screw from the lower (closer to the table) display bracket.

  17. MacBook Pro 15" Retina Display Mid 2015 Display Assembly Replacement: 手順 17、 1の画像 1
    • Be sure to hold the display and upper case together with your left hand. Failure to do so may cause the freed display/upper case to fall, potentially damaging each component.

    • While holding the display and upper case together with your left hand, remove the remaining T8 Torx screw from the upper display bracket.

  18. MacBook Pro 15" Retina Display Mid 2015 Display Assembly Replacement: 手順 18、 3の画像 1 MacBook Pro 15" Retina Display Mid 2015 Display Assembly Replacement: 手順 18、 3の画像 2 MacBook Pro 15" Retina Display Mid 2015 Display Assembly Replacement: 手順 18、 3の画像 3
    • Grip both halves of the device, one in each hand.

    • Gently push forward on the bottom half of the device to detach it from the display assembly.

    • Carefully set each component aside, making sure to set down the bottom half keyboard-side down to avoid damaging internal components.

    • Replacement displays may not have their hinges adjusted to the correct angle. Use needle nose pliers to gently adjust them to match the hinges on the display being replaced.

終わりに

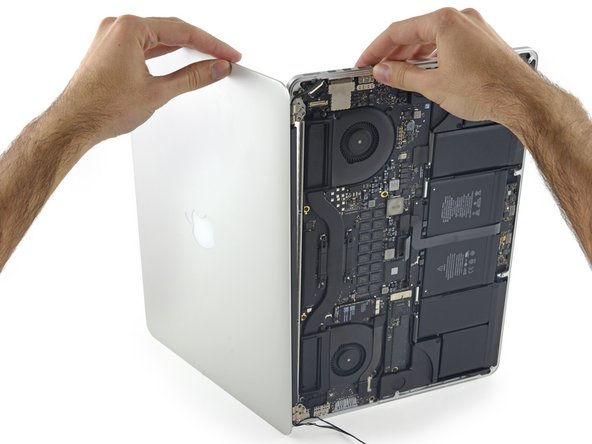
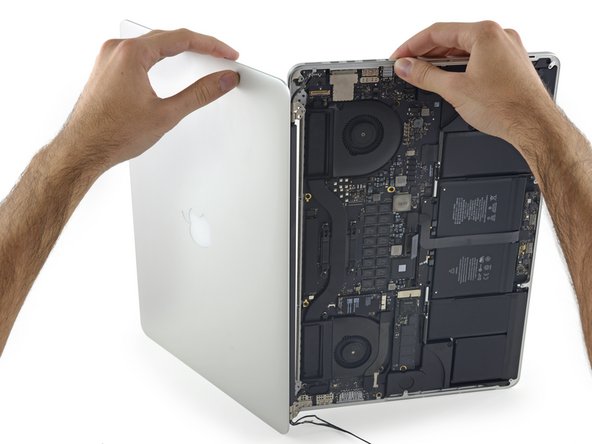
To reassemble your device, follow these instructions in reverse order.

149 の人々がこのガイドを完成させました。

作成者

5人の作成者と共同で作成されました。

Andrew Optimus Goldheart

メンバー登録日: 10/17/09

502,755 ポイント

407のガイドは作成済み

チーム

iFixit iFixit人のメンバー

Staff

135 メンバー

16,757のガイドは作成済み

52 件のコメント

Can the clutch be replaced in the 2015 15" Retina MacBook Pro?

Thomas Taggart - 返信

Successfully replaced screen and everything is working great. One mechanical exception - the black clutch cover is loose on one side (the left side looking at the keyboard). i can "lift it" towards myself. it wasn't obvious while i was in there that there was a step to "hook it" into anything. what has it let go from and how do i go about ensuring that it's secure when it's flipped? Anyone know?

Thnaks!

J Allard - 返信

It was a perfect job! Thanks!

Mike Mell - 返信

Thank you! These instructions couldn't be better.

Devin Fredericks - 返信

Do you have any intention of releasing a guide for the new A1707 2016 pro retina model with touch bar? Thanks for your help.

Michael Moore - 返信

コメントを追加

統計データ:

過去 24時間: 41

過去 7 日: 273

過去 30 日: 1,180

今までの合計 222,731