メインコンテンツにスキップ

このバージョンは誤った内容を含んでいる可能性があります。最新の承認済みスナップショットに切り替えてください。

必要条件のみ
この修理ガイドは、他のガイドの前提条件として使用されます。それ自体は不完全で、単独で使用されることはありません。

必要な工具と部品

  1. この手順は未翻訳です。 翻訳を手伝う。

    : 手順 1、 2の画像 1 : 手順 1、 2の画像 2
    • Remove the pieces of yellow kapton tape from the bottom left corner of the display.

    • Peel the three green antenna ground straps off the copper tape along the bottom edge of the LCD.

    • The adhesive connecting these straps to the display is very strong. An edged tool is helpful to separate the adhesive while you peel the straps off.

    • Remove the piece of tape securing the camera cable to the LCD.

  2. この手順は未翻訳です。 翻訳を手伝う。

    : 手順 2、 2の画像 1 : 手順 2、 2の画像 2
    • Remove the pieces of tape covering the display data cable and camera cable connectors.

    • Carefully peel the camera cable off the foam tape along the top edge of the LCD.

  3. この手順は未翻訳です。 翻訳を手伝う。

    : 手順 3、 2の画像 1 : 手順 3、 2の画像 2
    • Gently pull the camera cable away from its socket on the camera board.

    • Pull the display data cable connector away from its socket on the LCD.

    • Pull both cables parallel to the face of the logic board.

  4. この手順は未翻訳です。 翻訳を手伝う。

    : 手順 4、 2の画像 1 : 手順 4、 2の画像 2
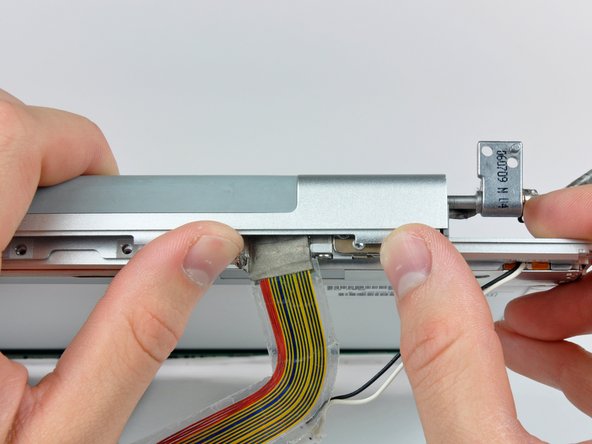
    • If you have a Core Duo machine, refer to picture 1 and remove three Phillips screws connecting the clutch assembly to the lower edge of the front display bezel near the display data cable.

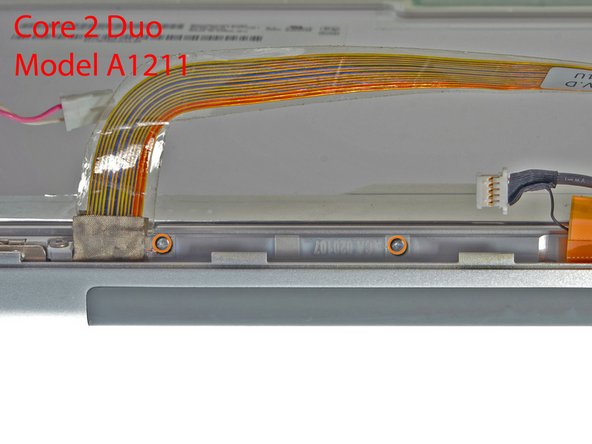
    • If you have a Core 2 Duo Model A1211 machine, refer to picture 2 and remove two Phillips screws connecting the clutch assembly to the lower edge of the front display bezel near the display data cable.

  5. この手順は未翻訳です。 翻訳を手伝う。

    : 手順 5、 1の画像 1
    • Remove the small Phillips screw from behind the display data cable.

    • Remove the small rectangular steel bracket by sliding it away from the right clutch hinge.

    • If you have a Core 2 Duo Model A1211, there is no steel bracket. Simply remove the screw and continue to the next step.

  6. この手順は未翻訳です。 翻訳を手伝う。

    : 手順 6、 1の画像 1
    • Remove three Phillips screws attaching the clutch assembly to the lower edge of the front display bezel.

    • The inverter cable ground loop is a very thin and delicate wire. Work gently.

  7. この手順は未翻訳です。 翻訳を手伝う。

    : 手順 7、 2の画像 1 : 手順 7、 2の画像 2
    • Push the open edge of the clutch cover away from the left clutch hinge to pop it off the clips attaching the two parts.

    • If necessary, repeat this process for the right side of the clutch assembly.

    • Remove the clutch assembly from the front display bezel.

ゴール

作成者

4人の作成者と共同で作成されました。

Andrew Bookholt

587,036 ポイント

619のガイドは作成済み

0 件のコメント

コメントを追加

統計データ:

過去 24時間: 0

過去 7 日: 2

過去 30 日: 13

今までの合計 948