メインコンテンツにスキップ

このバージョンは誤った内容を含んでいる可能性があります。最新の承認済みスナップショットに切り替えてください。

必要条件のみ
この修理ガイドは、他のガイドの前提条件として使用されます。それ自体は不完全で、単独で使用されることはありません。

必要な工具と部品

  1. この手順は未翻訳です。 翻訳を手伝う。

    : 手順 1、 2の画像 1 : 手順 1、 2の画像 2
    • Remove the two pieces of kapton tape covering the display data cable.

    • Remove the strip of tape securing the iSight cable to the LCD.

    • Peel the three antenna straps off the lower edge of the LCD.

  2. この手順は未翻訳です。 翻訳を手伝う。

    : 手順 2、 1の画像 1
    • Disconnect the display data cable by pulling its connector toward the bottom edge of the display, away from the socket on the LCD.

  3. この手順は未翻訳です。 翻訳を手伝う。

    : 手順 3、 1の画像 1
    • Remove the two Phillips screws securing the ground straps for the display data cable and LED driver board cable to the clutch cover.

  4. この手順は未翻訳です。 翻訳を手伝う。

    : 手順 4、 1の画像 1
    • Remove the Phillips screw hidden behind the display data cable.

  5. この手順は未翻訳です。 翻訳を手伝う。

    : 手順 5、 1の画像 1
    • Remove the three Phillips screws behind antenna straps along the bottom edge of the display.

  6. この手順は未翻訳です。 翻訳を手伝う。

    : 手順 6、 1の画像 1
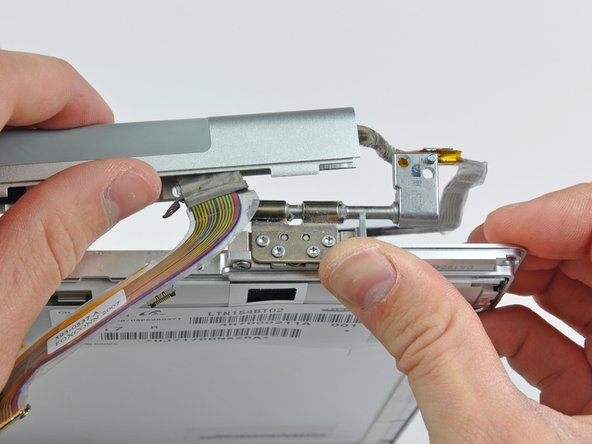
    • To remove the clutch assembly, first insert the flat end of a spudger into the gap between the clutch hinge and the clutch cover where the cables exit.

    • While prying the clutch assembly away from the clutch hinge with your spudger, use a plastic opening tool to increase the gap between the clutch cover and the front display bezel.

    • Work your way along the length of the clutch cover to fully separate the adhesive.

  7. この手順は未翻訳です。 翻訳を手伝う。

    : 手順 7、 2の画像 1 : 手順 7、 2の画像 2
    • Push the clutch assembly off each of the clutch hinges and remove it from the display.

ゴール

ある他の人がこのガイドを完成しました。

作成者

5人の作成者と共同で作成されました。

Walter Galan

694,561 ポイント

1,203のガイドは作成済み

0 件のコメント

コメントを追加

統計データ:

過去 24時間: 0

過去 7 日: 0

過去 30 日: 0

今までの合計 1,092