はじめに
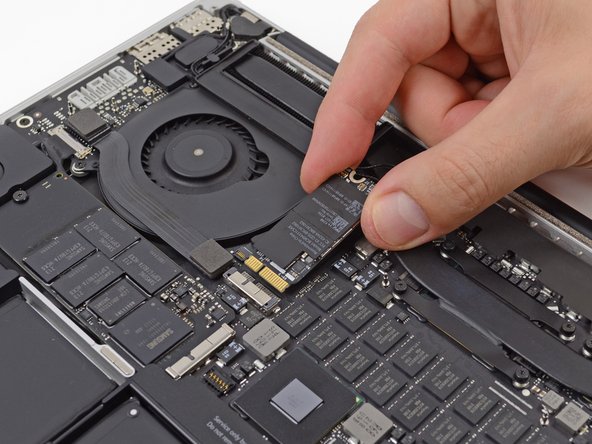
接続に支障がありますか?このガイドを参照して、AirPortボードを交換しましょう。
必要な工具と部品


デバイスを再度組み立てるには、この説明書の逆の順番で組み立ててください。
デバイスを再度組み立てるには、この説明書の逆の順番で組み立ててください。
19 の人々がこのガイドを完成させました。


8 件のコメント
This tutorial worked perfectly for me and I have never, ever, considered working on my computer before. I ordered the tools from ifixit.com and it was a breeze!!!! Everything works perfectly -thank you so very much!
Everything worked great, took me about 30 minutes to complete. I replaced my working adapter with an 802.11ac module (BCM94360CSAX), cost me $12 on Ebay. I now have 802.11ac (instead of just 802.11n) and with working 802.11v support provided by the new adapter, I can now unlock my MBP with my apple Watch! Thank you.
The required hardware seems correct -- I needed a T5 bit and a P5 Pentalobe, as well as a spudger. I used the flat end of the spudger to gently press the antenna connectors together. They make a distinctive "snap" when they connect.
When you replace the Airport card, (or at least if you’ve upgraded it to a newer but compatible 802.11ac/BT4.0 card) any apps you downloaded from the App Store won’t launch, but complain that they were downloaded on a different Mac. You’ll either need to authenticate with your Apple ID for each one, or reinstall them.
Success here using this tutorial to upgrade to an Airport card that supports 802.11ac/BT4.0. It took 30 minutes, and with the upgraded card I can now unlock my MacBook Pro with my Apple Watch.
As Alan mentions above, some of my App Store purchases have prompted me for my AppleID password. The bigger correction was that upon starting up my computer I had to System Preference >> Date & Time to update the calendar and clock. All I had to do was click the lock at the bottom left of the dialog box, enter my MacBook Pro password, and it auto-updated.
Then to get it to recognize my Apple Watch I went to System Preferences >> Security & Privacy and checked the box for “Allow your Apple Watch to unlock your Mac.” Then I clicked the lock in the bottom left to lock it, quit out of System Preferences, and I was good to go.