はじめに
お持ちのMacBook Pro 13インチ Touch Bar Late 2016のディスプレイ・アセンブリーを交換するには、このガイドを参照してください。
作業を始める前に、 Appleの無料リペアプログラム対象ではないか確認してください。対象の可能性があるものは以下です
・ディスプレイのバックライトが故障している。
・ディスプレイのスクリーン下側全体に沿って縦の線が発生している場合(通称、ステージライト)
安全のために、作業を始める前にMacBook Proのバッテリー残量を25%以下まで放電してください。
必要な工具と部品
-
-
Macを起動し、ターミナルを開きます。
-
以下のコマンドをターミナルにコピー(または正確にタイプ)します。
-
sudo nvram AutoBoot=%00
-
[return]キーを押します。パスワードを求められたら、管理者パスワードを入力し、 [return]キーを再度押します。補足: [return]キーは ⏎ や "enter"として印字されている場合もあります。
-
sudo nvram AutoBoot=%03
-
-
-
吸盤ハンドルをMacBook Proの正面中央付近の下部ケース上に装着します。
-
吸盤ハンドルを持ち上げて、下部ケースと筐体の間にわずかな隙間を作ります。
-
-
-
下部ケースを取り出します。
-
ディスプレイヒンジ付近のクリップの位置を揃えます。カバーをヒンジ側に押し込みます。クリップが装着されると、それ以上スライドできなくなります。
-
スライドしてクリップが完全に装着して、下部ケースが正しく揃ったら、下部ケースをしっかりと押させて、隠れた4つのクリップも装着します。カチッと音がして装着感があるはずです。
-
-
-
-
スパッジャーを使って、バッテリーの接続を外して、バッテリーパワーコネクタを慎重に持ち上げます。
-
コネクタを十分の高さに持ち上げて、ソケットから離します。修理中、アクシデントで接触しないようにご注意ください。MacBook Proにダメージを与えてしまう可能性があります。
-
-
-
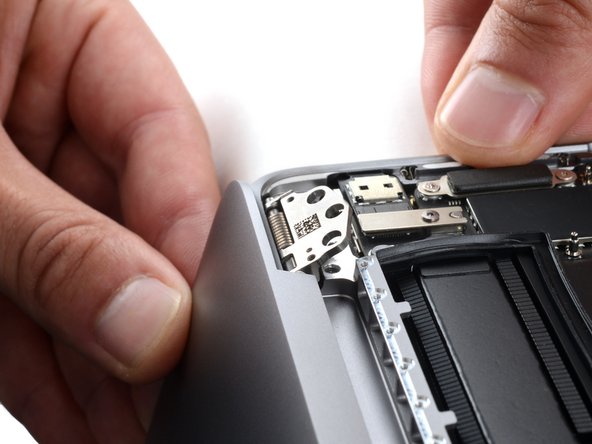
ディスプレイケーブルアセンブリの左側を摘んで、MacBookの下側端まで引っ張り、カバースプリングから引き離します。
-
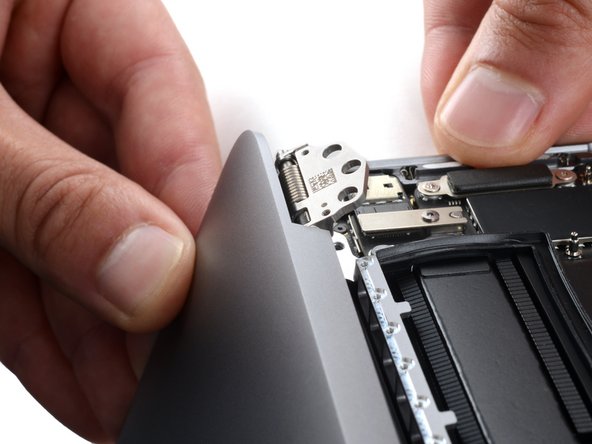
ピンセットを使用して、ディスプレイケーブルのカバースプリングをくぼみから引き出します。
-
ディスプレイケーブルアセンブリの右側カバースプリングで、この手順を繰り返します。
-
-
-
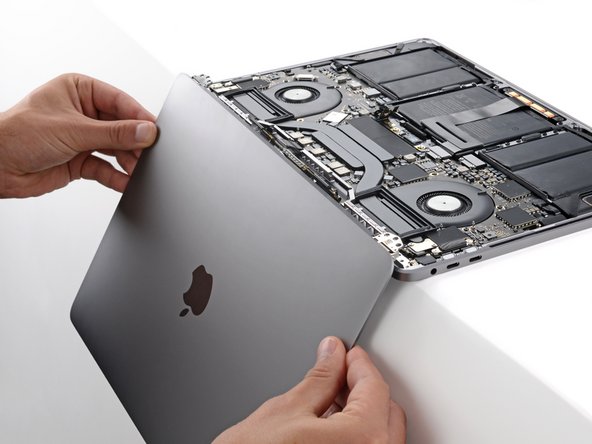
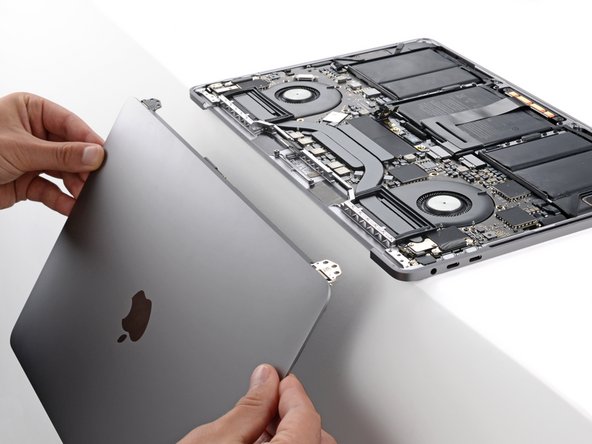
同様にして右側のヒンジも外すと、ディスプレイを取り外せるようになります。
-
スクリーンのヒンジがどちらも完全に開いた状態にして、筐体の切り欠きにに正しく差し込んで下さい。
-
ヒンジ固定ネジ8本(原文ママ)を仮締めします。
-
MacBookのスクリーンを閉じて、スクリーンの取り付け位置に問題がないことを確認して下さい。
-
問題がなければヒンジ固定ネジを本締めして下さい。
-


交換用のパーツとオリジナルのパーツを見比べてください。残りのコンポーネントを移植する必要があるか、パーツを取り付ける前に接着剤の裏張りを取る必要があります。
デバイスを再度組み立てるには、この説明書の逆の順番で組み立ててください。
電子パーツを処理する場合は、認可済みリサイクルセンターR2を通じて廃棄してください。
修理が上手く進みませんか?基本的なトラブルシューティング を参照するか、アンサーフォーラムを検索してください。
交換用のパーツとオリジナルのパーツを見比べてください。残りのコンポーネントを移植する必要があるか、パーツを取り付ける前に接着剤の裏張りを取る必要があります。
デバイスを再度組み立てるには、この説明書の逆の順番で組み立ててください。
電子パーツを処理する場合は、認可済みリサイクルセンターR2を通じて廃棄してください。
修理が上手く進みませんか?基本的なトラブルシューティング を参照するか、アンサーフォーラムを検索してください。
77 の人々がこのガイドを完成させました。
以下の翻訳者の皆さんにお礼を申し上げます:
100%

これらの翻訳者の方々は世界を修理する私たちのサポートをしてくれています。 あなたも貢献してみませんか?
翻訳を始める ›


29 件のコメント
Hello Lucas Zhu,
the interior build of the A1708 model is a bit different to this one. Especially the connection of the battery. You can check our guides for the A1708 model for the disconnection procedure. The removal of the display in general, is more or less the same with a few differences (e.g. two instead of 3 coax cables). Although the A1708 is a different model you might be able to remove the display following this guide.
THANK YOU THANK YOU THANK YOU!! You made my life so much easier. This guide was thorough and definitely made things a lot easier to understand.
Thanks for the guide! I’ve completed mine around 1 1/2 hours while being really careful not to short-circuit any components. Other video that I used for reference: https://youtu.be/153tVLIZVm8 and https://youtu.be/bEDhEWLrkUs