メインコンテンツにスキップ
リペアコミュニティに参加 - アカウントの作成

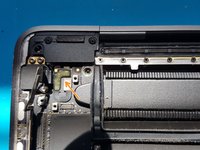
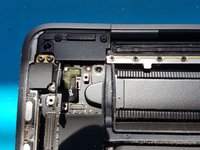
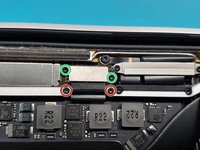
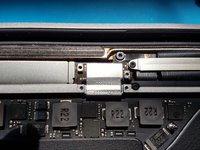
MacBook Pro 13" Touch Bar 2019 USB-C/Thunderbolt ports Replacement

必要な工具と部品

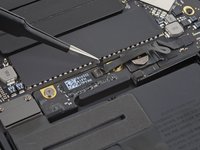
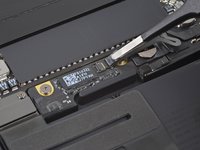
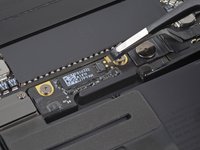
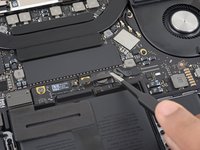
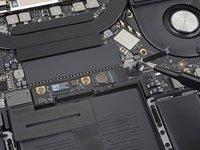
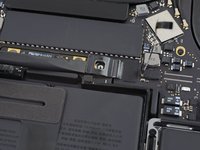
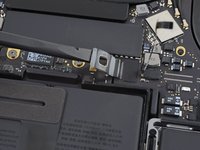
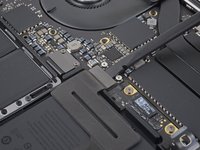
    1. MacBook Pro 13" Touch Bar 2019 USB-C/Thunderbolt ports Replacement, Disable Auto Boot: 手順 1、 3の画像 1 MacBook Pro 13" Touch Bar 2019 USB-C/Thunderbolt ports Replacement, Disable Auto Boot: 手順 1、 3の画像 2 MacBook Pro 13" Touch Bar 2019 USB-C/Thunderbolt ports Replacement, Disable Auto Boot: 手順 1、 3の画像 3
      • Before starting this procedure, you must disable your Mac's Auto Boot feature. Auto Boot powers on your Mac when you open the lid, and may be accidentally triggered during disassembly. Use this guide or follow the abbreviated instructions below to disable Auto Boot. This command may not work on all Macs.

      • Power on your Mac and launch Terminal.

      • Copy and paste the following command (or type it exactly) into Terminal:

      • 'sudo nvram AutoBoot=%00

      • Press [return]. If prompted, enter your administrator password and press [return] again. Note: Your return key may also be labeled ⏎ or "enter."

      • You can now safely power down your Mac and open the bottom case, without it accidentally powering on.

      • When your repair is complete and your Mac is successfully reassembled, re-enable Auto Boot with the following command (typed into Terminal, as shown above):

      • sudo nvram AutoBoot=%03

      FixBotに聞いてみる

      コメントを追加

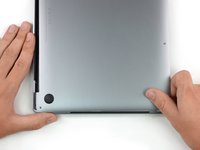
    2. MacBook Pro 13" Touch Bar 2019 USB-C/Thunderbolt ports Replacement, Remove the pentalobe screws: 手順 2、 1の画像 1
      • Before proceeding, unplug and power down your MacBook. Close the display and lay it on a soft surface, top-side down.

      • Use a P5 Pentalobe driver to remove the six screws securing the lower case:

      • Two 6.2 mm screws

      • Four 3.4 mm screws

      • Throughout this repair, keep track of each screw and make sure it goes back exactly where it came from to avoid damaging your device.

      FixBotに聞いてみる

      コメントを追加

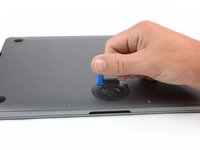
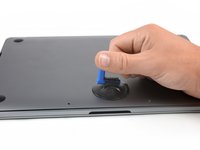
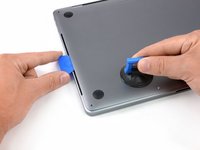
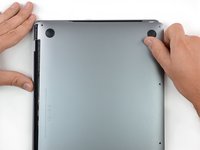
    3. MacBook Pro 13" Touch Bar 2019 USB-C/Thunderbolt ports Replacement, Open a gap using a suction cup: 手順 3、 2の画像 1 MacBook Pro 13" Touch Bar 2019 USB-C/Thunderbolt ports Replacement, Open a gap using a suction cup: 手順 3、 2の画像 2
      • Apply a suction handle to the lower case near the front-center area of the MacBook Pro.

      • Lift the suction handle to create a slight gap between the lower case and the chassis.

      FixBotに聞いてみる

      コメントを追加

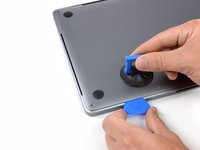
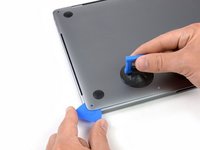
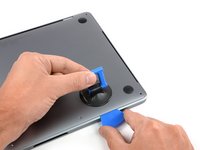
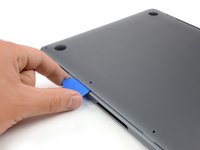
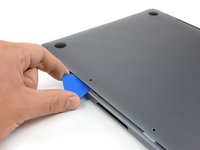
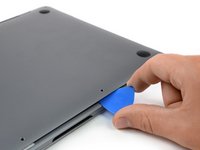
    4. MacBook Pro 13" Touch Bar 2019 USB-C/Thunderbolt ports Replacement, Separate the clips: 手順 4、 3の画像 1 MacBook Pro 13" Touch Bar 2019 USB-C/Thunderbolt ports Replacement, Separate the clips: 手順 4、 3の画像 2 MacBook Pro 13" Touch Bar 2019 USB-C/Thunderbolt ports Replacement, Separate the clips: 手順 4、 3の画像 3
      • Insert one corner of an opening pick into the space between the lower case and the chassis.

      • Slide the opening pick around the nearest corner and halfway up the side of the case.

      • This releases the first of the hidden clips securing the lower case to the chassis. You should feel and hear the clip pop free.

      FixBotに聞いてみる

      コメントを追加

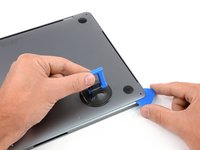
    5. MacBook Pro 13" Touch Bar 2019 USB-C/Thunderbolt ports Replacement: 手順 5、 3の画像 1 MacBook Pro 13" Touch Bar 2019 USB-C/Thunderbolt ports Replacement: 手順 5、 3の画像 2 MacBook Pro 13" Touch Bar 2019 USB-C/Thunderbolt ports Replacement: 手順 5、 3の画像 3
      • Repeat the previous step on the opposite side, sliding your opening pick under the lower case and up the side to pop the second clip free.

      FixBotに聞いてみる

      コメントを追加

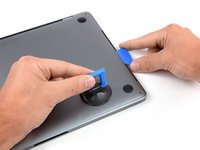
    6. MacBook Pro 13" Touch Bar 2019 USB-C/Thunderbolt ports Replacement: 手順 6、 3の画像 1 MacBook Pro 13" Touch Bar 2019 USB-C/Thunderbolt ports Replacement: 手順 6、 3の画像 2 MacBook Pro 13" Touch Bar 2019 USB-C/Thunderbolt ports Replacement: 手順 6、 3の画像 3
      • Insert your opening pick once again under the front edge of the lower case, near one of the two centermost screw holes.

      • Give the pick a firm twist to pop free the third clip securing the lower case to the chassis.

      • Repeat this procedure near the other of the two centermost screw holes, popping the fourth clip free.

      FixBotに聞いてみる

      コメントを追加

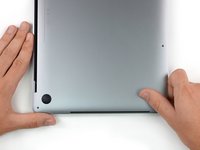
    7. MacBook Pro 13" Touch Bar 2019 USB-C/Thunderbolt ports Replacement: 手順 7、 3の画像 1 MacBook Pro 13" Touch Bar 2019 USB-C/Thunderbolt ports Replacement: 手順 7、 3の画像 2 MacBook Pro 13" Touch Bar 2019 USB-C/Thunderbolt ports Replacement: 手順 7、 3の画像 3
      • Pull the lower case firmly towards the front of the MacBook (away from the hinge area) to separate the last of the clips securing the lower case.

      • Pull first at one corner, then the other.

      • Pull to the side—not up.

      • This can require a lot of force.

      FixBotに聞いてみる

      コメントを追加

    8. MacBook Pro 13" Touch Bar 2019 USB-C/Thunderbolt ports Replacement, Remove the lower case: 手順 8、 1の画像 1
      • Remove the lower case.

      FixBotに聞いてみる

      コメントを追加

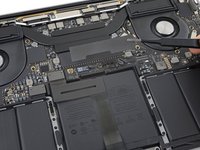
    9. MacBook Pro 13" Touch Bar 2019 USB-C/Thunderbolt ports Replacement, Uncover the battery connector: 手順 9、 2の画像 1 MacBook Pro 13" Touch Bar 2019 USB-C/Thunderbolt ports Replacement, Uncover the battery connector: 手順 9、 2の画像 2
      • Carefully peel up the large piece of tape covering the battery connector, on the edge of the logic board nearest the battery.

      • Remove the tape.

      FixBotに聞いてみる

      コメントを追加

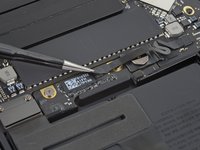
    10. MacBook Pro 13" Touch Bar 2019 USB-C/Thunderbolt ports Replacement: 手順 10、 2の画像 1 MacBook Pro 13" Touch Bar 2019 USB-C/Thunderbolt ports Replacement: 手順 10、 2の画像 2
      • Gently peel back the small piece of tape covering the battery board data cable connector.

      • The tape is integrated into the ribbon cable and will not detach completely. Simply peel it back enough to access the connector.

      FixBotに聞いてみる

      コメントを追加

    11. MacBook Pro 13" Touch Bar 2019 USB-C/Thunderbolt ports Replacement: 手順 11、 2の画像 1 MacBook Pro 13" Touch Bar 2019 USB-C/Thunderbolt ports Replacement: 手順 11、 2の画像 2
      • Disconnect the battery board data cable by sliding it out from its socket.

      • Slide parallel to the logic board, in the direction of the cable.

      FixBotに聞いてみる

      コメントを追加

    12. MacBook Pro 13" Touch Bar 2019 USB-C/Thunderbolt ports Replacement: 手順 12、 2の画像 1 MacBook Pro 13" Touch Bar 2019 USB-C/Thunderbolt ports Replacement: 手順 12、 2の画像 2
      • Fold the battery board data cable to the side and out of the way.

      FixBotに聞いてみる

      コメントを追加

    13. MacBook Pro 13" Touch Bar 2019 USB-C/Thunderbolt ports Replacement: 手順 13、 1の画像 1
      • Use a T5 Torx driver to remove the 3.7 mm pancake screw securing the battery power connector.

      FixBotに聞いてみる

      コメントを追加

    14. MacBook Pro 13" Touch Bar 2019 USB-C/Thunderbolt ports Replacement, Disconnect the battery: 手順 14、 2の画像 1 MacBook Pro 13" Touch Bar 2019 USB-C/Thunderbolt ports Replacement, Disconnect the battery: 手順 14、 2の画像 2
      • Use a spudger to gently lift the battery power connector, disconnecting the battery.

      • Lift the connector high enough so that it stays separated from its socket. If it accidentally makes contact during the course of your repair, it could damage your MacBook Pro.

      FixBotに聞いてみる

      コメントを追加

    15. MacBook Pro 13" Touch Bar 2019 USB-C/Thunderbolt ports Replacement, Remove the trackpad connector screws: 手順 15、 1の画像 1
      • Use a T3 Torx driver to remove the two 1.8 mm screws securing the trackpad cable connector bracket.

      FixBotに聞いてみる

      コメントを追加

    16. MacBook Pro 13" Touch Bar 2019 USB-C/Thunderbolt ports Replacement: 手順 16、 1の画像 1
      この手順で使用する道具:
      Tweezers
      $4.99
      • Remove the trackpad cable connector bracket with a pair of tweezers.

      FixBotに聞いてみる

      コメントを追加

    17. MacBook Pro 13" Touch Bar 2019 USB-C/Thunderbolt ports Replacement: 手順 17、 2の画像 1 MacBook Pro 13" Touch Bar 2019 USB-C/Thunderbolt ports Replacement: 手順 17、 2の画像 2
      • Use a spudger to disconnect the trackpad ribbon cable by gently prying its connector straight up from the logic board.

      FixBotに聞いてみる

      コメントを追加

    18. MacBook Pro 13" Touch Bar 2019 USB-C/Thunderbolt ports Replacement, Disconnect keyboard connector: 手順 18、 1の画像 1
      • Use a T3 Torx driver to remove the two screws.

      • Two T3 Torx Screws.

      FixBotに聞いてみる

      コメントを追加

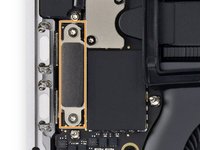
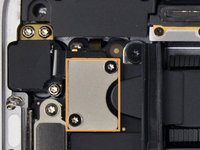
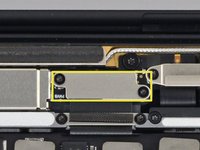
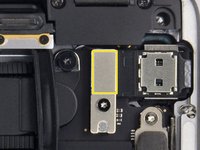
    19. MacBook Pro 13" Touch Bar 2019 USB-C/Thunderbolt ports Replacement, Unplug Left speaker cables: 手順 19、 1の画像 1
      • Carefully peel back the black tape to reveal the ZIF connector.

      • Unlatch the ZIF connector by flicking the arm on the connector upwards and carefully remove the cable from the connector by sliding it out.

      • Repeat this process with the newly revealed connector.

      • The two screws that are outlined in yellow are not relevant to this step and are marked on the board itself. For this step, yellow corresponds to the yellow rectangle in the image.

      FixBotに聞いてみる

      コメントを追加

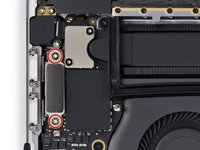
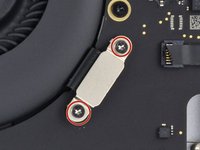
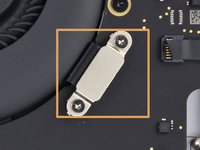
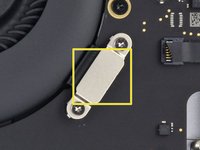
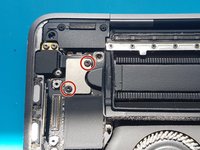
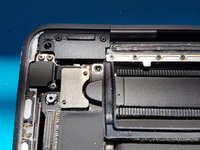
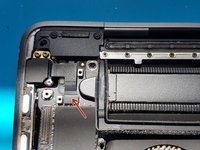
    20. MacBook Pro 13" Touch Bar 2019 USB-C/Thunderbolt ports Replacement, Unplug left Thunderbolt ports: 手順 20、 2の画像 1 MacBook Pro 13" Touch Bar 2019 USB-C/Thunderbolt ports Replacement, Unplug left Thunderbolt ports: 手順 20、 2の画像 2
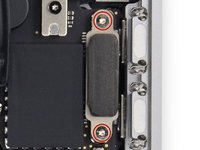
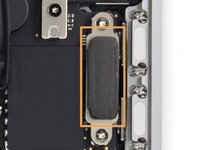
      • Use a T3 Torx driver to remove the two screws.

      • Once the screw have been removed carefully remove the metal shield.

      • Under the metal shield there is a connector, carefully unplug it.

      FixBotに聞いてみる

      コメントを追加

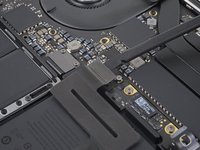
    21. MacBook Pro 13" Touch Bar 2019 USB-C/Thunderbolt ports Replacement, Unplug Touch ID and Auxiliary port: 手順 21、 3の画像 1 MacBook Pro 13" Touch Bar 2019 USB-C/Thunderbolt ports Replacement, Unplug Touch ID and Auxiliary port: 手順 21、 3の画像 2 MacBook Pro 13" Touch Bar 2019 USB-C/Thunderbolt ports Replacement, Unplug Touch ID and Auxiliary port: 手順 21、 3の画像 3
      • Use a T4 Torx driver to remove the two screws.

      • Two T4 Torx screws.

      • Carefully remove the metal shield.

      • Under the metal shield you will find two connectors, carefully unclip them.

      • The second cable you will disconnect will be lightly adhered so carefully slide a plastic spudger under it and finally unplug it.

      • The adhered cable is very thin and delicate so don't rush it and take your time.

      FixBotに聞いてみる

      コメントを追加

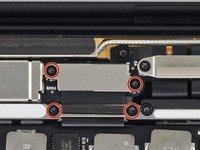
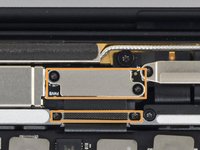
    22. MacBook Pro 13" Touch Bar 2019 USB-C/Thunderbolt ports Replacement, Disconnecting the display connector: 手順 22、 3の画像 1 MacBook Pro 13" Touch Bar 2019 USB-C/Thunderbolt ports Replacement, Disconnecting the display connector: 手順 22、 3の画像 2 MacBook Pro 13" Touch Bar 2019 USB-C/Thunderbolt ports Replacement, Disconnecting the display connector: 手順 22、 3の画像 3
      • Use a T3 Torx driver to remove the four screws.

      • 4 T3 Torx screws.

      • Once the screws are removed carefully remove the metal shields.

      • Carefully unclip the connector.

      FixBotに聞いてみる

      コメントを追加

    23. MacBook Pro 13" Touch Bar 2019 USB-C/Thunderbolt ports Replacement, Disconnect wifi and Bluetooth antennas: 手順 23、 1の画像 1
      • Disconnect the cables carefully with a plastic pry tool.

      • Be gentle, if too much force is applied it can take the board connector up with it.

      FixBotに聞いてみる

      コメントを追加

    24. MacBook Pro 13" Touch Bar 2019 USB-C/Thunderbolt ports Replacement, Touch Bar cable 1: 手順 24、 3の画像 1 MacBook Pro 13" Touch Bar 2019 USB-C/Thunderbolt ports Replacement, Touch Bar cable 1: 手順 24、 3の画像 2 MacBook Pro 13" Touch Bar 2019 USB-C/Thunderbolt ports Replacement, Touch Bar cable 1: 手順 24、 3の画像 3
      • Use a T3 Torx driver to remove the two screws.

      • Remove the metal shield carefully.

      • Carefully unplug the connector.

      FixBotに聞いてみる

      コメントを追加

    25. MacBook Pro 13" Touch Bar 2019 USB-C/Thunderbolt ports Replacement, Right speaker cable: 手順 25、 1の画像 1
      • Carefully peel back the black tape to reveal the ZIF connector.

      • Unlatch the ZIF connector by flicking the arm on the connector upwards and carefully remove the cable from the connector by sliding it out.

      • Repeat this process with the newly revealed connector.

      FixBotに聞いてみる

      コメントを追加

    26. MacBook Pro 13" Touch Bar 2019 USB-C/Thunderbolt ports Replacement, ZIF connector: 手順 26、 1の画像 1
      • Carefully peel back the black tape to reveal the ZIF connector.

      • Unlatch the ZIF connector by flicking the arm on the connector upwards and carefully remove the cable from the connector by sliding it out.

      FixBotに聞いてみる

      コメントを追加

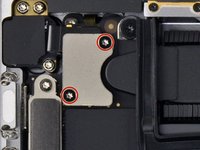
    27. MacBook Pro 13" Touch Bar 2019 USB-C/Thunderbolt ports Replacement, Unplug Right Thunderbolt ports: 手順 27、 2の画像 1 MacBook Pro 13" Touch Bar 2019 USB-C/Thunderbolt ports Replacement, Unplug Right Thunderbolt ports: 手順 27、 2の画像 2
      • Use a T3 Torx driver to remove the two screws.

      • Once the screw have been removed carefully remove the metal shield.

      • Under the metal shield there is a connector, carefully unplug it.

      FixBotに聞いてみる

      コメントを追加

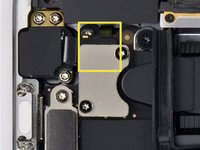
    28. MacBook Pro 13" Touch Bar 2019 USB-C/Thunderbolt ports Replacement, Touch bar bracket / Flex: 手順 28、 3の画像 1 MacBook Pro 13" Touch Bar 2019 USB-C/Thunderbolt ports Replacement, Touch bar bracket / Flex: 手順 28、 3の画像 2 MacBook Pro 13" Touch Bar 2019 USB-C/Thunderbolt ports Replacement, Touch bar bracket / Flex: 手順 28、 3の画像 3
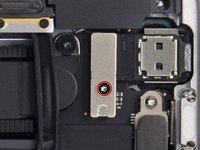
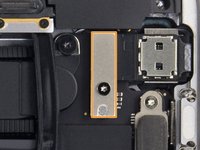
      • Use a T4 Torx driver to remove the screw.

      • T4 Torx screw.

      • Remove the metal shield carefully.

      • Carefully unplug the connector.

      • The two screws that are outlined in yellow are not relevant to this step and are marked on the board itself. For this step, yellow corresponds to the yellow rectangle in the image.

      FixBotに聞いてみる

      コメントを追加

    29. MacBook Pro 13" Touch Bar 2019 USB-C/Thunderbolt ports Replacement, Audio socket / Touch ID bracket: 手順 29、 2の画像 1 MacBook Pro 13" Touch Bar 2019 USB-C/Thunderbolt ports Replacement, Audio socket / Touch ID bracket: 手順 29、 2の画像 2
      • Use a T3 Torx driver to remove the two 1.4mm screws securing the bracket.

      • Remove the bracket.

      FixBotに聞いてみる

      コメントを追加

    30. MacBook Pro 13" Touch Bar 2019 USB-C/Thunderbolt ports Replacement: 手順 30、 3の画像 1 MacBook Pro 13" Touch Bar 2019 USB-C/Thunderbolt ports Replacement: 手順 30、 3の画像 2 MacBook Pro 13" Touch Bar 2019 USB-C/Thunderbolt ports Replacement: 手順 30、 3の画像 3
      • gently disconnect the audio socket flex cable with a spudger.

      • gently disconnect the Touch ID flex cable with a spudger.

      FixBotに聞いてみる

      コメントを追加

    31. MacBook Pro 13" Touch Bar 2019 USB-C/Thunderbolt ports Replacement, Display cable: 手順 31、 3の画像 1 MacBook Pro 13" Touch Bar 2019 USB-C/Thunderbolt ports Replacement, Display cable: 手順 31、 3の画像 2 MacBook Pro 13" Touch Bar 2019 USB-C/Thunderbolt ports Replacement, Display cable: 手順 31、 3の画像 3
      • Use a T3 Torx driver to remove the two 2.4mm screws securing the display cable bracket.

      • Use a T3 Torx driver to remove the two 1.2mm screws securing the display cable bracket.

      • Remove the bracket.

      • gently disconnect the flex cable with a spudger.

      FixBotに聞いてみる

      コメントを追加

    32. MacBook Pro 13" Touch Bar 2019 USB-C/Thunderbolt ports Replacement: 手順 32、 1の画像 1
      • Use a T5 Torx driver to remove the six 2.2mm screws securing the logic board.

      • Use a T3 Torx driver to remove the three 1.9mm screws securing the logic board.

      • Use a T5 Torx driver to remove the two 2.3mm (3.7mm head) screws securing the heatsink.

      FixBotに聞いてみる

      コメントを追加

    33. MacBook Pro 13" Touch Bar 2019 USB-C/Thunderbolt ports Replacement: 手順 33、 1の画像 1
      • Carefully lift up the logic board, make sure none of the connectors are connected, also make sure they aren't caught on the logic board.

      FixBotに聞いてみる

      コメントを追加

    34. MacBook Pro 13" Touch Bar 2019 USB-C/Thunderbolt ports Replacement: 手順 34、 1の画像 1
      • Congratulations you have now removed your MacBook's LogicBoard

      FixBotに聞いてみる

      コメントを追加

    1. MacBook Pro 13" Touch Bar 2019 USB-C/Thunderbolt ports Replacement, Remove the USB-C/Thunderbolt: 手順 35、 2の画像 1 MacBook Pro 13" Touch Bar 2019 USB-C/Thunderbolt ports Replacement, Remove the USB-C/Thunderbolt: 手順 35、 2の画像 2
      • Use a T5 Torx driver to remove the two screws.

      • Two T5 screws

      • Carefully remove the port

      • Repeat on the other side

      FixBotに聞いてみる

      コメントを追加

    2. MacBook Pro 13" Touch Bar 2019 USB-C/Thunderbolt ports Replacement: 手順 36、 1の画像 1
      • Congratulations!

      • You have now replace your USB-C/Thunderbolt Port

      • If you have any questions please ask:-)

      FixBotに聞いてみる

      コメントを追加

終わりに

To reassemble your device, follow these instructions in reverse order.

キャンセル: このガイドを終了できませんでした。

ある他の人がこのガイドを完成しました。

作成者

1人の作成者と共同作成されました。

HelloMacOS

メンバー登録日: 01/24/22

27,538 ポイント

11のガイドは作成済み

6件のガイドコメント

This guide is not for the 2019 MacBook Pro (A2159 EMC 3301) with 2 Thunderbolt ports.

dpikop - 返信 共有

Does anyone know of a guide for the 2019 MacBook Pro?

madkrupt - 返信 共有

If it doesn't turn on first try just keep troubleshooting. I had to disconnect the zip connector for the battery and reconnect it and then really smash (maybe not smash, but firmly press on every section of the case) down the case (I don't think it turns on otherwise). Otherwise great guide even though there are some things that are repeated and small steps that are omitted (unplugging and removing a bracket in step 18). Also would have been nice to see some pictures underneath the brackets. Felt like I was just poking around at times. Also, don't get the data alliance thing. You don't need it.

Noah Schatz - 返信 共有

Also be completely prepared for this repair to potentially do absolutely nothing. I had one USB C port go out so I tried this and it did nothing. Apparently there's a USBC controller issue on the logic board.

Noah Schatz - 返信 共有
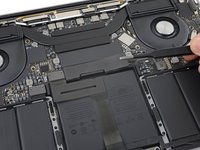
The first step seems so pointless as you should have the battery disconnected anyway.

Ultrabytes Repairs - 返信 共有

コメントを追加

統計データ:

過去 24時間: 9

過去 7 日: 41

過去 30 日: 180

今までの合計 11,350