この翻訳は、ソースガイドの最新の更新を反映していない可能性があります。 翻訳の更新に協力してください。 または ソースガイドを参照してください。
はじめに
ディスプレイアセンブリを交換する際はこのガイドをご利用ください。
必要な工具と部品
-
この手順で使用する道具:Magnetic Project Mat$19.95
-
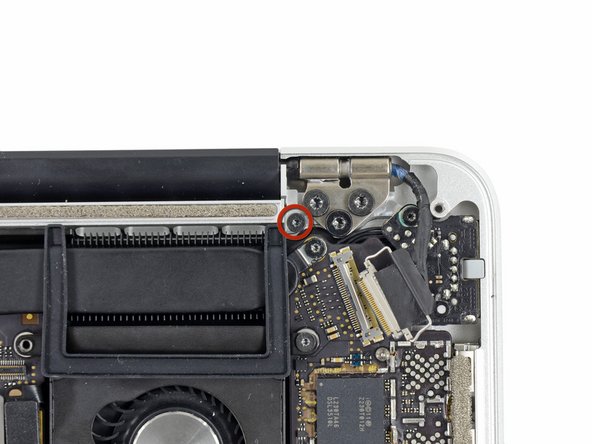
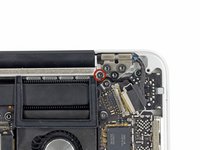
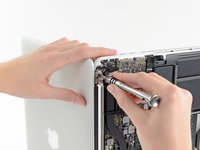
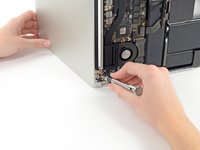
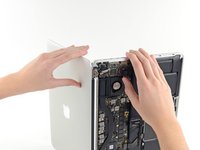
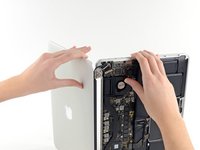
底ケースと上部ケースを留めている次のネジを10本外します。
-
2.3 mm P5ペンタロープネジー2本
-
3.0 mm P5 ペンタロープネジー8本
-
この作業中、外した各ネジの管理を安全に行ってください。再組み立ての際は、デバイスのダメージを防ぐため、正しい位置に装着してください。
-
-
-
-
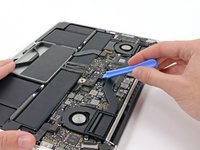
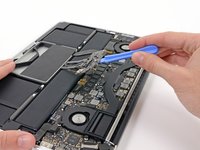
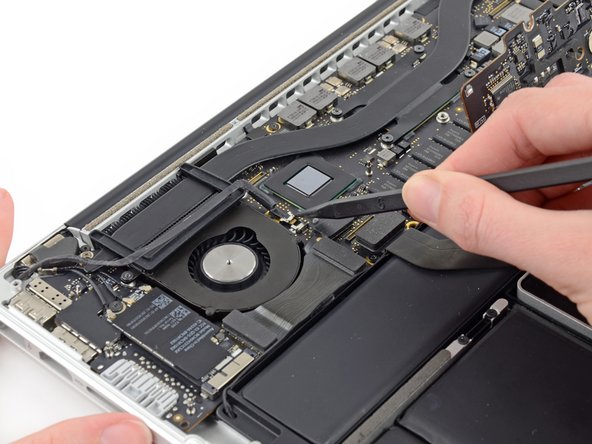
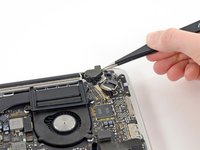
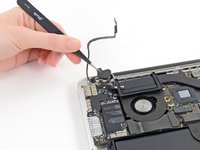
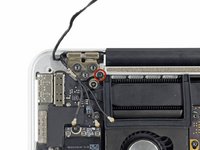
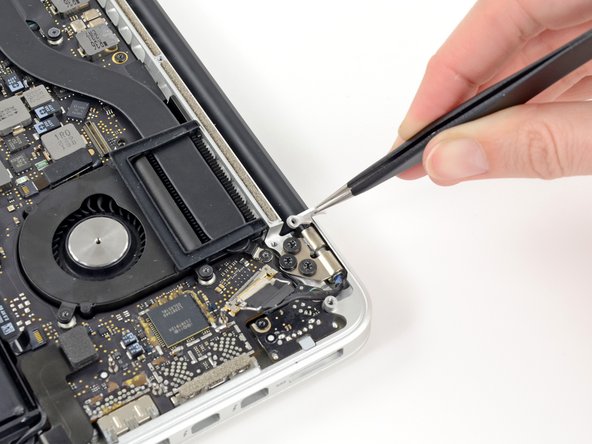
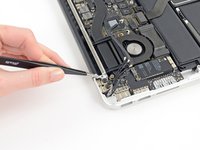
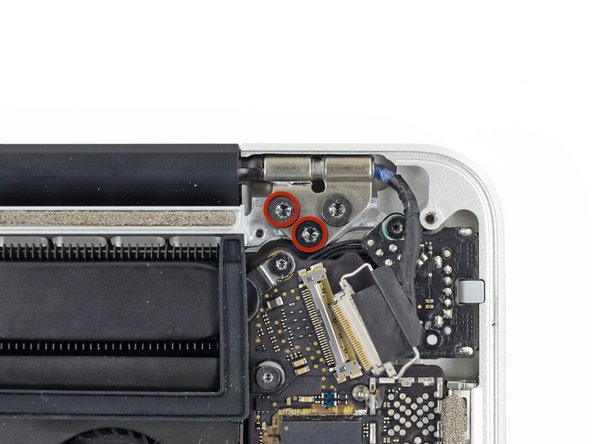
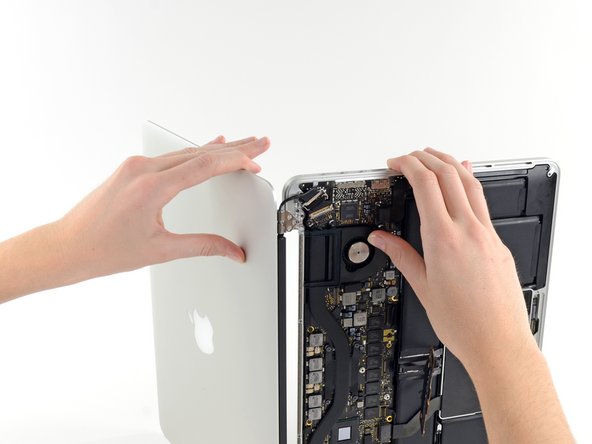
スパッジャーの平面側先端を使ってAirPortボードから3つのアンテナケーブルコネクターの接続を外します。
-
3つのケーブルは異なる長さで黒色のスリーブでコーティングされています。再組み立ての際は次の点にご注意ください。
-
長いスリーブのケーブルをポートに一番近いソケットに接続します。
-
短いスリーブのケーブルはネジの隣に接続します。
-
最後のケーブルにはスリーブはありません。ファンの隣にある最後のソケットに接続します。
-
-
-
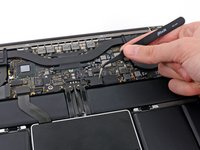
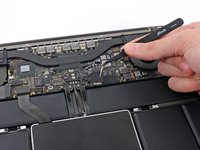
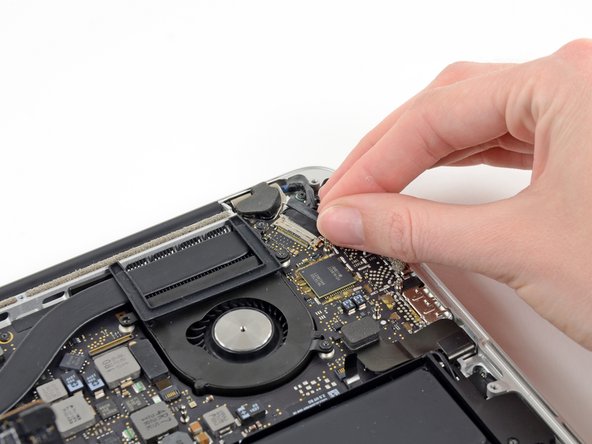
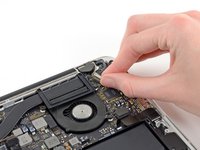
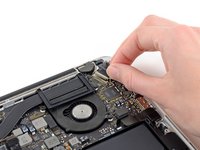
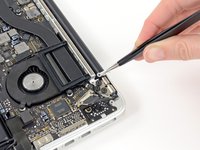
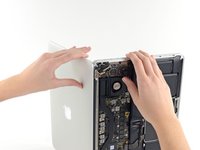
ディスプレイデータケーブルに装着されている黒色のプルタブを掴み、コンピューターのDC電源の方に向かって回転させます。
-
ディスプレイデータケーブルをまっすぐロジックボードのソケットから引っ張ります。
-


デバイスを再組み立てする際は、これらのインストラクションを逆の順番に従って作業を進めてください。
デバイスを再組み立てする際は、これらのインストラクションを逆の順番に従って作業を進めてください。
58 の人々がこのガイドを完成させました。
以下の翻訳者の皆さんにお礼を申し上げます:
90%

Midori Doiさんは世界中で修理する私たちを助けてくれています! あなたも貢献してみませんか?
翻訳を始める ›

9 件のコメント
The screen arrived 1 day ahead of schedule. The "A" level screen was in perfect condition. I replaced the display in about 1 hour using the above instructions, powered up and everything worked perfectly.
My screen was wobbling, after removing the display, and tightening the screws on the display (after removing the black case at the bottom of the display, if you slide it to the right you can pull the black case of the display) the issue was fixed.
Excellent guide, walked through the steps and in reverse without any problems except removal of the bottom case. The P5 pentalobe has been such a headache. I ended up using a drill to grind down the heads (which was scary and probably incorrect) after stripping them. Now I'm looking for a way to extract the shafts. However, rest of the process once in was a dream.
Excellent guide, helped me to fix my wobbling screen.