メインコンテンツにスキップ

このバージョンは誤った内容を含んでいる可能性があります。最新の承認済みスナップショットに切り替えてください。

アーカイブされたガイド
このガイドは将来的な使用のためにのみ保存されてます。ご自身の修理作業には更新バージョンをご利用ください。

必要な工具と部品

  1. , 下部ケース: 手順 1、 1の画像 1
    この手順で使用する道具:
    Magnetic Project Mat
    $19.95
    購入する
    • 底ケースと上部ケースを留めている次のネジを10本外します。

    • 2.3 mm P5ペンタロープネジー2本

    • 3.0 mm P5 ペンタロープネジー8本

    • この作業中、外した各ネジの管理を安全に行ってください。再組み立ての際は、デバイスのダメージを防ぐため、正しい位置に装着してください。

  2. : 手順 2、 1の画像 1
    • 上部ケースと底ケースの間に指を差し込みます。

    • 丁寧に底ケースを上部ケースから外していきます。

    • 完全に底ケースを取り出します。

  3. : 手順 3、 3の画像 1 : 手順 3、 3の画像 2 : 手順 3、 3の画像 3
    • 再組み立ての際、下部ケースの中央を軽く押して、2つのプラスチッククリップを再度取り付けます。

    • 下部ケースは中央で上部ケースと2つのプラスチック製クリップで接続されています。

  4. , バッテリーコネクター: 手順 4、 1の画像 1
    • バッテリーボードに装着されているプラスチックカバーを外します。

  5. : 手順 5、 1の画像 1
    • ロジックボードにバッテリーボードを取り付けている次のネジを外します。

    • 2.8 mm T6トルクスネジー2本

    • 7.0 mm T6トルクス肩付きネジー1本

  6. : 手順 6、 2の画像 1 : 手順 6、 2の画像 2
    • ピンセットを使って、バッテリーコネクターボードの右側底付近にある小さいプラスチックカバーを取り出します。

  7. : 手順 7、 1の画像 1
    • バッテリーコネクターをロジックボードアセンブリに留めている広幅の6.4 mm T6トルクスネジを外します。

  8. : 手順 8、 2の画像 1 : 手順 8、 2の画像 2
    • 丁寧にロジックボードからバッテリーコネクターボードを引き上げます。

    • 若干バッテリーケーブルを曲げてください。ボードがロジックボード上で引き上げられた状態にして、作業の邪魔にならないようにします。

    • ボードを完全に折り曲げたり、ケーブルにしわを入れないでください。バッテリーにダメージを与えてしまいます。

  9. , バッテリーボード: 手順 9、 2の画像 1 , バッテリーボード: 手順 9、 2の画像 2
    • ピンセットでインターポーザーを掴みます。

    • インターポーザーとはLSI間の接続を担う役割を持つインターフェイスの名称です。この修理ではバッテリーとロジックボードを接続しているボードを対象とします。

    • インターポーザーをロジックボードから引き上げて外します。

    • このボードを取り外す際は修理作業中、バッテリーが完全に外されているか確認してください。コンピューターがアクシデントにより再起動しないようにご注意ください。バッテリーを取り出しておく事もおすすめです。

  10. , I/Oボードデータケーブル: 手順 10、 2の画像 1 , I/Oボードデータケーブル: 手順 10、 2の画像 2
    • スパッジャーの平面側先端を使って、出入力ボードデータケーブルコネクターの右側を出入力ボード上のソケットから引き上げます。

    • 出入力ボードデータケーブルコネクターをソケットから引き上げる際は、コネクターのみに接触し、ソケットには触らないようにご注意ください。ソケットをこじ開けてしまうと出入力ボードに決定的なダメージを与えてしまいます。

  11. : 手順 11、 2の画像 1 : 手順 11、 2の画像 2
    • スパッジャーの平面側先端を使って、出入力ボードデータケーブルコネクターの左側底に差し込みます。

    • 丁寧にスパッジャーを曲げて、ロジックボード上のソケットから出入力ボードケーブルコネクターの接続を外します。

  12. : 手順 12、 1の画像 1
    • MacBook Proから出入力ボードデータケーブルを引き上げて外します。

  13. , 右側スピーカー: 手順 13、 3の画像 1 , 右側スピーカー: 手順 13、 3の画像 2 , 右側スピーカー: 手順 13、 3の画像 3
    • スパッジャーの平面側先端を使って、SSDケーブルコネクターをロジックボードのソケットから引き上げます。

    • SSDケーブルコネクターを作業の邪魔にならない位置に動かします。

  14. : 手順 14、 2の画像 1 : 手順 14、 2の画像 2
    • スパッジャーの鋭利側先端をスピーカーケーブルコネクターの右側下に差し込みます。

    • 右側スピーカーケーブルのコネクターをロジックボードのソケットから丁寧に引き上げます。

    • コネクターのみを引き上げるように注意してください。ソケット自体には接触しないでください。

  15. : 手順 15、 2の画像 1 : 手順 15、 2の画像 2
    • T5トルクスドライバーを使って、上部ケースに右側スピーカーを固定している次のネジを外します。

    • 黒 6.8 mmネジー1本

    • シルバー 6.3 mmネジー1本

    • 黒 4.89mmネジー1本

    • シルバーネジ(コーナー)はフォームパッドで覆われていることがあります。ピンセットを使って剥がしてから、ネジを外します。

  16. : 手順 16、 2の画像 1 : 手順 16、 2の画像 2
    • 上部ケースから右側のスピーカーを引き上げて取り出します。

    • 必要に応じて、上部ケース回路から右側のスピーカーケーブルを外します。

  17. , 左側スピーカー: 手順 17、 3の画像 1 , 左側スピーカー: 手順 17、 3の画像 2 , 左側スピーカー: 手順 17、 3の画像 3
    • スパッジャーの平面側先端を使って、ヘッドフォンジャックケーブルコネクターをロジックボード上のソケットからまっすぐ引き上げます。

    • 丁寧にヘッドフォンジャックケーブルをロジックボードに対して直角に曲げます。

    • ヘッドフォンジャックケーブルを直角に曲げる事で、ヘッドフォンジャックケーブルが邪魔にならずに左側のスピーカーケーブルコネクターの接続を外すことができます。

  18. : 手順 18、 2の画像 1 : 手順 18、 2の画像 2
    • スパッジャーの先端を左側スピーカーケーブルコネクターに差し込みます。

    • 左側のスピーカーケーブルコネクターをロジックボード上のソケットから引き上げます。

    • コネクターのみ引き上げるようにご注意ください。ソケット自体には接触しないでください。

  19. : 手順 19、 1の画像 1
    • T5トルクスドライバーを使って、左側スピーカーを上部ケースに固定している次のネジを外します。

    • 黒 6.8 mmネジー1本

    • シルバー 6.3 mmネジー1本

    • 黒 4.9mm ネジー1本

    • シルバーのネジ(コーナー)はフォームパッドで覆われている場合があります。その場合、ピンセットでパッドを剥がしてからネジを外します。

  20. : 手順 20、 2の画像 1 : 手順 20、 2の画像 2
    • 上部ケースから左側スピーカーを持ち上げて取り出します。

  21. , SSDアセンブリ: 手順 21、 3の画像 1 , SSDアセンブリ: 手順 21、 3の画像 2 , SSDアセンブリ: 手順 21、 3の画像 3
    • 親指を使ってSSDトレイ上のプラスチック製バネ付きバーを曲げ、デバイスの正面側にある2つのクリップを外します。

    • バネ付きバーを押さえながら、SSDアセンブリをスペースから外すように前向き押し上げます。

  22. : 手順 22、 1の画像 1
    • 上部ケースからSSD アセンブリを取り出します。

  23. この手順は未翻訳です。 翻訳を手伝う。

    : 手順 23、 2の画像 1 : 手順 23、 2の画像 2
    • Remove three 2.2 mm T5 Torx screws from each side of the battery (six screws total).

  24. この手順は未翻訳です。 翻訳を手伝う。

    : 手順 24、 1の画像 1
    • The liquid adhesive remover provided in your kit can affect the antireflective coating on your MacBook Pro's display.

    • To protect your display, place a sheet of aluminum foil between the display and keyboard and leave it there while you work.

  25. この手順は未翻訳です。 翻訳を手伝う。

    : 手順 25、 2の画像 1 : 手順 25、 2の画像 2
    • Now that your MacBook Pro is fully prepped, it's time to prep yourself.

    • iFixit adhesive remover contains acetone, a mild skin and eye irritant.

    • Wear eye protection when handling and applying the adhesive remover. (Eye protection is included in your kit.)

    • Do not wear contact lenses without eye protection.

    • Protective gloves are also included in your kit. If you are concerned about skin irritation, put your gloves on now.

  26. この手順は未翻訳です。 翻訳を手伝う。

    : 手順 26、 2の画像 1 : 手順 26、 2の画像 2
    • Open your container of adhesive remover.

    • Fill the syringe included in your kit with a small amount (approximately 1-2 milliliters) of adhesive remover.

    • It's best to fill the syringe with no more than about 1-2 milliliters of adhesive remover at a time, so as to avoid accidentally applying too much.

    • Refill your syringe as needed throughout the rest of this procedure.

  27. この手順は未翻訳です。 翻訳を手伝う。

    : 手順 27、 1の画像 1
    • Apply a small amount of adhesive remover (approximately 1 ml) evenly under the edge of the leftmost battery cell.

    • Wait 2-3 minutes for the liquid adhesive remover to penetrate underneath the battery cell before you proceed to the next step.

  28. この手順は未翻訳です。 翻訳を手伝う。

    : 手順 28、 3の画像 1 : 手順 28、 3の画像 2 : 手順 28、 3の画像 3
    この手順で使用する道具:
    Plastic Cards
    $2.99
    購入する
    • Insert the flat edge of a spudger or plastic card underneath the leftmost battery cell.

    • Run your tool along the bottom perimeter of the battery cell and lift to begin separating the adhesive.

  29. この手順は未翻訳です。 翻訳を手伝う。

    : 手順 29、 3の画像 1 : 手順 29、 3の画像 2 : 手順 29、 3の画像 3
    • Insert the spudger along the left-hand side of the leftmost battery cell.

    • Run the spudger up along the left side of the leftmost battery cell.

    • Slightly pry the leftmost battery cell to release it from the adhesive.

  30. この手順は未翻訳です。 翻訳を手伝う。

    : 手順 30、 3の画像 1 : 手順 30、 3の画像 2 : 手順 30、 3の画像 3
    • Repeat the above steps to separate the adjacent battery cell from its adhesive:

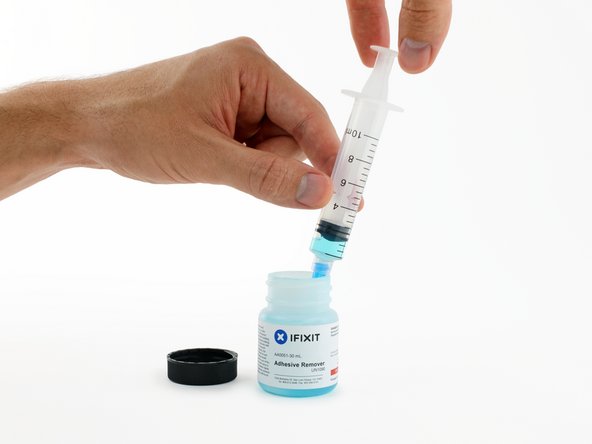
    • Apply a small amount (about 1 ml) of liquid adhesive remover under the battery cell.

    • Wait 2-3 minutes for the adhesive remover to penetrate and soften the adhesive.

    • Carefully wedge a spudger or plastic card inwards, being careful to not damage the battery, and separate the battery cell from the adhesive securing it to your MacBook Pro.

  31. この手順は未翻訳です。 翻訳を手伝う。

    : 手順 31、 3の画像 1 : 手順 31、 3の画像 2 : 手順 31、 3の画像 3
    • Insert the flat end of a spudger underneath the larger leftmost battery cell.

    • Carefully wedge the spudger inwards, being careful to not damage the battery cells.

    • Pry the larger leftmost battery cell up off the upper case.

  32. この手順は未翻訳です。 翻訳を手伝う。

    : 手順 32、 3の画像 1 : 手順 32、 3の画像 2 : 手順 32、 3の画像 3
    • Grasp the battery cells and gently move (but do not remove) them from their recess in the upper case.

    • Leave the battery cells resting on top of the upper case as shown in the third picture.

  33. この手順は未翻訳です。 翻訳を手伝う。

    : 手順 33、 3の画像 1 : 手順 33、 3の画像 2 : 手順 33、 3の画像 3
    • Switch sides and repeat the above procedure for the two battery cells on the right-hand side of the MacBook Pro.

    • Remember to add about 1 ml of liquid adhesive remover under each battery cell, and wait 2-3 minutes for it to penetrate before prying up the cell.

    • Be careful not to puncture or otherwise damage the battery cells.

  34. この手順は未翻訳です。 翻訳を手伝う。

    : 手順 34、 3の画像 1 : 手順 34、 3の画像 2 : 手順 34、 3の画像 3
    • Lift the battery as a whole up out of the upper case, and remove the battery.

    • Before installing a new battery, remove all the old adhesive from the MacBook Pro's case.

    • With a little luck, you can slowly pull out each strip of adhesive with your fingers.

    • Otherwise, soak each section of adhesive with a bit of adhesive remover for 2-3 minutes, and then scrape it out with an opening pick or one of the other tools in your kit. This can take quite a bit of work, so be patient.

    • Mop up any remaining adhesive remover and give your MacBook Pro a few minutes to air dry.

    • The replacement battery included in your iFixit kit comes with adhesive pre-installed. Test the battery's fit and alignment carefully before peeling off the film covering the adhesive, and then press each cell firmly into place. If any additional films/liners are present that weren't on your original battery, remove them now.

    • Calibrate your new battery before using it: allow it to drain overnight, then charge it to 100% and drain it again until your MacBook Pro shuts down automatically. Charge it again and use it normally.

    • If you notice any unusual behavior or problems after installing your new battery, you may need to reset your MacBook Pro's SMC.

ゴール

2 の人々がこのガイドを完成させました。

作成者

2人の作成者と共同で作成されました。

Walter Galan

694,785 ポイント

1,203のガイドは作成済み

コメント 1 件

Step 14 and Step 18 (disconnecting the speakers) are not really useful. But there should be a reason I didn’t catch for these steps. Thank you by the way, it was really clear and it worked perfectly!

Aslam CADER - 返信

コメントを追加

統計データ:

過去 24時間: 3

過去 7 日: 13

過去 30 日: 16

今までの合計 643