はじめに
トラックパッドを交換するにはこのガイドをご利用ください。
iFixitの接着剤リムーバーは可燃性が高いです。このリムーバーを使って作業をする際は、通気性のよい場所で行ってください。作業中、付近で喫煙したり、火器のある場所で行わないでください。
ダメージのリスクを軽減するため、この作業を始めるにバッテリーを完全に放電してください。充電したリチウムポリマーバッテリーに穴を開けてしまうと、危険かつ手に負えない火事を引き起こしかねます。バッテリーが膨張している場合は、特に注意を払って適切な方法で処理してください。
必要な工具と部品
-
-
底ケースと上部ケースを留めている次のネジを10本外します。
-
2.3 mm P5ペンタロープネジー2本
-
3.0 mm P5 ペンタロープネジー8本
-
この作業中、外した各ネジの管理を安全に行ってください。再組み立ての際は、デバイスのダメージを防ぐため、正しい位置に装着してください。
-
-
-
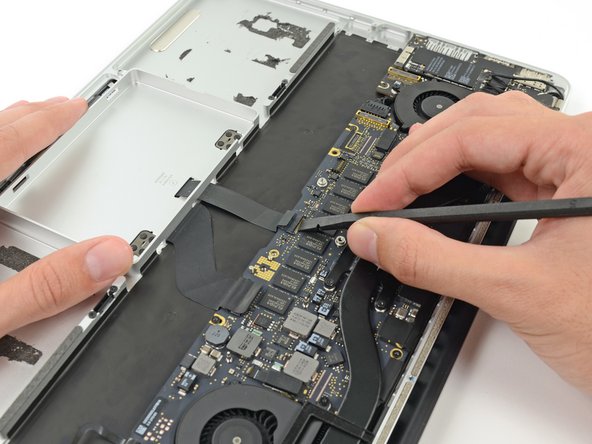
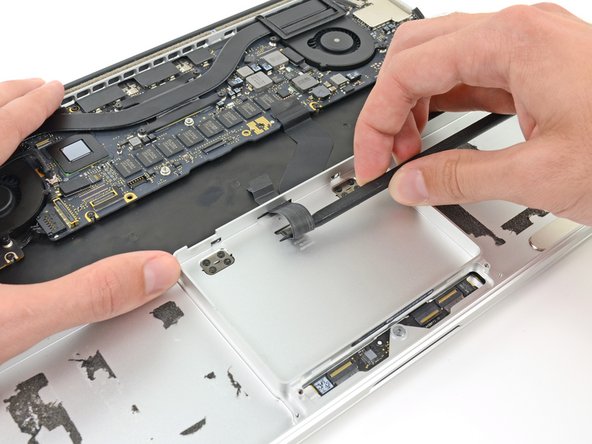
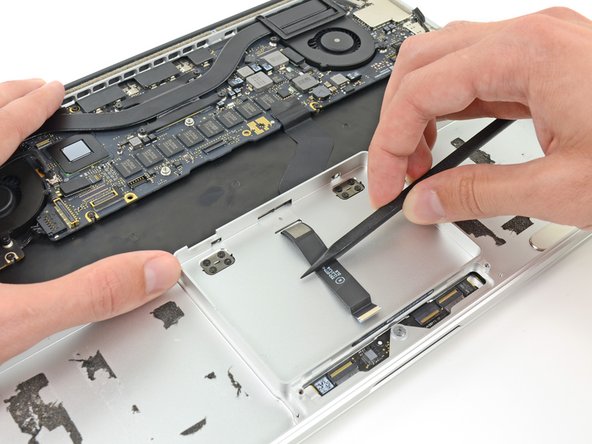
スパッジャーの平面側先端を使って、SSDケーブルコネクターをロジックボードのソケットから引き上げます。
-
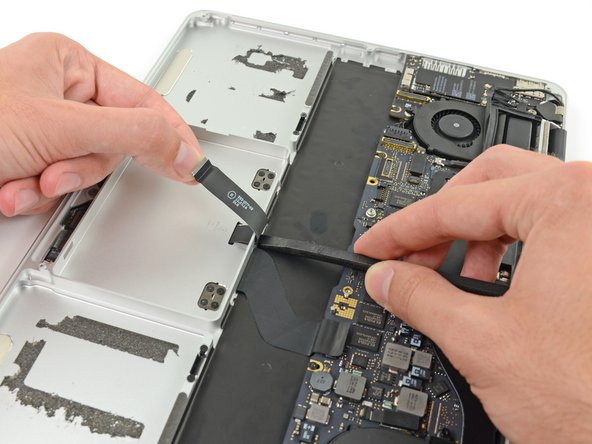
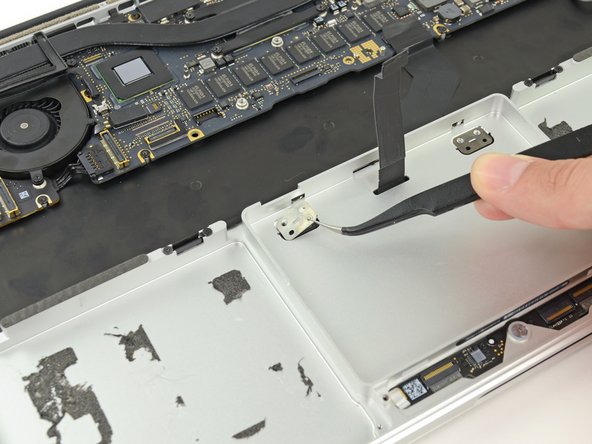
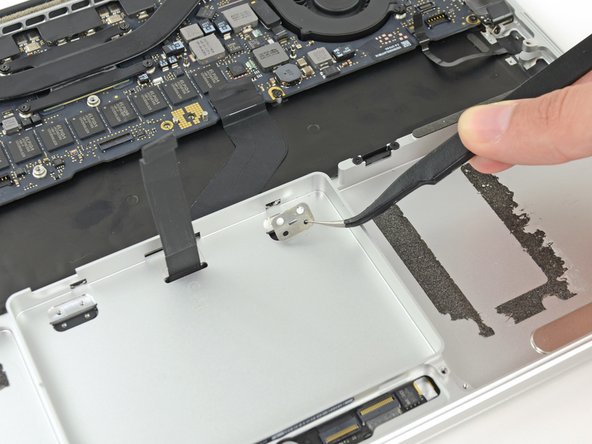
SSDケーブルコネクターを作業の邪魔にならない位置に動かします。
-
-
-
-
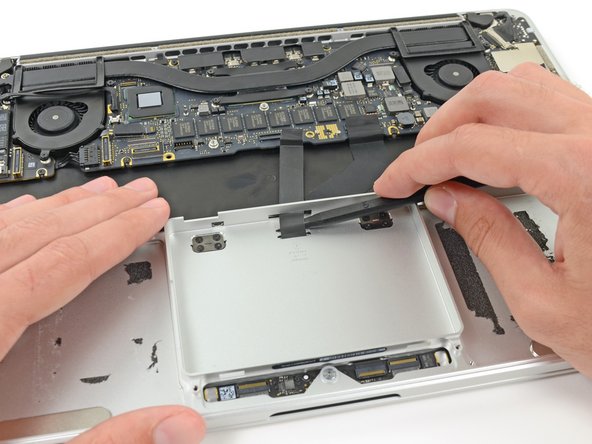
親指を使ってSSDトレイ上のプラスチック製バネ付きバーを曲げ、デバイスの正面側にある2つのクリップを外します。
-
バネ付きバーを押さえながら、SSDアセンブリをスペースから外すように前向き押し上げます。
-
-
-
バッテリーを上部ケースから完全に取り出します。
-
運が良ければ、ゆっくりと指で各接着ストリップを剥がせます。
-
そうでない場合は、各バッテリーセルの下に接着剤リムーバーを少量ずつ付けます。2−3分間待った後、開口ピックやお持ちのツールで接着剤をこすり落とします。この作業には少し忍耐が必要です。
-
残りのバッテリーセルについても接着剤リムーバーを付けて同じ作業を繰り返します。それからMacBook Proを数分間、空気乾燥させます。
-
この修理ガイドを完成したら、新しく装着したバッテリーのキャリブレーションを行なってください。100%になるまで充電します。充電後も最低2時間はプラグを繋げたままにします。それからプラグを外して、通常通り使用しながら、自然に放電させます。バッテリー残量小のサインが表示されたら、これまでの作業を保存して、スリープ状態になるまで放置してください。スリープ状態に入ったら、少なくとも5時間置きます。それから一気に100%まで充電します。
-


デバイスを再組み立てする際は、これらのインストラクションを逆の順番に従って作業を進めてください。
デバイスを再組み立てする際は、これらのインストラクションを逆の順番に従って作業を進めてください。
13 の人々がこのガイドを完成させました。
以下の翻訳者の皆さんにお礼を申し上げます:
100%

Midori Doiさんは世界中で修理する私たちを助けてくれています! あなたも貢献してみませんか?
翻訳を始める ›


12 件のコメント
Hi!
I have a Macbook Pro Retina 15-Inch Early 2013. Is it a similar procedure for this laptop with a larger screen (15" versus yours 13")?
We've got guides for the 15" Early 2013, unfortunately, removing the battery in the 15" is significantly harder, you can follow the upper case guide to get most of the way and either replace the whole upper case (and get a new battery included), or use this guide to try to get the rest of the way. Best of luck!
I just wanted to say this worked for me, thank you for the walkthrough! My trackpad just suddenly died one day out of the blue. I thought it might be a lose cable, but ordered a replacement just in case. No loose cables, simple swap out did the trick. This walkthrough is very good. Only thing I'd warn the feint of heart is the removal of the batteries can be intense because they are glued in. You really need the right tool to work it free. I think the battery removal took at least 20 minutes alone!
Anyone, thanks again for your help!
Excellent write up. Three suggestions which i uncovered when i followed this procedure:
Step 5 - The silver shouldered screw was a T6 Torx, not a T7. On this basis, I didn't need a T7 Torx screwdriver for this procedure.
Step 15 & 19 - To remove the corner screws (the heads of which aren't immediately visible), you need to carefully remove the covering mesh with tweezers
Step 44 - Reposition of trackpad. I found that when putting the trackpad back in place during reassembly, it was tricky to get it in exactly the right position (perfectly centralised). I found that taking four small pieces of paper and folding them in half helped. I wedged a piece of folded paper in between the four sides of the trackpad and then tightened the screws. Once the screws are tightened, you can simply remove the paper.