はじめに
上部ケースを交換するにはこのガイドをご利用ください。この手順では接着剤リムーバーを使用してバッテリーを取り外します。一度取り外したバッテリーは、再利用しないでください。安全上の問題が発生する可能性があります。新しいバッテリーと交換してください。
iFixitの接着剤リムーバーは可燃性です。 この作業は換気の良い場所で行ってください。 また作業中は、喫煙を控え、火気のある所で作業しないでください。
ダメージを軽減するために、MacBookの電源を入れて、バッテリーを完全に放電してから作業を進めてください。バッテリーが膨張している場合は、デバイスを温めないでください。膨張したバッテリーは大変危険です。
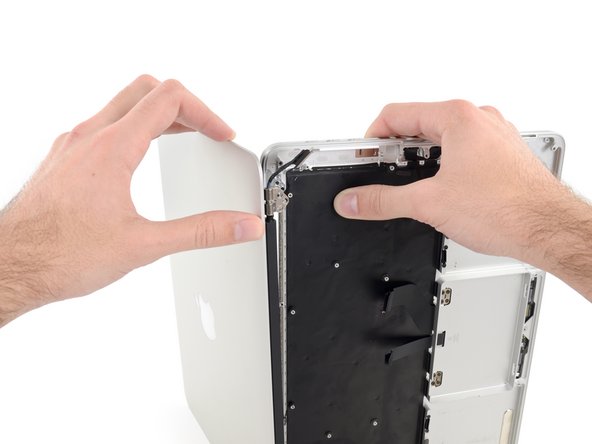
上部ケースアセンブリの交換には、トラックパッドとバッテリーも含まれます。このガイドでは、手順18-44となります。
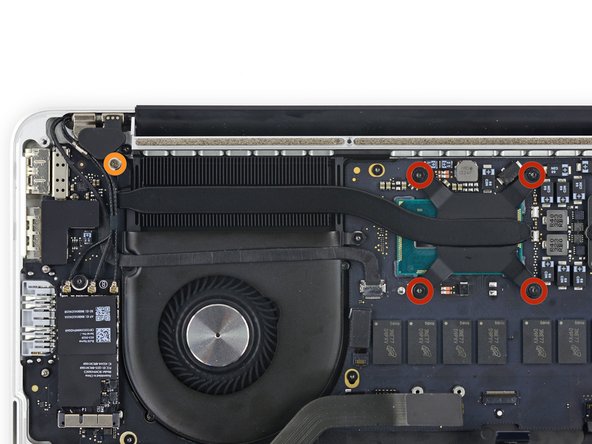
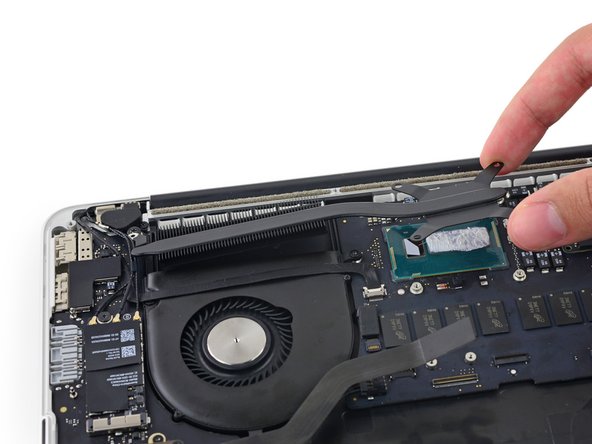
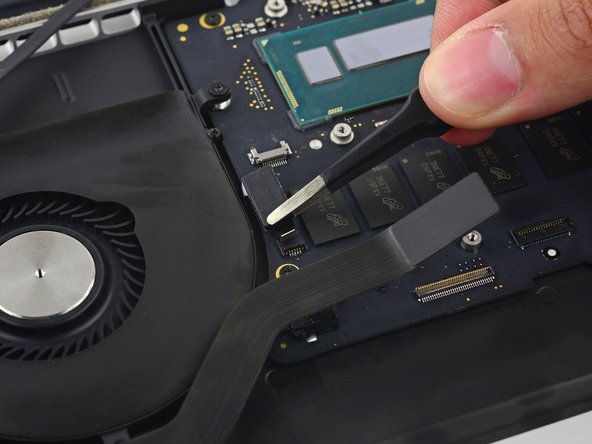
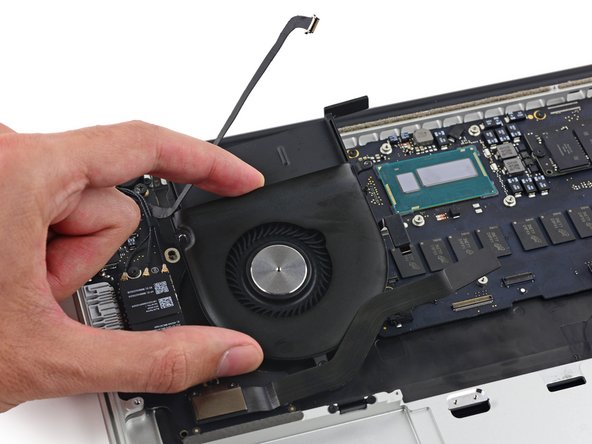
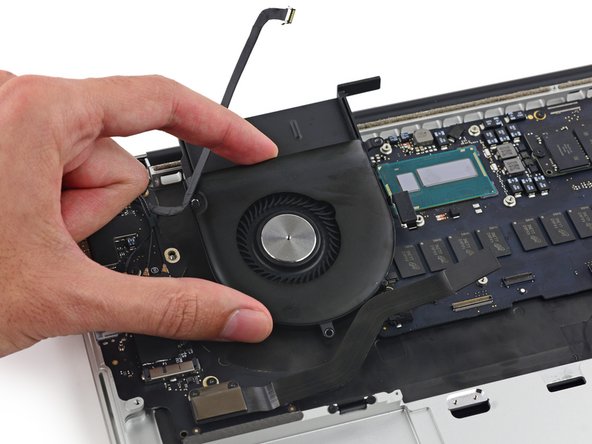
このガイドではヒートシンクの取り出しも必要です。ヒートシンクを再インストールする前に、 放熱グリスの塗布ガイドを参照してください。
必要な工具と部品
-
-
上部ケースと底ケースを留めている次の10本のネジを外します。
-
2.3 mm P5ペンタローブネジ−2本
-
3.0 mm P5ペンタローブネジー8本
-
この修理では、各ネジの装着位置をメモ書きして管理してください。再組み立ての際は、デバイスにダメージを与えないよう、正しい場所に装着してください。
-
-
-
鍋を十分な量のお湯で満たして、iOpener を完全に沈めます。
-
お湯を沸かして熱くなったら火を止めます。
-
iOpenerを熱湯の中に約2−3分間沈めます。iOpener全体が完全に浸かっているか確認してください。
-
トングなどを浸かって、温まったiOpenerをお湯から取り出します。
-
タオルでiOpener全体を拭き取ります。
-
iOpenerの準備は整いました。iOpenerを再度温める必要がある場合は、お湯を沸騰させて、火を止めてからiOpenerを2-3分間浸してください。
-
-
-
-
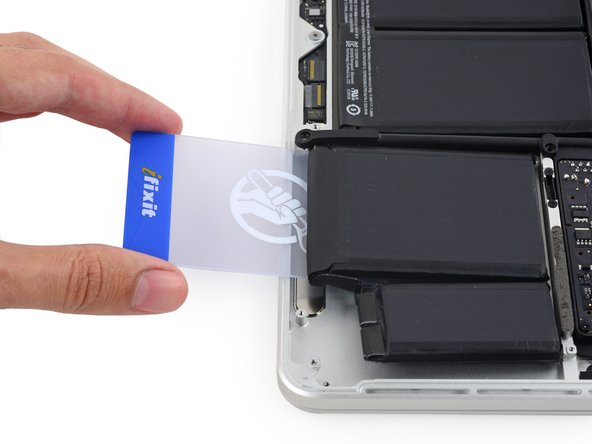
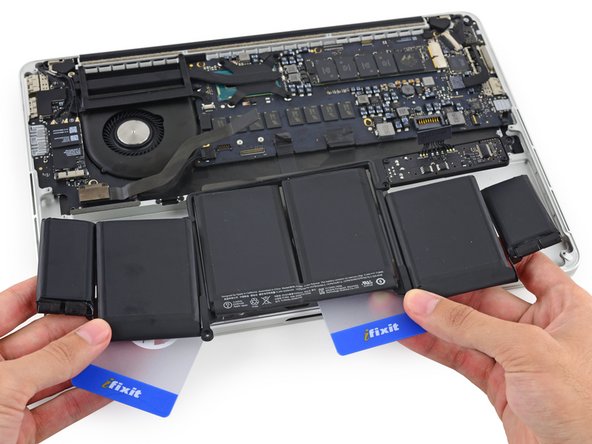
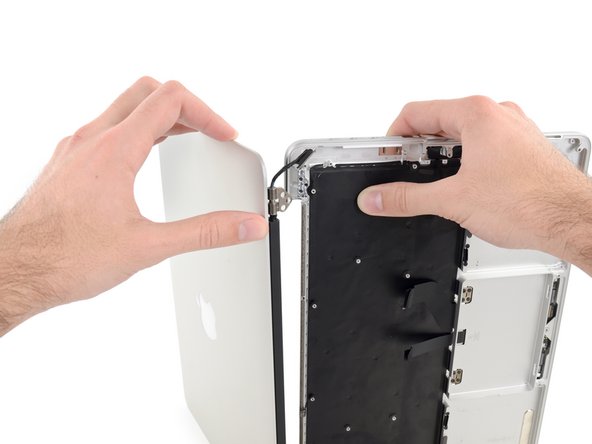
バッテリーを上部ケースから取り出します。
-
運が良ければ、ゆっくりと指で各接着ストリップを剥がせます。
-
そうでない場合は、各バッテリーセルの下に接着剤リムーバーを少量ずつ付けます。2−3分間待った後、開口ピックやお持ちのツールで接着剤をこすり落とします。この作業には少し忍耐が必要です。
-
残りのバッテリーセルについても接着剤リムーバーを付けて同じ作業を繰り返します。それからMacBook Proを数分間、空気乾燥させます。
-
この修理ガイドを完成したら、新しく装着したバッテリーのカリブレーションを行なってください。まず100%まで充電したら、少なくとも2時間はプラグにつなげたままにします。それからプラグを抜いて、そして通常通りMacBook Proを使用してください。バッテリー残量が少ないサインが出るまで放電させます。それから作業を保存し、バッテリーが完全に放電され、スリープ状態になるまで放置してください。スリープ状態になってから5時間待ち、一気に100%まで充電してください。
-
-
-
黒色のプラスチックタブを掴んで、ディスプレイケーブルのコネクタを裏返して、基板状のソケットからまっすぐ引き抜きます。
-
ロジックボードと平行に、ケーブルの方向に引っ張ります。 引き上げないでください。
-


デバイスを再組み立てする際は、これらのインストラクションを逆の順番に従って作業を進めてください。
デバイスを再組み立てする際は、これらのインストラクションを逆の順番に従って作業を進めてください。
20 の人々がこのガイドを完成させました。
以下の翻訳者の皆さんにお礼を申し上げます:
100%

Midori Doiさんは世界中で修理する私たちを助けてくれています! あなたも貢献してみませんか?
翻訳を始める ›


7 件のコメント
hey there! steps seem very useful, really hope that this will work. but what am i going to do after the replacement? now i “only“ know how to get to the upper case. is there any instruction for putting the mac book back together after replacing the upper case? would be thankful for that advice!
I have just done this repair now and it all went great with the help of this article. I purchased a second hand top case which had a battery, trackpad, keyboard, speakers and microphones still in tact and in good condition. This allows you to skip nearly 50% of the steps in this tutorial. Highly recommended to try and find something similar yourself. Slow and steady is definitely the way to do this repair and if you do that and use the right tools you will find the repair to be easy and painless. Best of luck to all.
Took a tad over 2 hours to do, including the screen. Have to remember to reset the SMC controller (Once repaired press Control, option, power button for 10 sec after shut down. Then hit power button again). I watched the cpu temp with Fanny to make sure the new thermal paste was applied correctly and used rubbing alcohol to do the cleaning.
Kudos on a great guide. Did what Mr. Davies did, saves a lot of heartache. Battery removals are not enjoyable one bit. Looked for a top case sub $60 with a low battery cycle count (250 and below),
Managed to get this done in about 2.5 hours, but I was able to skip some steps. Goal was replacing upper case assembly to get a working keyboard. I managed to replace the logic board without removing the heatsink, which was the only step I really wanted to avoid due to manual application of thermal paste as opposed to the dot method. I also managed to find an upper case replacement with only about 100 cycles on it and a working trackpad, so not having to replace the batteries or trackpad saved time and effort as well. Need to check temps just in case— and still need to test the I/O ports to be sure. But overall, great guide- very comprehensive. Just use the sections you need. FYI - if you’re planning on replacing the keyboard for this machine, plan on replacing the whole Upper Case Assembly. My understanding from others giving advice are that keys are riveted on and very difficult to replace. You’re better off swapping out the whole upper case.
Hi
I purchased by mistake a 2015 upper case for my 2014 Macbook Pro (both A1502)
Having dismantled the MBP I noticed that the trackpad is different therefore I ordered the proper model and ribbon cable
Will this installed (2015) upper case be compatible with my MBP 2014 ?
thanks
yann