はじめに
このガイドを参照して、MacBook Air 13インチ Mid 2011 上部ケースの交換をします。
必要な工具と部品
-
この手順で使用する道具:P5 Pentalobe Screwdriver Retina MacBook Pro and Air$5.99
-
P5ペンタローブドライバーを使って、下部ケースをはずしてください。ネジは次の長さに分かれます。
-
9mm ネジー 2本
-
2.6mm ネジー 8本
-
-
-
-
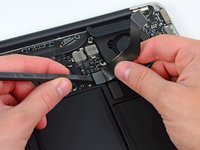
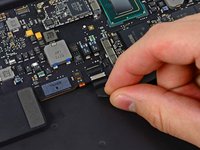
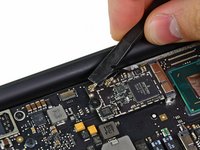
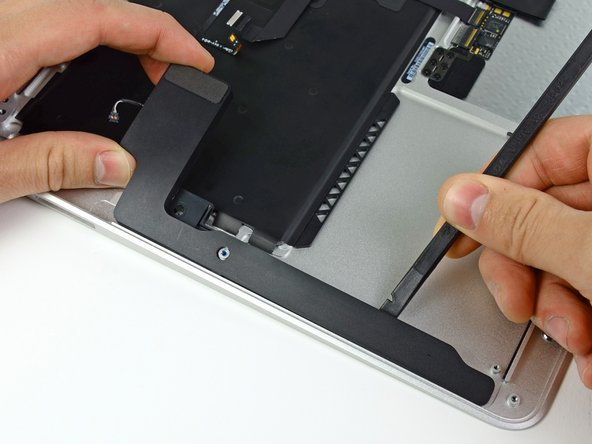
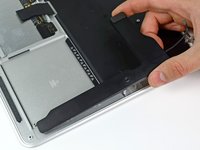
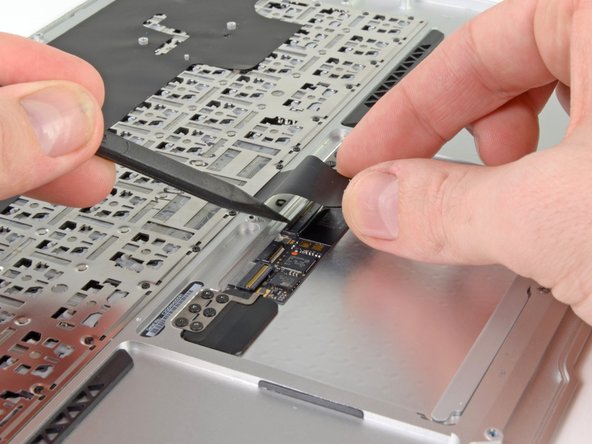
スパッジャーもしくは指先を使って、トラックパッドのリボンケーブルZIFソケット上の固定フラップを持ち上げます。
-
ソケット自体ではなく、ヒンジ状の固定フラップを持ち上げてください。
-
-
-
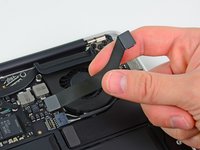
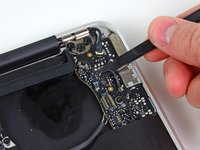
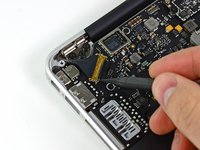
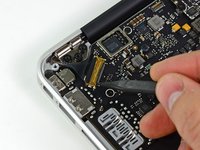
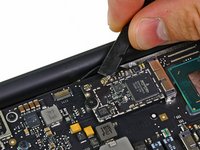
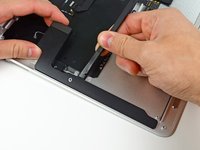
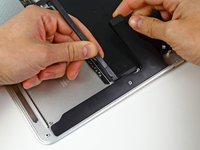
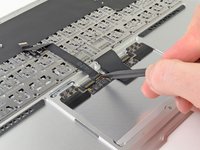
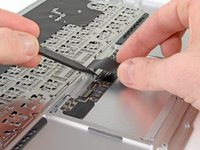
スパッジャーの先端や指の爪を使って、トラックパッドリボンケーブルのZIFソケット上の固定フラップを跳ね上げます。
-
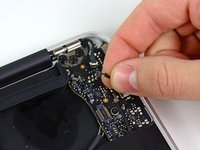
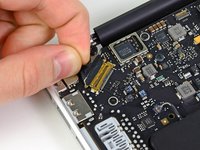
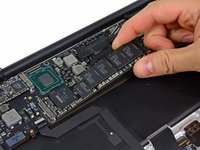
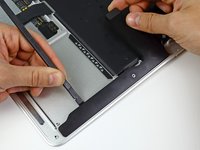
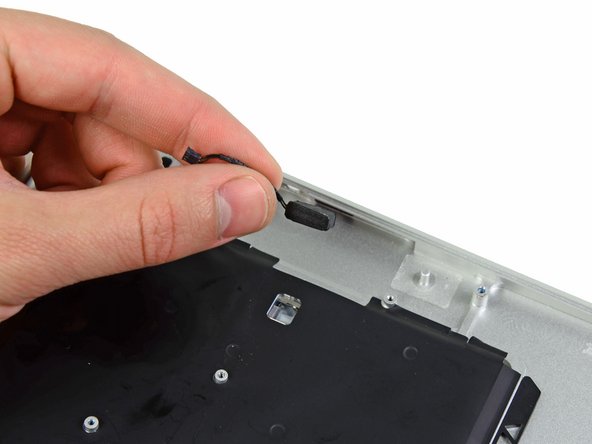
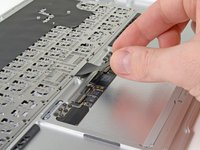
Airの後端に向けて、ソケットからトラックパッドのリボンケーブルをまっすぐ引き抜きます。
-


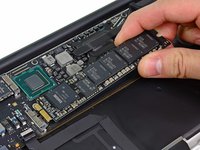


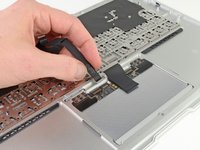


デバイスを再組立する際は、これらのインストラクションを逆の順番に従って作業を進めてください。
81 の人々がこのガイドを完成させました。
以下の翻訳者の皆さんにお礼を申し上げます:
100%

これらの翻訳者の方々は世界を修理する私たちのサポートをしてくれています。 あなたも貢献してみませんか?
翻訳を始める ›

16件のガイドコメント
question for anyone...just did step 14, and accidentally pried the whole microphone cable box out of the board. Any way to put that back in or did i just lose microphone capability?
You can resolder it back on or carefully use a hot-air rework station and Kapton tape to protect the surrounding area.
This guide is truly SPOT-on!!
I went to my local Fry's Electronics and purchased a Pro's Kit branded "Consumer Electronic Equipment Repair Kit" that had all the necessary bits and tools needed for US$35.
No need to spend $250 for a new upper case, I figured: what did I have to loose?
I found a brand new keyboard $45.95 (included priority shipping) from MCCComputers.com
Steps: Remove keyboard:: CAREFULLY, remove all #000 Philips head screws around the outside edge of the keyboard on the logic board side of top case. Then, i started at one end, four keys at a time and started rocking around the four corners and pressing firmly in sections (from the side where you usually type on the keys, inward) until the rivets started popping out. MAKE SURE YOU ARE DOING THIS IN AN ENVIRONMENT THAT IS CLEAN and SMOOTH SURFACES. They go everywhere!
Reassembly:use 3M #77 adhesive spray on the aluminum casing to reattach and make up for lost rivets. Snap in rivets with flat end of T-15 bit and screw-in edge screws.
Step 9
On reassembly with a new upper case I spent a long time trying to replace the red-circled screw to hold the fan. After a while I figured out that the new case I purchased from IFIXIT had a small screw already inserted in the socket. Once I removed this extra part everything went smoothly.
THAT’S why I ended up with an extra screw!
I agree, this guide is great. Was able to skip the last few steps, as my replacement upper case was already assembled.