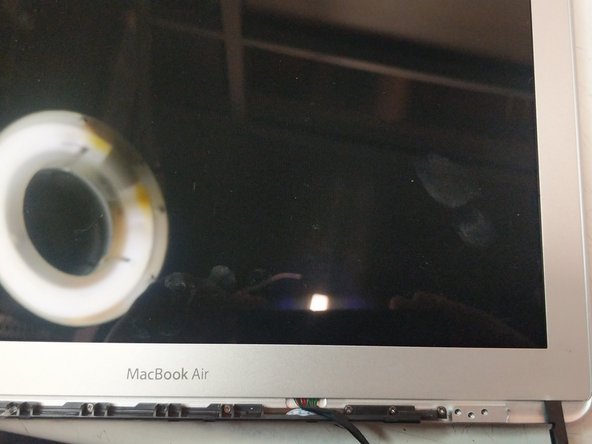
メインコンテンツにスキップ

MacBook Air 13" Bluetooth/Wifi Antenae /Webcam /Display Cable/Hinge Replacement

必要な工具と部品

  1. MacBook Air 13" Bluetooth/Wifi Antenae /Webcam /Display Cable/Hinge Replacement, Chin and Display Connector Removal: 手順 1、 1の画像 1
    • Slide the plastic chin to the right and off the display.

  2. MacBook Air 13" Bluetooth/Wifi Antenae /Webcam /Display Cable/Hinge Replacement: 手順 2、 2の画像 1 MacBook Air 13" Bluetooth/Wifi Antenae /Webcam /Display Cable/Hinge Replacement: 手順 2、 2の画像 2
    • Remove the three T8 torx screws from the bracket

    • This screw hole pattern is different for older MacBook Airs

  3. MacBook Air 13" Bluetooth/Wifi Antenae /Webcam /Display Cable/Hinge Replacement, Heat and Remove Bezel: 手順 3、 3の画像 1 MacBook Air 13" Bluetooth/Wifi Antenae /Webcam /Display Cable/Hinge Replacement, Heat and Remove Bezel: 手順 3、 3の画像 2 MacBook Air 13" Bluetooth/Wifi Antenae /Webcam /Display Cable/Hinge Replacement, Heat and Remove Bezel: 手順 3、 3の画像 3
    • Remove the gasket that runs along the perimeter of the display. You can use a spudger to pry up the bezel and tweezers to pull it out.

    • Be careful to not tear your gasket

    • Apply Heat to loosen the adhesive, in a pinch you do not necessarily need it; but it always helps with adhesives.

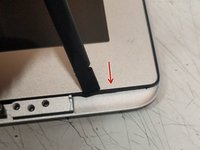
    • Begin Prying from the right corner as pictured.

    • The Webcam and Antennae are under the left side of the bezel.

  4. MacBook Air 13" Bluetooth/Wifi Antenae /Webcam /Display Cable/Hinge Replacement, Replacement of your Right Hinge: 手順 4、 2の画像 1 MacBook Air 13" Bluetooth/Wifi Antenae /Webcam /Display Cable/Hinge Replacement, Replacement of your Right Hinge: 手順 4、 2の画像 2
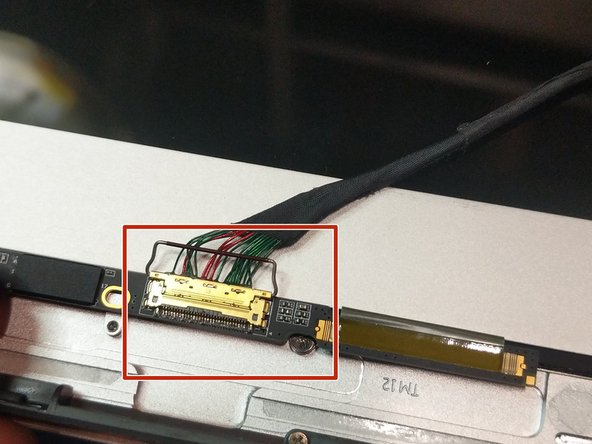
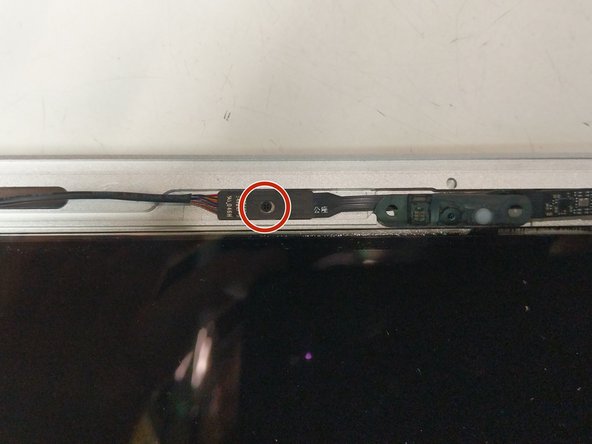
    • Remove the two PH000 screws holding in the LCD board in

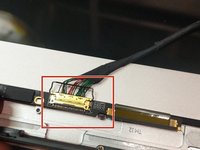
    • To replace the display connection you can open the retaining latch and disconnect the cable.

    • If you're replacing the Webcam/ Wifi Antennae Continue on to the next step.

    • WARNING: There is a ribbon cable attached to the center of the board. be very careful not to damage this

  5. MacBook Air 13" Bluetooth/Wifi Antenae /Webcam /Display Cable/Hinge Replacement: 手順 6、 3の画像 1 MacBook Air 13" Bluetooth/Wifi Antenae /Webcam /Display Cable/Hinge Replacement: 手順 6、 3の画像 2 MacBook Air 13" Bluetooth/Wifi Antenae /Webcam /Display Cable/Hinge Replacement: 手順 6、 3の画像 3
    • If you're just replacing your Webcam skip this step

    • Remove the three T8 Torx screws

    • Remove the PH000 screw

    • Flip the board over and disconnect it.

    • The Wifi / Bluetooth / Webcam cable can now be removed and replaced.

  6. MacBook Air 13" Bluetooth/Wifi Antenae /Webcam /Display Cable/Hinge Replacement: 手順 7、 1の画像 1
    • Disconnect your webcam connection,

    • The webcam is held in by the bezel and a small bit of adhesive on the backside of the webcam

終わりに

To reassemble your device, follow these instructions in reverse order. I recommend cleaning it with alcohol and using VHB tape for glueing the bezel back on.

2 の人々がこのガイドを完成させました。

作成者

1人の作成者と共同作成されました。

Emmett Normand

メンバー登録日: 08/09/17

555 ポイント

3のガイドは作成済み

チーム

iFixit iFixit人のメンバー

Staff

135 メンバー

17,198のガイドは作成済み

コメント 1 件

Buen paso a paso, pero es de tener en cuenta 2 consideraciones. 1. al momento de la apertura, ¿donde se consigue una cama calefactora tran grande?. 2. al momento del sellado, ¿se debe usar un adesivo especial?

diego Pinzon - 返信

コメントを追加

統計データ:

過去 24時間: 3

過去 7 日: 16

過去 30 日: 65

今までの合計 2,412