はじめに
このガイドを参照して、ディスプレイアセンブリを交換しましょう。
必要な工具と部品
-
-
スパッジャーの平面側先端を利用し、バッテリーコネクターを持ち上げてロジックボードのソケットから外します。
-
ロジックボードから外したコネクターのケーブルをわずかに曲げて、コネクター部分が誤ってソケットに接触しないようにします。
-
-
-
スパッジャーの先端を使って、ファンケーブルのZIFソケット上の固定フラップを注意深く跳ね上げます。
-
-
-
スパッジャーの平面側先端を使って両側のアンテナコネクタをAirPort/Bluetoothカード上のソケットから引き抜き、作業の邪魔にならないように動かします。
Be very careful. When I did this - just as in the photo - I prised the top of the antenna connector off from the bottom of it, leaving me with only one functioning antenna.
You can usually pull the airport card out of the socket and let it dangle by the attached wires. They can be frustrating to re-attach.
maccentric - 返信
This seems like great advice! Any more details would be greatly appreciated
Just walk it out slowly. The cables don’t have a lot of slack, so if you pull too hard on the card it may yank the cables out of their sockets, or worse, when it comes free.
When I did this, one antenna connection broke off and the other will not reattach for love nor money. I have not idea how to fix it. I’d try a blob of solder if my fingers were the size of matchsticks! Haha
-
-
-
-
ロジックボード上のソケットから電源ケーブルを引き抜いて、I/Oボードの接続を外します。
Did it wrong to begin with by taking the complete socket away and not just the insert. Now I can’t get the socket back on the logic board contacts. Any ideas?
I have the same issue! Did you find a solution?
-
-
-
スパッジャーの先端を使って、ロジックボード上の切り欠きからアンテナケーブルを巻き戻して外します。
They're not clicking back in when I reassemble it
-
-
-
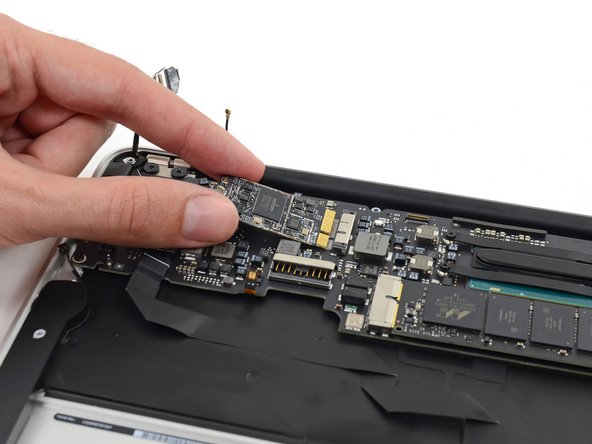
ヒートシンク端をロジックボードアセンブリを慎重に持ち上げて、上部ケースのポート側から引き抜いて、Air本体より取り出します。
There's a screw that's connecting the logic board to the casing that has to be removed before sliding the logic board out. I found that out the hard way.
Only 3 were in mine, where did you find another screw?
When replacing the logic board, make sure you haven’t trapped an antenna cable underneath. Easy to sort it out now, much more annoying if you only discover it after screwing everything down first!
-
-
-
スパッジャーの先端を使って、コネクタの近くにあるピーカーケーブルの下に差し込んでこじ開けて、ソケットからまっすぐ持ち上げます。
-
ロジックボードの凹みからケーブルを解きます。
-
-
-
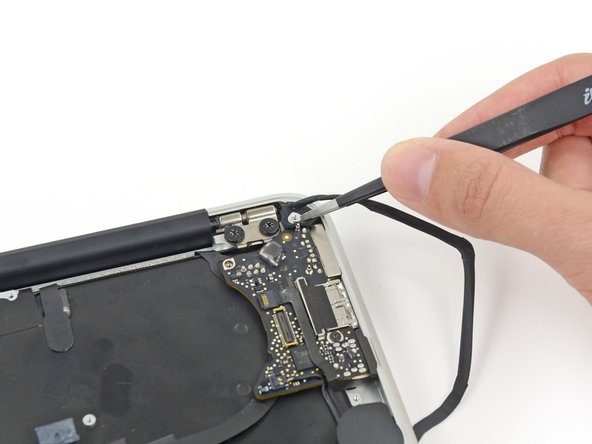
上部ケースにアンテナケーブルを固定している6本のケーブルループを剥がします。
-
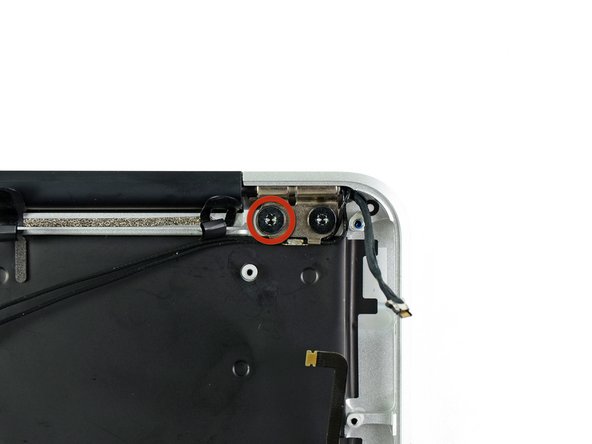
ケーブルループを上部ケースのチャンネルカットから一度に引き抜きます。
On the reassemble phase, rethread these before you reattach the display/
-


デバイスを再度組み立てるには、この説明書の逆の順番で組み立ててください。
デバイスを再度組み立てるには、この説明書の逆の順番で組み立ててください。
29 の人々がこのガイドを完成させました。
以下の翻訳者の皆さんにお礼を申し上げます:
100%

これらの翻訳者の方々は世界を修理する私たちのサポートをしてくれています。 あなたも貢献してみませんか?
翻訳を始める ›


3 件のコメント
Great tutorial. Easy to follow. Don't be afraid to do it.
I wish the tutorial showed the procedure for tearing down the LCD and backlight panel... So not fun.
When you say:
Remove the following ten screws:
Two 8 mm 5-point Pentalobe screws
Eight 2.5 mm 5-point Pentalobe screws
Do the 8mm & 2.5mm dimensions refer to the LENGTH of those screws, or the size of the pentalobe? That is, are there other sizes of pentalobe drivers like there are for hex, phillips and torx? When only one dimension is provided, it is usually the socket/driver size, not the screw length, maybe since the length cannot be seen when the screw is installed.
Can I suggest that you clarify your instructions so folks are confident they are only in need of _one_ pentalobe driver?
Nerdily yours,
Larry (whose iPhone 4S can now get through a day without 6 recharges thanks to ifixit.com ;-)
larryleveen - 返信
The 8mm and 2.5mm are the length of the screws. One pentalobe P5 screwdriver suffices for all the screws (P5 is implicitly the size of the pentalobe screw heads).
Michael Welham -
I sourced all the parts from ifixit, plus a magnetic project mat which I found to be very useful for organising the teardown and reassembly.
Allen - 返信
The magnetic mat is
GERARD SZAREK -
Keep the 2.5mm tiny screws away from the MagSafe connector as they will be attracted and sucked in to the magnet.
Frank O'Carroll - 返信
A tip an old bench tech taught me that has saved me many times: I put clear “Scotch” tape over the case screws as they became “free”. The tape kept them in place while I lifted the lid off, cleaned it etc.
Michael Mee - 返信
Thank you for a really smart tip! I will be using that countless more times!
Lilljedahl -
I’m confused about internet recovery and installing MacOS. Is all of this done before placing in the new ssd card or after. I don’t have any files that I would like to safe/transfer, is all of this necessary, if I don’t do it before placing new ssd, will I still be able to instal/upgrade macOS afterwards.
It’s an old Mac and now it won’t start or charge, I know I will have to replace battery and put new battery first and turn on Mac before doing the ssd stuff. Since it won’t effing start.
I’m really clueless about backing up old ssd, since I don’t need any files, besides MacOS(software) ,and is that related to the ssd?
AMG - 返信
The answer to your question: You need to insert your SSD into the computer before internet recovery. If you start the recovery before inserting SSD, it won’t affect the setup, you won’t damage anything. But your SSD will not be detected (as there isn’t one inserted.)
Also, a little tip: If you bought a used SSD, go into Disk Utility and format the drive with the highest security level to permanently remove all of the previous files.
Also a FYI: Internet Recovery will load up Mac OS X 10.9.5 Mavericks, so I would recommend making a recovery drive from a Big Sur (or desired version) through another Mac, and a USB. You can visit this support doc: https://support.apple.com/en-us/HT201372
Hope this helps! -Dan
danielwen -
I got a macbook air with a damaged and swollen battery. I could remove all screws, except one 2,5 mm screw. I’m afraid it got damaged while attempting to remove it, I have no grip with the P5 pentalobe screwdriver. How can I proceed?
Robert Hermans - 返信
Hi Robert!
Try some techniques found in this stripped screw removal guide. Good luck!
Arthur Shi -
Hello I have a macbook air they are say they do not have parts for my laptop macbook air 11 inches 2013 mid need to replace battery which one to buy
vensilver - 返信
Hello! This is the part you want—maybe we’re not able to ship it to you if you’re out of the United States. The battery in your MacBook Air should be the same for all 11” between mid-2011 to early-2015.
Arthur Shi -
The smaller screws went in more easily when I put back all the screws along the hinge edge first.
Rachel Slatkin - 返信