はじめに
We tried to put a whopping terabyte worth of storage in a Mac mini -- and succeeded!
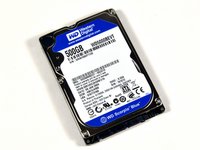
This guide walks you through the process of replacing the stock hard drive and optical drive with TWO 500 GB hard drives.
Warning: Although you're welcome to do this at home, this surgery is at your own risk. Make sure to back up any important data prior to working on your mini's hard drive. We'll post more information regarding heat and performance as soon as we have it available.
必要な工具と部品
-
-
We decided to see if we could stuff a full terabyte worth of storage into our new Mac mini. Why would anyone possibly want this much storage?
-
Bragging rights. Mac minis come with either 120, 250, or 320 GB standard. Yours has 1 TERABYTE.
-
Built-in Time Machine. Sure, you can hook up an external drive, but it's sure nice not to have cables everywhere.
-
RAID -- mirroring, striping, concatenating -- take your pick.
-
And seriously, with that much space, who needs an optical drive?
-
-
-
We're going to:
-
Swap out a the existing hard drive for a 500 GB drive.
-
Then remove the optical drive and install another new 500 GB drive in its place.
-
Carefully insert a putty knife into the crevice between the top cover and bottom housing. Start on the left side first.
-
Gently enlarge the existing crevice by twisting the putty knife downward and away from the mini.
-
Repeat the prying motion until a portion of the bottom housing has been nudged upward.
-
-
-
Repeat the same prying procedure on the right side.
-
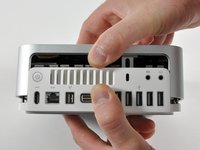
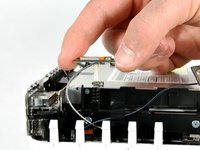
The top cover should now be marginally separated from the bottom housing. Use your fingers to completely separate the two, starting with the I/O side of the mini.
-
The top cover does not have any cables attaching it to the bottom housing; it should now be completely detached from the bottom.
-
-
-
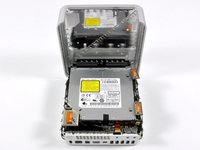
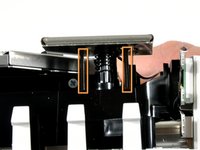
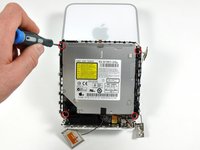
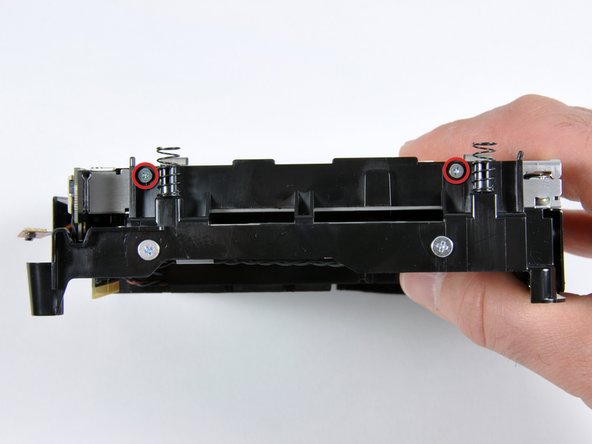
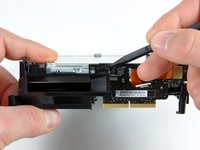
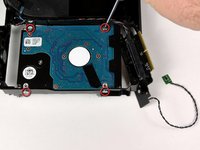
Remove the two silver Phillips screws holding the SuperDrive to the internal frame.
-
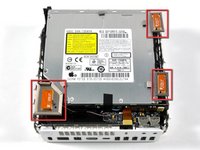
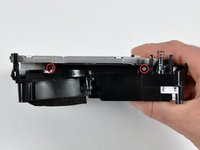
Rotate the internal frame 180 degrees and remove two more silver Phillips screws.
-
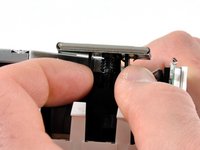
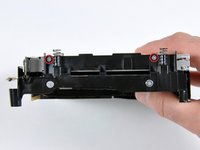
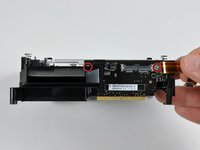
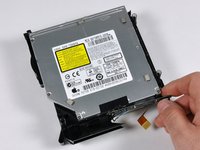
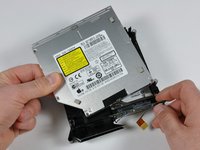
Rotate the internal frame so that the interconnect board connector is facing you.
-
Remove the two silver Phillips screws holding the SuperDrive to the interconnect board connector.
-
-
-
-
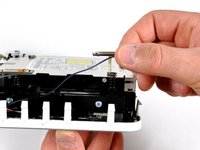
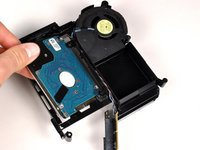
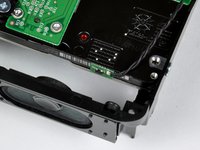
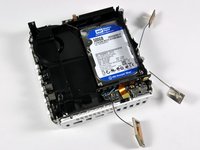
Flip the frame and then rotate it 180 degrees so that the speakers are facing you.
-
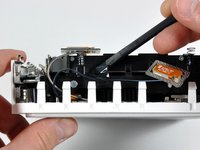
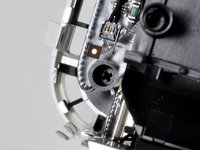
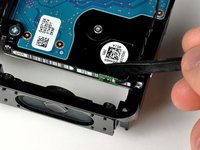
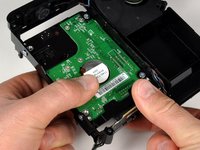
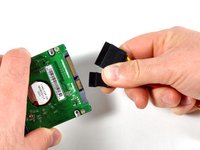
Use a spudger to gently disconnect the thermal sensor from the hard drive.
-
Peel back the black tape and free the double-stranded wire from the drive.
-
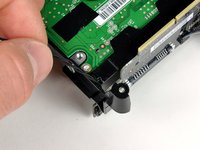
Gently deroute the wire from the small notch on the frame (third picture).
-
-
-
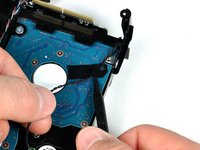
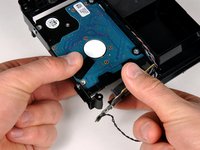
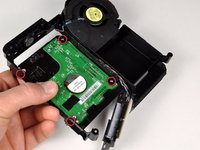
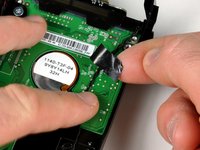
Secure the thermal sensor to the new hard drive. The original adhesive on the back of the thermal sensor should hold the sensor in place.
-
Reuse the black tape from the old drive to secure the thermal sensor wire to the new drive.
-
Your newly-installed drive should look very similar to the third picture.
-
-
-
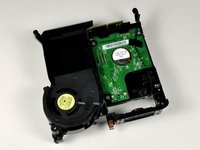
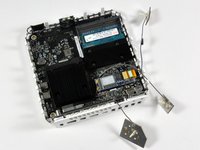
Flip over the internal framework with the newly attached drive. It should look like the first picture
-
Prepare the bottom housing for connection with the internal framework by connecting the antenna cables to the Broadcom AirPort card as shown
-
Arranging the antennas as pictured will ensure a smooth connection of the two large components
-
When setting the internal framework into the bottom housing, make sure the male connector on the interconnect board finds its way into the female connector on the logic board
-
-
-
Snap the antenna boards back into their respective posts.
-
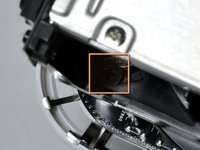
Tape the upper right antenna cable to the side of the internal framework (circled in green).
-
Route the bottom left antenna cable through the guides on the internal framework (marked in yellow).
-
Connect the orange ribbon cable from the interconnect board to the sound card (indicated in red).
-
-
-
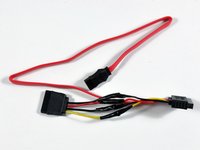
To connect the new hard drive, we need to modify some cables.
-
The hard drive has a standard 15 pin SATA power connection, but the logic board has a 6 pin slim SATA power connection. A cable to connect them doesn't exist (yet), so we're going to make one.
-
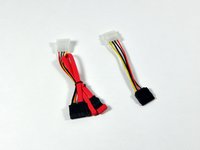
The two cables you need are:
-
15 pin Female SATA power to 4 pin Male Molex power.
-
13 pin Male Slimline SATA to 7 pin Female SATA / 4 pin Male Molex power.
-
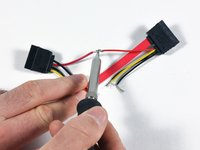
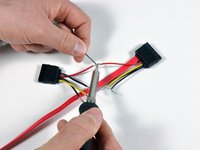
Cut the white Molex connectors off both cables. The excess cable has to fit inside the mini, so just leave 3-4" on each cable.
-
-
-
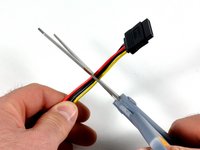
Strip half an inch of insulation from the end of each wire.
-
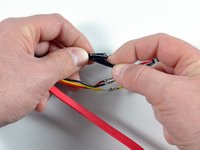
Connect each loose wire with the matching color wire on the other cable. Red-red, black-black, yellow-yellow, black-black.
-
To our knowledge, both black wires are ground, so just make sure you have black to black.
-
Tightly twist each pair of wires together.
-
-
-
The one drawback to this hack is that we removed the optical drive. Fortunately, Apple's provided an easy solution, thanks to the MacBook Air.
-
You can use Remote Disc to share the optical drive of a nearby Mac or PC.
-
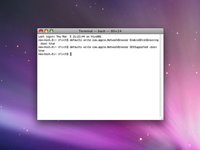
Remote Disc is not activated on the mini, but fortunately turning it on is simple. Just type the following two commands in Terminal:
-
defaults write com.apple.NetworkBrowser EnableODiskBrowsing -bool true
-
defaults write com.apple.NetworkBrowser ODSSupported -bool true
-
Restart, and you're all set.
-
-
-
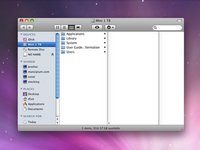
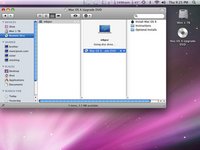
If you're like us and Time Machine just isn't enough, you can RAID the two drives together to make a single 1 TB drive.
-
Instructions are elsewhere online to do this, but the basic steps are:
-
Back any data up, then boot off a different startup disc.
-
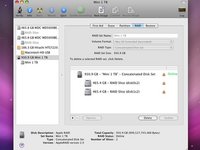
Format both drives as Mac OS Extended.
-
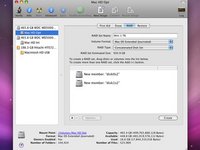
Create a new 'RAID set', and add both drives to it. You can choose 'Concatenated Set', mirrored RAID 1, or striped RAID 0.
-
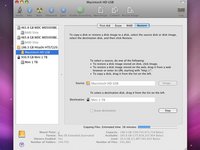
After you create the drive array, you can copy an OS onto it from a backup (as we did), or you can install OS X from scratch.
-


To reassemble your device, follow these instructions in reverse order.
21 の人々がこのガイドを完成させました。

3件のガイドコメント
Perfect Cable Found:
Http://www.microsatacables.com
Search for this item:
This is the standard 22 pin Female SATA connector to a 13 pin Slimline SATA Male connector.
Item # ADPC22PFWV13PM
It's $7.75 and is a perfect fit. With this cable, the difficulty of this endeavor goes down to "just a little" :-)
It completely eliminates steps 17 to 20
I just replaced my hand soldered adventurous one with the one above and that's a clean and reliable solution.
Enjoy the 2 drives in the mini.
-Jo.
Josef Kohn - 返信
Dear friends, it is necessary that they are of different RPM HDD, my question is if I can use both disks of equal speed???
It's necessary to use the same drive of your going to RAID it. At least in size, not sure about speed.