メインコンテンツにスキップ

Mac mini Model A1176 Top Housing Replacement

必要条件のみ
この修理ガイドは、他のガイドの前提条件として使用されます。それ自体は不完全で、単独で使用されることはありません。

必要な工具と部品

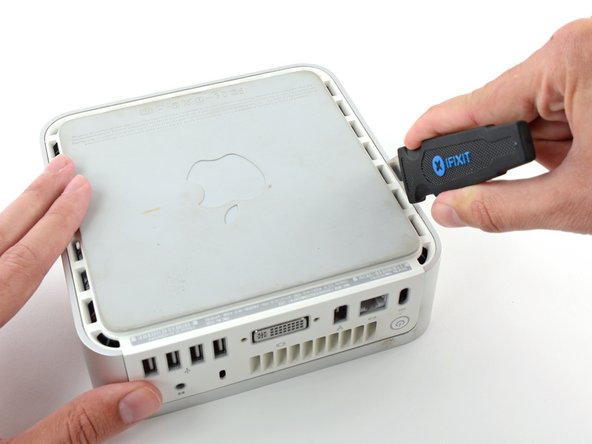
  1. Mac mini Model A1176 Top Housing Replacement, Top Housing: 手順 1、 2の画像 1 Mac mini Model A1176 Top Housing Replacement, Top Housing: 手順 1、 2の画像 2
    • Power down your Mac mini, disconnect all of the cables, and flip it over.

    • Insert the Jimmy into the crack between the aluminum top housing and the plastic lower housing.

    • The Jimmy should reach a stop about 3/8" down.

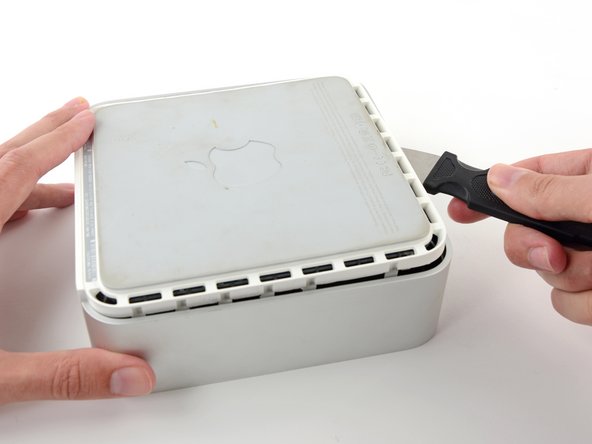
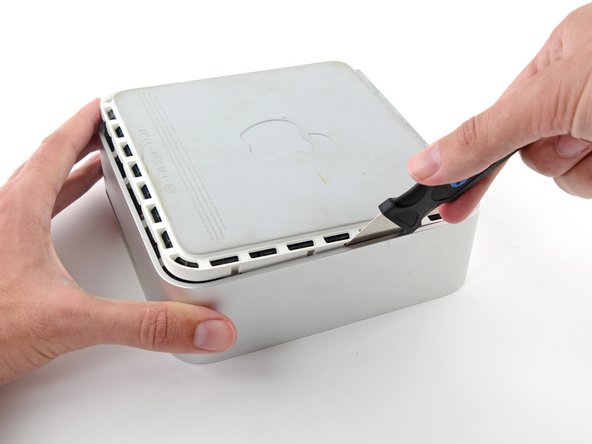
  2. Mac mini Model A1176 Top Housing Replacement: 手順 2、 3の画像 1 Mac mini Model A1176 Top Housing Replacement: 手順 2、 3の画像 2 Mac mini Model A1176 Top Housing Replacement: 手順 2、 3の画像 3
    • Gently bend the Jimmy outwards to pry the crack open a little larger and lift the lower housing up a small amount.

    • There are several plastic clips on the lower housing that fit into a channel in the aluminum top housing. Your goal is to use the Jimmy to push these clips inward enough to free them from the channel, while gently pulling up on the lower housing.

  3. Mac mini Model A1176 Top Housing Replacement: 手順 3、 2の画像 1 Mac mini Model A1176 Top Housing Replacement: 手順 3、 2の画像 2
    • Once you have the first side free, rotate the Mac mini and start prying up on the front edge.

    • Use the same prying motion to both bend the clips inward and lift the lower housing up out of the top housing.

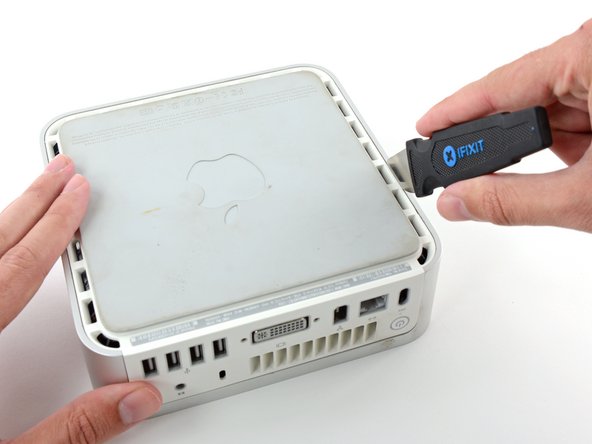
  4. Mac mini Model A1176 Top Housing Replacement: 手順 4、 2の画像 1 Mac mini Model A1176 Top Housing Replacement: 手順 4、 2の画像 2
    • You may need to move the Jimmy along the edge to pry up all of the clips. Be patient and do a little bit at a time.

  5. Mac mini Model A1176 Top Housing Replacement: 手順 5、 2の画像 1 Mac mini Model A1176 Top Housing Replacement: 手順 5、 2の画像 2
    • Keep working around the perimeter, freeing the clips along the final edge.

  6. Mac mini Model A1176 Top Housing Replacement: 手順 6、 2の画像 1 Mac mini Model A1176 Top Housing Replacement: 手順 6、 2の画像 2
    • Flip the Mac mini back over and lift the top housing off of the lower housing.

終わりに

To reassemble your device, follow these instructions in reverse order.
作成者

2人の作成者と共同で作成されました。

Andrew Optimus Goldheart

メンバー登録日: 10/17/09

502,109 ポイント

407のガイドは作成済み

チーム

iFixit iFixit人のメンバー

Staff

135 メンバー

16,476のガイドは作成済み

0 件のコメント

コメントを追加

統計データ:

過去 24時間: 0

過去 7 日: 0

過去 30 日: 0

今までの合計 157