メインコンテンツにスキップ

Mac mini Mid 2011のファン交換

必要な工具と部品

  1. Mac mini Mid 2011のファン交換, ボトムカバー: 手順 1、 2の画像 1 Mac mini Mid 2011のファン交換, ボトムカバー: 手順 1、 2の画像 2
    • ボトムカバーのくぼみに親指を当てます。

    • ボトムカバーの白い点がアウターケース上の輪印に揃うまでボトムカバーを反時計回りに回します。

    • 回しているときに強く押さえる必要はありません。

  2. Mac mini Mid 2011のファン交換: 手順 2、 1の画像 1
    • アウターケースからボトムカバーが外れるようにminiを傾けます。

    • ボトムカバーを取り外します。

  3. Mac mini Mid 2011のファン交換, ファン: 手順 3、 1の画像 1
    • アンテナプレート付近のファンをロジックボードに固定している2つの11.3 mm T6トルクスネジを外します。

  4. Mac mini Mid 2011のファン交換: 手順 4、 1の画像 1
    • RAMに一番近い所のファンの耳を持ち上げ、アウターケースに固定されているスタンドオフから取り外します。

    • ファンを取り外すためにスタンドオフネジを外す必要はありません。スタンドオフネジから外すようにファンを持ち上げるだけです。

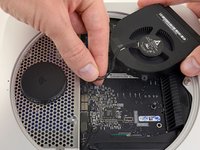
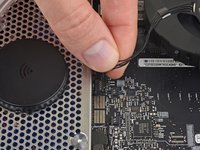
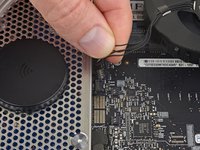
  5. Mac mini Mid 2011のファン交換: 手順 5、 3の画像 1 Mac mini Mid 2011のファン交換: 手順 5、 3の画像 2 Mac mini Mid 2011のファン交換: 手順 5、 3の画像 3
    • コネクターにアクセスできるようmini本体からファンを持ち上げます。

    • 全てのワイヤーを一度に掴み、ファンをロジックボードから外すために慎重にまっすぐ引き上げます。

    • ソケットをこじ開けないでください。ロジックボードから引き裂く可能性があります。

    • ファンを取り出します。

ゴール

31 の人々がこのガイドを完成させました。

以下の翻訳者の皆さんにお礼を申し上げます:

en jp

100%

これらの翻訳者の方々は世界を修理する私たちのサポートをしてくれています。 あなたも貢献してみませんか?
翻訳を始める ›

作成者

10人の作成者と共同で作成されました。

Walter Galan

693,685 ポイント

1,203のガイドは作成済み

3 件のコメント

one of the screws will be "stuck" inside the mount due to having two fixed washers on either side. this screw can be taken apart by holding the bottom piece with pliers and using your torx driver on the top. you will need to do this to replace the fan with a new one.

good luck

ben shore - 返信

step 3 should have note to remove 3 ea. screws ... the screw on the left bottom on the picture is not shown ... it is obvious when you look at the fan you recieve ... connector came out very easy, just pull up (easily) ... took less than 15 minutes on my i7 server mini, mid 2011 model

DiSH

hamagucd - 返信

how do we take or remove the screws and shaft from the fan unit?

i’m repealing one this week, and cant get the screw out of the old fan unit.

thanks in advance!

[deleted] - 返信

コメントを追加

統計データ:

過去 24時間: 1

過去 7 日: 11

過去 30 日: 52

今までの合計 26,291