はじめに
このガイドを参照して、故障した電源を交換しましょう。
必要な工具と部品
-
-
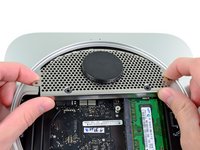
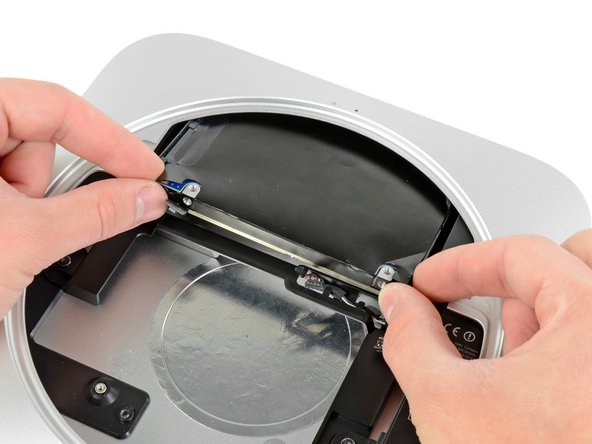
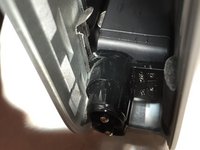
下記のアンテナプレートを固定している次のネジを外します:
-
2本の6.6 mm T8 トルクスネジ
-
2本の5.0 mm T8 トルクスネジ(スクリュードライバーでも可)
-
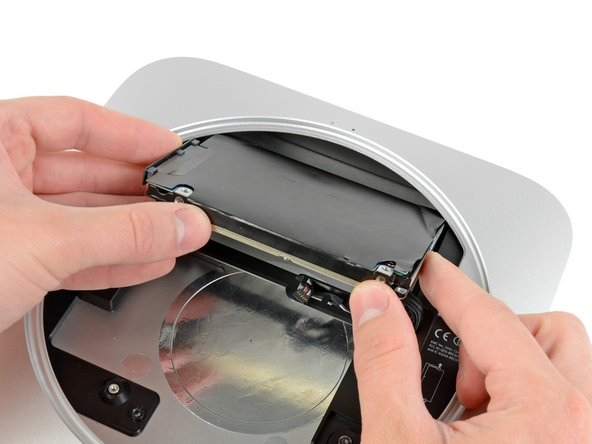
再組み立ての際には:
-
-
-
この手順で使用する道具:Mac mini Logic Board Removal Tool$4.99
-
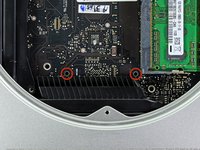
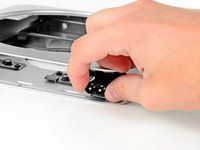
Mac Mini Logic Board Removal Tool を赤でハイライトされた穴に挿入してください。工具が基盤の下のアウターケースに到達しているか確認してください。
-
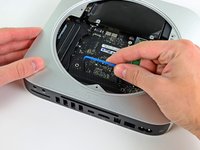
慎重に工具をI/Oボード側に引っ張ります。基板とI/Oボードアセンブリはアウターケース外側にわずかに動きます
-
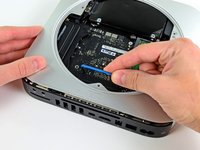
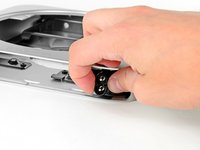
Mac mini Logic Board Removal toolを取り出します。
-


デバイスを再度組み立てるには、この説明書の逆の順番で組み立ててください。
デバイスを再度組み立てるには、この説明書の逆の順番で組み立ててください。
42 の人々がこのガイドを完成させました。

9 件のコメント
Hello,
Can you please mention the part number of the powersupply module.
Shakthi Gs - 返信
The instructions mention a T6, and T8 screwdrivers. The “Buy these tools” link to T6 and T8 security screwdrivers. There is no mention of the security version of these screwdrivers required. Can someone clarify?
For the late 2012 Apple Mac Mini, You do not need the security version of either the T6 nor the T8. However, I use the iFixit Pro Tech Tool Kit so mine are security torx. Either will work in this case. Goodluck!
(I’ve taken apart plenty of Apple products as well as 3 mac mini’s this week alone 2011, 2012, and 2012. They start using Safety Torx in 2014 to keep “clumsy customers” out. However that does not keep out the enthusiasts ;)
can the power supply be tested IN PLACE with volt amp meter? i can see the power supply pins after Step 3. many people i see searching for this want to know if their power supply is good or if failure is also the logic board. i would stop disassembly if logic board has failed. also would know if one had to order power supply and logic board immediately/at the same time. Thank you!