メインコンテンツにスキップ

このバージョンは誤った内容を含んでいる可能性があります。最新の承認済みスナップショットに切り替えてください。

Mac mini (PowerPC)の上部ケースの交換

必要な工具と部品

  1. この手順は未翻訳です。 翻訳を手伝う。

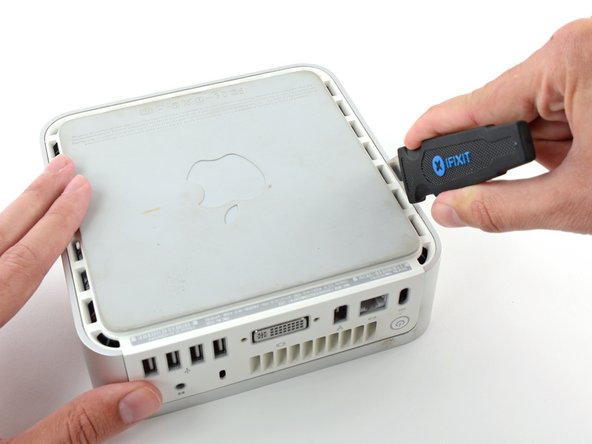
    Mac mini (PowerPC)の上部ケースの交換: 手順 1、 2の画像 1 Mac mini (PowerPC)の上部ケースの交換: 手順 1、 2の画像 2
    • Power down your Mac mini, disconnect all of the cables, and flip it over.

    • Insert the Jimmy into the crack between the aluminum top housing and the plastic lower housing.

    • The Jimmy should reach a stop about 3/8" down.

  2. この手順は未翻訳です。 翻訳を手伝う。

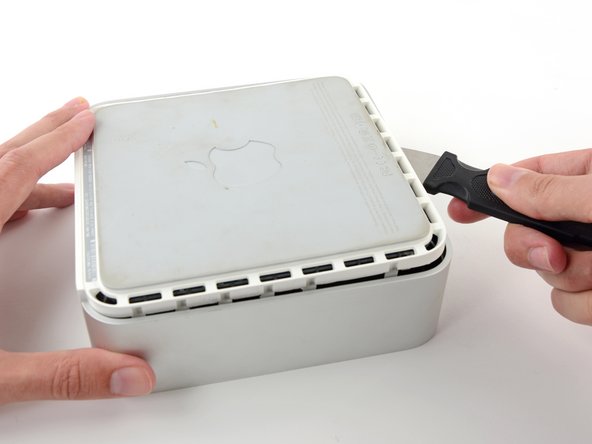
    Mac mini (PowerPC)の上部ケースの交換: 手順 2、 3の画像 1 Mac mini (PowerPC)の上部ケースの交換: 手順 2、 3の画像 2 Mac mini (PowerPC)の上部ケースの交換: 手順 2、 3の画像 3
    • Gently bend the Jimmy outwards to pry the crack open a little larger and lift the lower housing up a small amount.

    • There are several plastic clips on the lower housing that fit into a channel in the aluminum top housing. Your goal is to use the Jimmy to push these clips inward enough to free them from the channel, while gently pulling up on the lower housing.

  3. この手順は未翻訳です。 翻訳を手伝う。

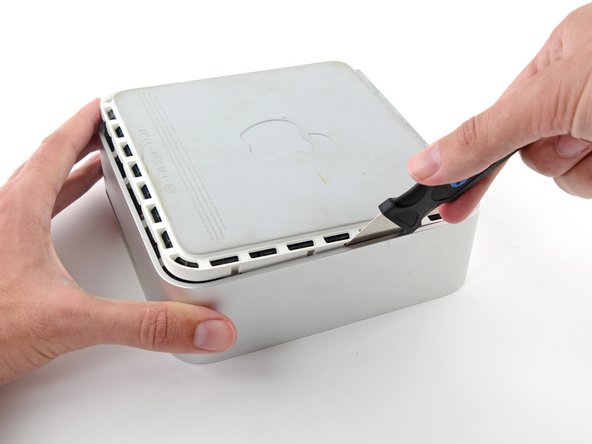
    Mac mini (PowerPC)の上部ケースの交換: 手順 3、 2の画像 1 Mac mini (PowerPC)の上部ケースの交換: 手順 3、 2の画像 2
    • Once you have the first side free, rotate the Mac mini and start prying up on the front edge.

    • Use the same prying motion to both bend the clips inward and lift the lower housing up out of the top housing.

  4. この手順は未翻訳です。 翻訳を手伝う。

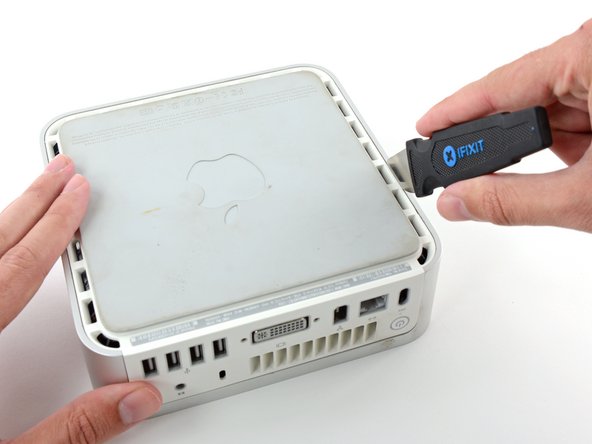
    Mac mini (PowerPC)の上部ケースの交換: 手順 4、 2の画像 1 Mac mini (PowerPC)の上部ケースの交換: 手順 4、 2の画像 2
    • You may need to move the Jimmy along the edge to pry up all of the clips. Be patient and do a little bit at a time.

  5. この手順は未翻訳です。 翻訳を手伝う。

    Mac mini (PowerPC)の上部ケースの交換: 手順 5、 2の画像 1 Mac mini (PowerPC)の上部ケースの交換: 手順 5、 2の画像 2
    • Keep working around the perimeter, freeing the clips along the final edge.

  6. この手順は未翻訳です。 翻訳を手伝う。

    Mac mini (PowerPC)の上部ケースの交換: 手順 6、 2の画像 1 Mac mini (PowerPC)の上部ケースの交換: 手順 6、 2の画像 2
    • Flip the Mac mini back over and lift the top housing off of the lower housing.

終わりに

デバイスを再度組み立てるには、この説明書の逆の順番で組み立ててください。

12 の人々がこのガイドを完成させました。

以下の翻訳者の皆さんにお礼を申し上げます:

en jp

100%

railgunさんは世界中で修理する私たちを助けてくれています! あなたも貢献してみませんか?
翻訳を始める ›

作成者

6人の作成者と共同で作成されました。

iRobot

メンバー登録日: 09/24/09

1 ポイント

636のガイドは作成済み

2 件のコメント

those Putty Knifes are:

too smal

too sharp

too expensive.

Better use a 100mm broad Spatula; (opens all the claws in on step)

out of plastic is good enough and cheap.

And use two of them at one time.

spatula - 返信

No, I didn’t think the Jimmy is expensive or too small.

And the Jimmy didn’t break something so it is the best solution I think!
Toni Makkaroni -

コメントを追加

統計データ:

過去 24時間: 0

過去 7 日: 3

過去 30 日: 40

今までの合計 11,578