メインコンテンツにスキップ

Mac Pro 2009-2012 Case Replacement

必要な工具と部品

  1. Mac Pro 2009-2012 Case Replacement, Open the Case: 手順 1、 3の画像 1 Mac Pro 2009-2012 Case Replacement, Open the Case: 手順 1、 3の画像 2 Mac Pro 2009-2012 Case Replacement, Open the Case: 手順 1、 3の画像 3
    • To open the Mac Pro, you'll have to lift the clip on the back of the case

    • Leave the clip open during the entire disassembly!

  2. Mac Pro 2009-2012 Case Replacement, Remove the side panel: 手順 2、 2の画像 1 Mac Pro 2009-2012 Case Replacement, Remove the side panel: 手順 2、 2の画像 2
    • Lift the flap to put it in the unlocked position, the panel should separate from the box without forcing.

  3. Mac Pro 2009-2012 Case Replacement, Remove the hard drives: 手順 3、 2の画像 1 Mac Pro 2009-2012 Case Replacement, Remove the hard drives: 手順 3、 2の画像 2
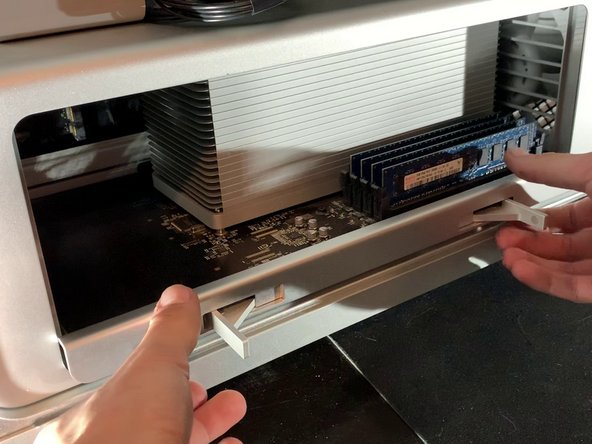
    • Then to remove the hard drives, pull them towards you with a bit of force.

  4. Mac Pro 2009-2012 Case Replacement, Remove the DVD drives: 手順 4、 3の画像 1 Mac Pro 2009-2012 Case Replacement, Remove the DVD drives: 手順 4、 3の画像 2 Mac Pro 2009-2012 Case Replacement, Remove the DVD drives: 手順 4、 3の画像 3
    • Pull the DVD drives towards you, just like the hard drives.

  5. Mac Pro 2009-2012 Case Replacement, Remove the CPU board: 手順 5、 3の画像 1 Mac Pro 2009-2012 Case Replacement, Remove the CPU board: 手順 5、 3の画像 2 Mac Pro 2009-2012 Case Replacement, Remove the CPU board: 手順 5、 3の画像 3
    • Press both latches to unlock the bracket and then pull it towards you.

    • You shouldn't need to apply much force.

  6. Mac Pro 2009-2012 Case Replacement, Disconnect the GPU: 手順 6、 2の画像 1 Mac Pro 2009-2012 Case Replacement, Disconnect the GPU: 手順 6、 2の画像 2
    • Remove the 6 or 8 pin connector from your graphics card.

    • This step is optional, it will depend on the graphics card of your Mac Pro

  7. Mac Pro 2009-2012 Case Replacement, Disconnect the GPU power supply ( Optional ): 手順 7、 3の画像 1 Mac Pro 2009-2012 Case Replacement, Disconnect the GPU power supply ( Optional ): 手順 7、 3の画像 2 Mac Pro 2009-2012 Case Replacement, Disconnect the GPU power supply ( Optional ): 手順 7、 3の画像 3
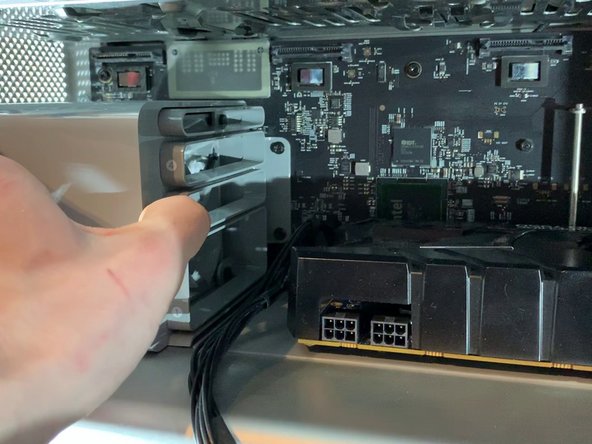
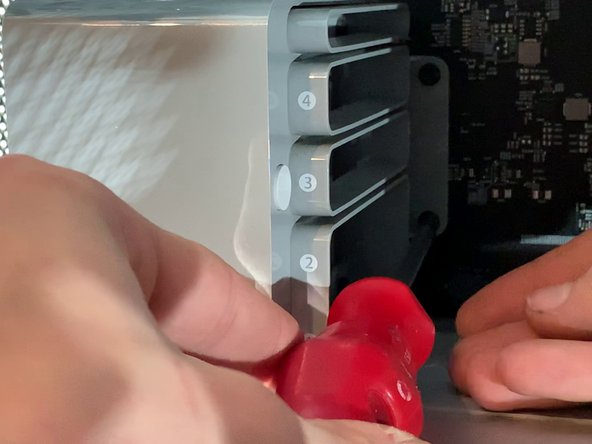
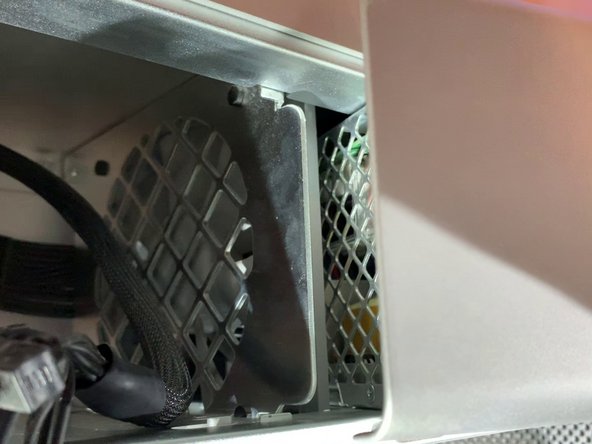
    • On the power supply there is a button, press it to move the power supply to the left (see picture)

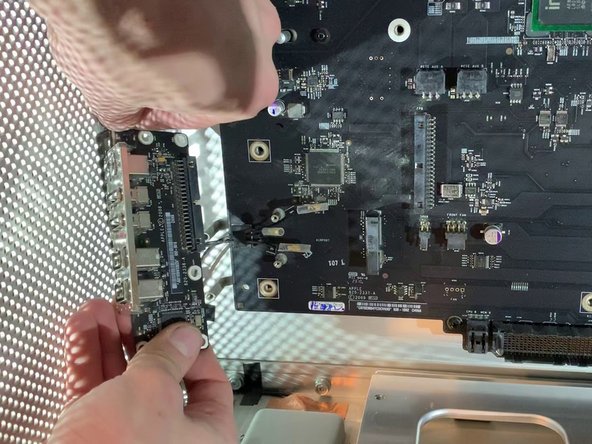
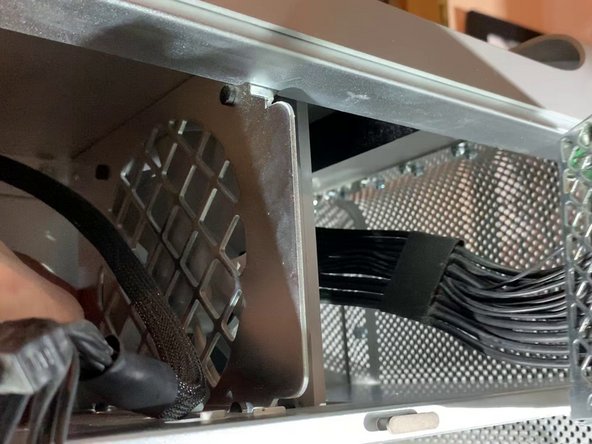
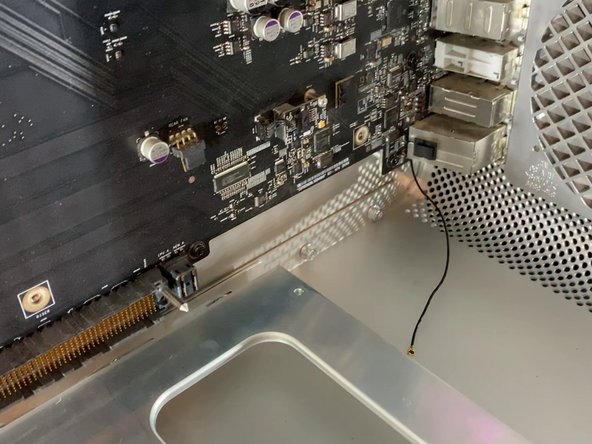
    • Then pull the graphics card towards you to take it out of the box

    • This step is optional depending on the GPU of your Mac Pro

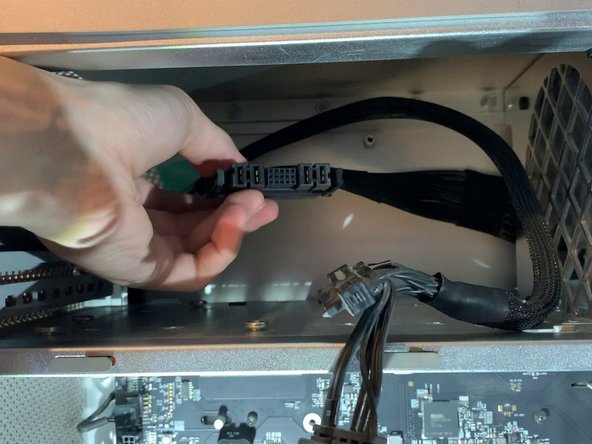
    That is not the power supply but rather just a fan shroud. It is important to move that back to release any PCIE cards that have the rear locking tab as it also moves the metal bat shown on the right side of the picture to release the lock from the tabs.

    Kevin Youngblood - 返信

    Hello, the cable between the grey block and GPU is my GPU alimentation (mini 8-pins), so for unplug this alimentation, you need to move the fan shroud

    Please read the whole tutorial, just after this step, I explain how to unplug this cable

    remitouch -

  8. Mac Pro 2009-2012 Case Replacement, Disconnect GPU support ( optional): 手順 8、 2の画像 1 Mac Pro 2009-2012 Case Replacement, Disconnect GPU support ( optional): 手順 8、 2の画像 2
    • Disconnect the PCI-e cables from the motherboard

    • This step is optional depending on your Mac Pro

  9. Mac Pro 2009-2012 Case Replacement, Take out the PCI-e fan: 手順 9、 3の画像 1 Mac Pro 2009-2012 Case Replacement, Take out the PCI-e fan: 手順 9、 3の画像 2 Mac Pro 2009-2012 Case Replacement, Take out the PCI-e fan: 手順 9、 3の画像 3
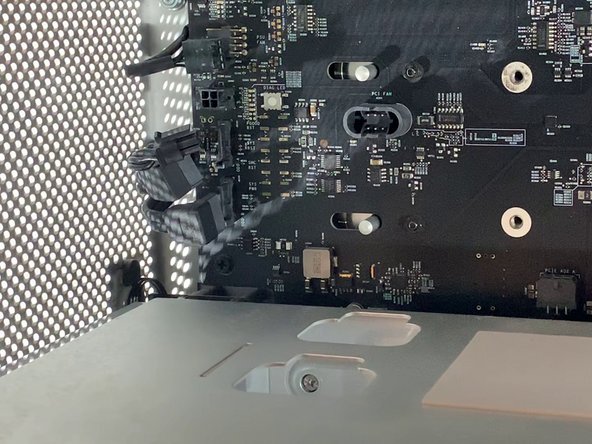
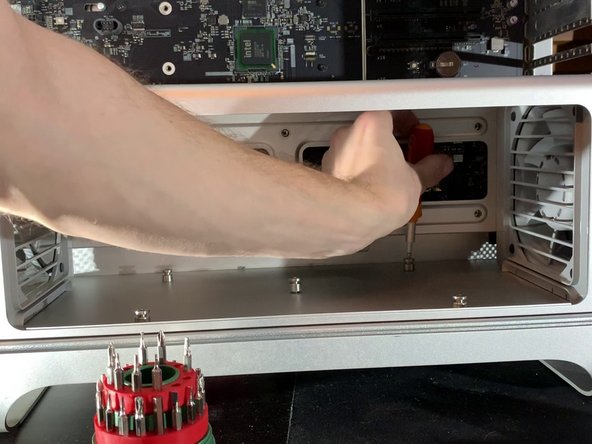
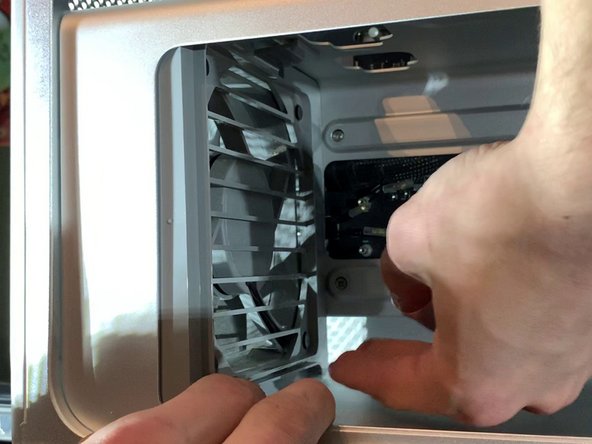
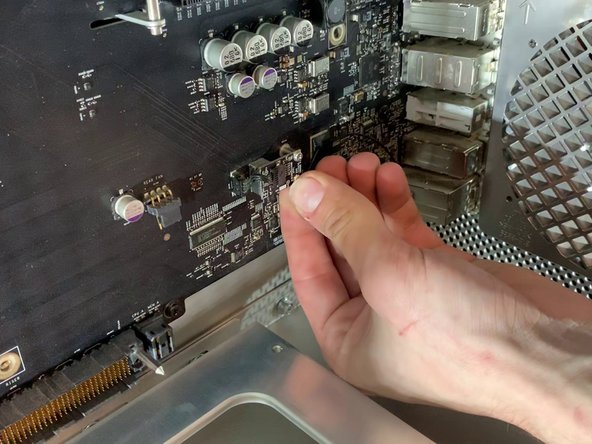
    • With a screwdriver unscrew the two screws that hold the fan bracket to the board

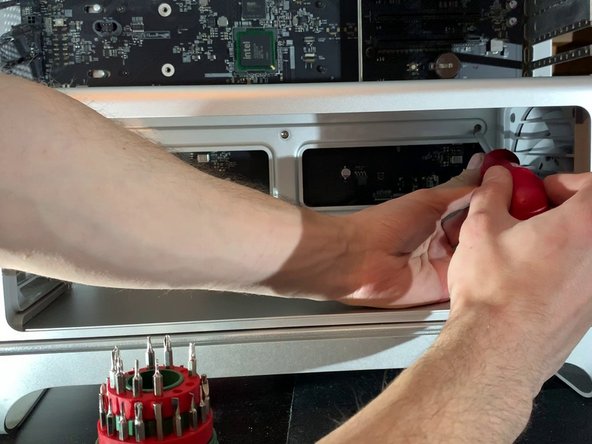
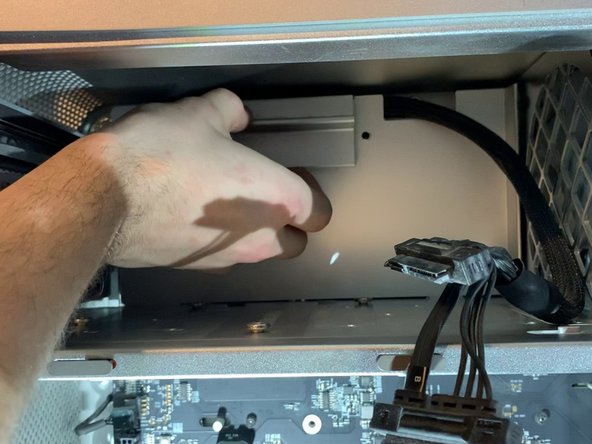
    • Pull the fan towards you

  10. Mac Pro 2009-2012 Case Replacement, Disconnect the SATA Cables: 手順 10、 2の画像 1 Mac Pro 2009-2012 Case Replacement, Disconnect the SATA Cables: 手順 10、 2の画像 2
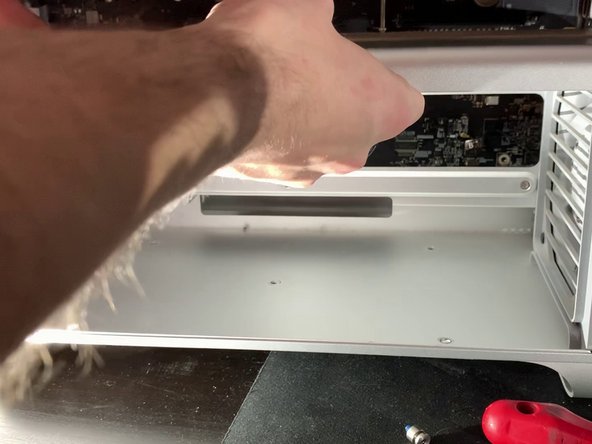
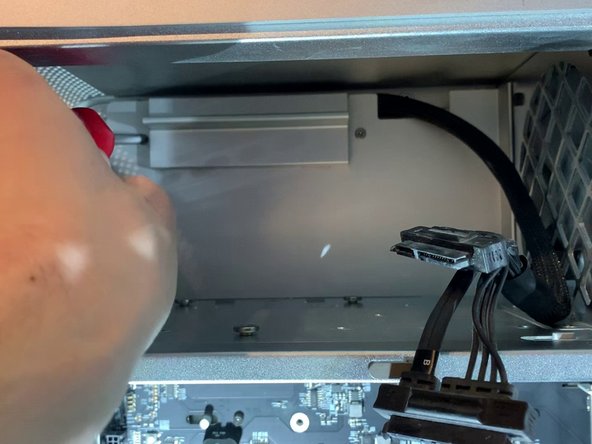
    • Behind the fan bracket there are 2 SATA cables, a 4 pin mini power supply and a 4 pin fan

  11. Mac Pro 2009-2012 Case Replacement, Unscrew CPU support: 手順 11、 3の画像 1 Mac Pro 2009-2012 Case Replacement, Unscrew CPU support: 手順 11、 3の画像 2 Mac Pro 2009-2012 Case Replacement, Unscrew CPU support: 手順 11、 3の画像 3
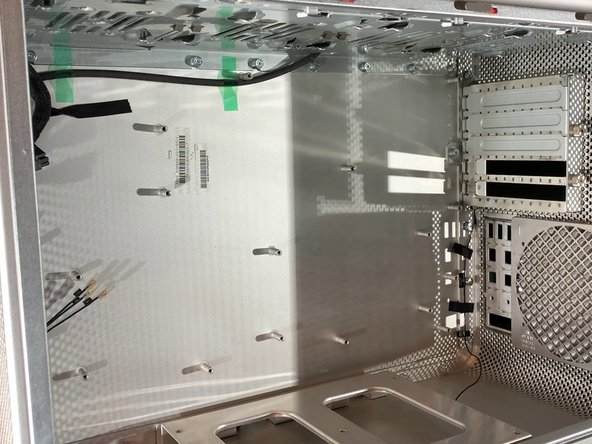
    • With a H2.5 screwdriver, unscrew the screws on the bottom of the bracket (photo 2)

    • With a Phillips screwdriver, unscrew the screws on the bottom of the case (photo 3)

    The bottom screws are H2.5

    John Zheng - 返信

    corrected, thk

    remitouch -

  12. Mac Pro 2009-2012 Case Replacement, Remove the CPU Fan: 手順 12、 3の画像 1 Mac Pro 2009-2012 Case Replacement, Remove the CPU Fan: 手順 12、 3の画像 2 Mac Pro 2009-2012 Case Replacement, Remove the CPU Fan: 手順 12、 3の画像 3
    • Remove the clip at the top of the fan

    • Pull on the top of the fan a bit.

  13. Mac Pro 2009-2012 Case Replacement, Remove the CPU Fan: 手順 13、 2の画像 1 Mac Pro 2009-2012 Case Replacement, Remove the CPU Fan: 手順 13、 2の画像 2
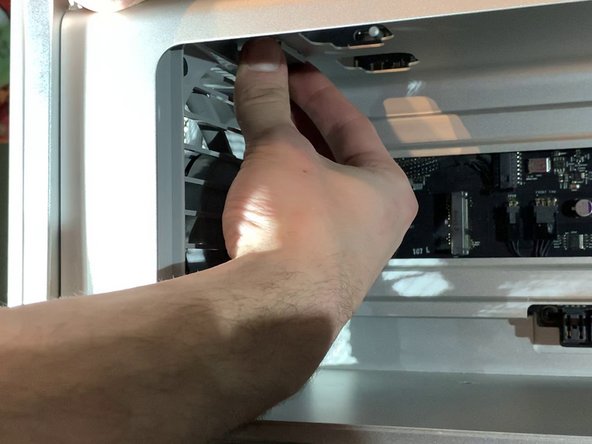
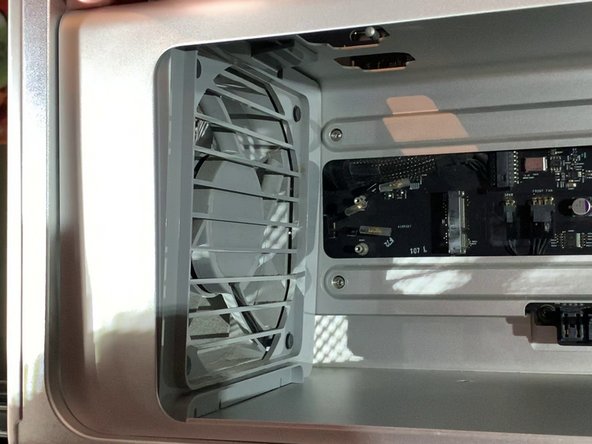
    • Similar to the top remove the clip at the bottom and pull out the fan.

    Where tf os the clip at the bottom???????

    Dan man5000 - 返信

    It is only necessary to move both fans about 1 cm towards the centre of the computer box. You then need to disconnect the plugs for both fans the the loudspeaker in order to slide out the cpu unit. Do not attempt to remove the fans!

    frank booy - 返信

  14. Mac Pro 2009-2012 Case Replacement, Disconnect Fan and Speakers: 手順 14、 3の画像 1 Mac Pro 2009-2012 Case Replacement, Disconnect Fan and Speakers: 手順 14、 3の画像 2 Mac Pro 2009-2012 Case Replacement, Disconnect Fan and Speakers: 手順 14、 3の画像 3
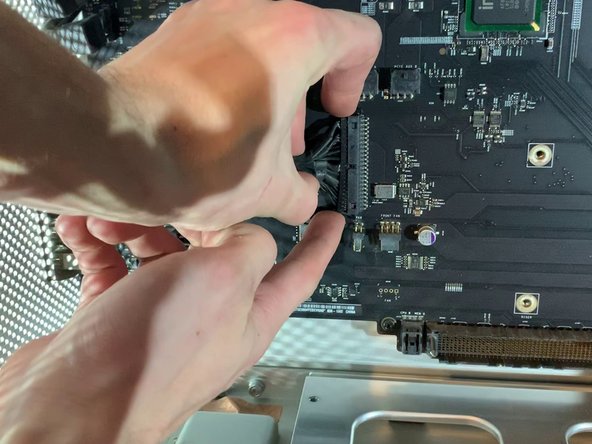
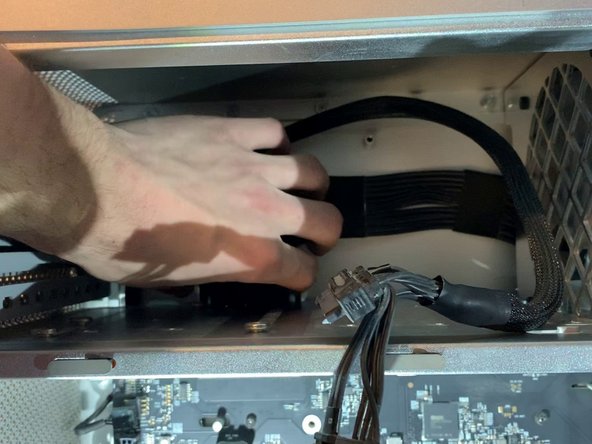
    • Disconnect the 2 x 4pin fan cables and the 1 x 2 pin speaker cable

    • Do not forget this step or you risk damaging your connectors on the motherboard and make unusable fans and speaker!

    Wtf hot the !&&* do you get those out. There like stuck

    Dan man5000 - 返信

    - You need to disconnect/seperate the retaining catch on the motherboard connecting shroud from the retaining clip on the cable connector.

    - To help do this, you can Very Lightly use a spudger/prying tool or cut some piece of scrap recycled plastic off a bottle to slide between the two on the top side of the connector, parallel to the motherboard.

    - Once you have to two interlocking halves held apart, then you may be able to

    * wiggle the connector off

    * use a small flat headed screw driver or similar tool to Again Lightly help start to push from between the motherboard and cable connectors

    * and/or, Gently use a hobby plyers or large tweezers to lightly grab the cable connector from the short edges for a better grip while wiggling

    - If this still doesn’t make sense, then you might try searching for images of “motherboard cable connector retaining clip” or some such.

    Hope that helps.

    Chris Alby - 返信

  15. Mac Pro 2009-2012 Case Replacement, Remove the CPU Support: 手順 15、 3の画像 1 Mac Pro 2009-2012 Case Replacement, Remove the CPU Support: 手順 15、 3の画像 2 Mac Pro 2009-2012 Case Replacement, Remove the CPU Support: 手順 15、 3の画像 3
    • Pull the CPU support towards you

    • Do not use force during this step,It it does not come out easily ensure the fans are not blocking the exit.

  16. Mac Pro 2009-2012 Case Replacement, Remove the expansion card connector: 手順 16、 3の画像 1 Mac Pro 2009-2012 Case Replacement, Remove the expansion card connector: 手順 16、 3の画像 2 Mac Pro 2009-2012 Case Replacement, Remove the expansion card connector: 手順 16、 3の画像 3
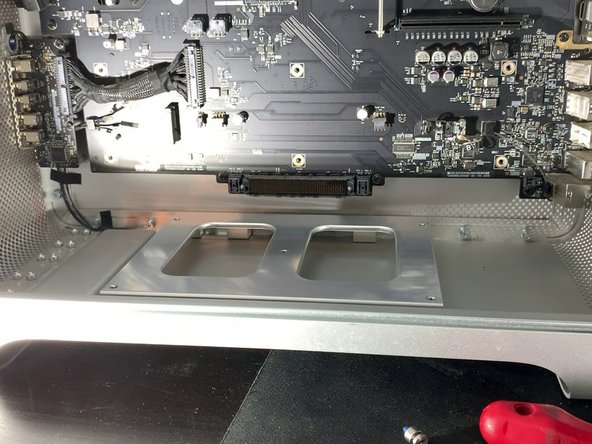
    • Remove the ribbon that connects the motherboard to the expansion card (USB, Jack, Power Off etc.)

    • Attention, it is necessary to remove the cable carefully so as not to bend the pins which are in the connector of the motherboard!

  17. Mac Pro 2009-2012 Case Replacement, Remove the expansion card: 手順 17、 3の画像 1 Mac Pro 2009-2012 Case Replacement, Remove the expansion card: 手順 17、 3の画像 2 Mac Pro 2009-2012 Case Replacement, Remove the expansion card: 手順 17、 3の画像 3
    • Unscrew the 6 screws that hold the card in place.

    • Be careful to unplug the power cable on the card !!

  18. Mac Pro 2009-2012 Case Replacement, Remove the cover: 手順 18、 3の画像 1 Mac Pro 2009-2012 Case Replacement, Remove the cover: 手順 18、 3の画像 2 Mac Pro 2009-2012 Case Replacement, Remove the cover: 手順 18、 3の画像 3
    • unscrew the two screws and remove the cover

  19. Mac Pro 2009-2012 Case Replacement, Unplug the power supply: 手順 19、 3の画像 1 Mac Pro 2009-2012 Case Replacement, Unplug the power supply: 手順 19、 3の画像 2 Mac Pro 2009-2012 Case Replacement, Unplug the power supply: 手順 19、 3の画像 3
    • Push on both knobs to remove the power connector

    • Do not use force, if you are struggling ensure you are squeezing the clips adequately.

  20. Mac Pro 2009-2012 Case Replacement, Separate the power supply: 手順 20、 2の画像 1 Mac Pro 2009-2012 Case Replacement, Separate the power supply: 手順 20、 2の画像 2
    • Unscrew the 4 screws that hold in the power supply

    The 4 screws used here require a 2mm Hex bit. You do not need to unscrew the Phillips screws to remove the power supply.

    tabbypears4 - 返信

  21. Mac Pro 2009-2012 Case Replacement, Remove the power supply: 手順 21、 3の画像 1 Mac Pro 2009-2012 Case Replacement, Remove the power supply: 手順 21、 3の画像 2 Mac Pro 2009-2012 Case Replacement, Remove the power supply: 手順 21、 3の画像 3
    • Pull the power supply towards you.

    • Be sure to pull the connector forward and watch the cables

  22. Mac Pro 2009-2012 Case Replacement, Detach the bluetooth antenna: 手順 22、 3の画像 1 Mac Pro 2009-2012 Case Replacement, Detach the bluetooth antenna: 手順 22、 3の画像 2 Mac Pro 2009-2012 Case Replacement, Detach the bluetooth antenna: 手順 22、 3の画像 3
    • Unclip the bluetooth antenna

  23. Mac Pro 2009-2012 Case Replacement, Remove the mother board: 手順 23、 3の画像 1 Mac Pro 2009-2012 Case Replacement, Remove the mother board: 手順 23、 3の画像 2 Mac Pro 2009-2012 Case Replacement, Remove the mother board: 手順 23、 3の画像 3
    • Unscrew the 10 screws holding in the motherboard

  24. Mac Pro 2009-2012 Case Replacement, Change the case: 手順 24、 1の画像 1
    • Follow the steps in reverse to resemble.

    Great instructions.

    Easy to follow

    Andrew Schmetterling - 返信

    Thanks for posting this teardown! Worked out great!

    Used this to replace all the cooling fans in my macpro5,1

    Andrew Clark - 返信

    how can i take apart the case further as in Taking off the latch and the Wifi and the top piece that holds the PSU?

    CaffeinatedMac - 返信

    how can i take apart the case Further as in the latch and the plastic parts the cheese grater front panel ect.

    CaffeinatedMac - 返信

終わりに

To resemble, follow the instructions in the reverse order.

21 の人々がこのガイドを完成させました。

以下の翻訳者の皆さんにお礼を申し上げます:

fr en

100%

これらの翻訳者の方々は世界を修理する私たちのサポートをしてくれています。 あなたも貢献してみませんか?
翻訳を始める ›

作成者

1人の作成者と共同作成されました。

remitouch

メンバー登録日: 10/12/16

979 ポイント

1ガイドが承認済み

7 件のコメント

Bonjour, j’ai un mac pro 5,1 de 2010 dont les clapets (ou les trappes, j’ignore le terme exact) de la baie des lecteurs de disques restent ouverts à chaque fois qu’ils sont actionnés. Je n’ai pas réussi à les démonter, et les 2 gouttes de 3 en 1 sur les glissières latérales n’ont rien changé au problème. Je n’ai trouvé aucun tutoriel, ni même aucune occurrence de ce problème sur le web. Pourriez-vous me donner quelques conseils ? Merci.

Gabriel Fracque - 返信

Amazing explanations and perfect picture track on each move made.

Thanks much - this was very helpful :)

Dennis.

Dennis OBrien - 返信

Hello sir , I have a problem with my Mac Pro 5,1 mid 2010 Xeon 6core Cpu 64 GB Ram RX580

I erase SSD Hard Drive and I want to reinstall mojave OS and it does not work still appear ‘Missing Operating System’

I try to use all commends on startup like (Option) (Commend+R) (Option+Commend+R)(Option+Commend+R+P) and more commends

but nothing work with it … please I want help . I need your help please , please …

Hussain Khan - 返信

You’d probably get an answer a lot quicker if you just posted that as a question.

[deleted] -

Thanks for posting this guide!

I used it to replace all the cooking fans in my macpro5,1. Worked great!!

Andrew Clark - 返信

The "cooking fans", is your Mac Pro a flat top grill?

guardian10 -

@guardian10

Haha! 😆

I guess my spell check/proofreading skills were not engaged that day…

Andrew Clark -

コメントを追加

統計データ:

過去 24時間: 11

過去 7 日: 63

過去 30 日: 297

今までの合計 24,374