メインコンテンツにスキップ

この翻訳は、ソースガイドの最新の更新を反映していない可能性があります。 翻訳の更新に協力してください。 または ソースガイドを参照してください

必要な工具と部品

  1. , ロジックボードアセンブリ: 手順 1、 1の画像 1
    • SATAケーブルコネクタのブラケットを固定している2.6mmT6ネジを外してください。

  2. : 手順 2、 2の画像 1 : 手順 2、 2の画像 2
    • SATAケーブルコネクタのブラケットを外してください。

  3. : 手順 3、 2の画像 1 : 手順 3、 2の画像 2
    • ヘラ状のスパッジャーを用いてSATAケーブルコネクタをロジックボード上のソケットから外してください。

  4. : 手順 4、 2の画像 1 : 手順 4、 2の画像 2
    • 先端の尖ったスパッジャーを用いて赤外線センサーケーブルコネクタを外してください。このとき、その部分をソケットからまっすぐ引き抜いてください。

  5. : 手順 5、 1の画像 1
    • これ以降の3つの手順は、Mac miniにPCle SSDが装着されている場合のみ行ってください。もしハードドライブのみ装着している場合は次の3つの手順は必要ありません。

    • PCle SSDケーブルのブラケットを固定している2本のT6ネジを外します。

  6. : 手順 6、 2の画像 1 : 手順 6、 2の画像 2
    • PCle SSDケーブルブラケットを取り出してください。

  7. : 手順 7、 2の画像 1 : 手順 7、 2の画像 2
    • PCle SSDコネクタをソケットから持ち上げて外します。

  8. : 手順 8、 1の画像 1
    • ロジックボードを固定している1つの16mmT6ネジを外します。

  9. : 手順 9、 1の画像 1
    この手順で使用する道具:
    Mac mini Logic Board Removal Tool
    $4.99
    購入する
    • ロジックボードを外すには、Mac miniロジックボード専用の取外しツールには入っている円筒形の棒2本を赤く表示されたホール部分に挿入してください。赤く表示された部分以外のロジックボード上の穴に差し込んだ場合、破損する可能性があります。

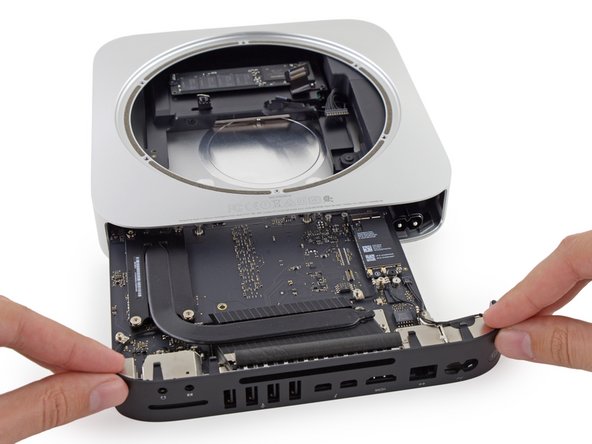
    • Mac miniロジックボード専用取外しツールを赤く表示された2つの穴に入れます。必ず棒がロジックボードの下のケースに到達するまで入れてください。

  10. : 手順 10、 3の画像 1 : 手順 10、 3の画像 2 : 手順 10、 3の画像 3
    • 注意しながら I/Oボードに向けてツールを倒します。ロジックボードと I/Oボードはケースからゆっくりスライドすると外れるように組み立てられています。

    • 取り外しツールがケース縁に当たったら止めます。

    • Mac miniロジックボード専用取外しツールを出します。

  11. : 手順 11、 2の画像 1 : 手順 11、 2の画像 2
    • DC-Inケーブルコネクタをロジックボード上のソケットからまっすぐ抜いてください。

  12. : 手順 12、 2の画像 1 : 手順 12、 2の画像 2
    • 注意しながら、ロジックボードアセンブリをMac miniから取り外します。この時、ケーブルを巻き込まないよう気をつけてください。

  13. , テープを剥がす: 手順 13、 1の画像 1
    • ロジックボードを取り外したら、基板を裏返します。

    • テープを剥がします。

  14. この手順は未翻訳です。 翻訳を手伝う。

    : 手順 14、 2の画像 1 : 手順 14、 2の画像 2
    • Use a spudger or small screwdriver to push the battery to the side and it will flip out

  15. この手順は未翻訳です。 翻訳を手伝う。

    : 手順 15、 1の画像 1
    • Insert the replacement battery

    • Put the tape back the best you can

ゴール

12 の人々がこのガイドを完成させました。

以下の翻訳者の皆さんにお礼を申し上げます:

en jp

22%

railgunさんは世界中で修理する私たちを助けてくれています! あなたも貢献してみませんか?
翻訳を始める ›

作成者

2人の作成者と共同で作成されました。

Tom

メンバー登録日: 05/04/14

1,642 ポイント

4のガイドは作成済み

5 件のコメント

I can’t find a way to contact you anywhere on your site but your fix for installing windows on a mac worked for me. I had been trying to get it to work for 2 days. Deleted my OSX install and everything. Deleting the second EFI partition is what it was. Nowhere else said that but your blog. So man, thanks and keep it up.

Jordan - 返信

No problem, your welcome. Thanks for your help too, you made me realise I broke the website comments during an upgrade.

Tom -

Thanks! This guide helped a lot! To folks doing this replacement, the tape covering the battery comes up fairly easy if you first use your tweezers to gently lift the three tabs on the sides of the battery housing, then it should come off in one piece.

Nick - 返信

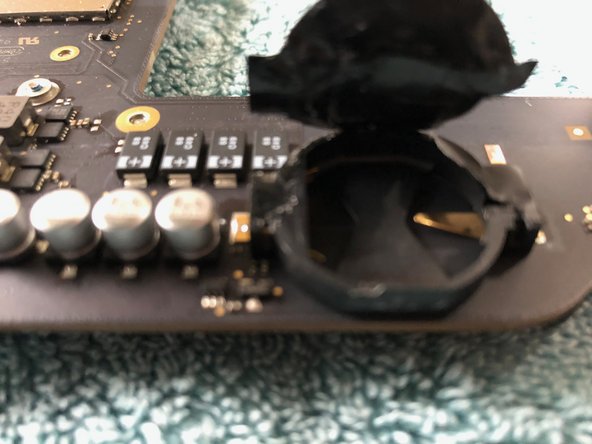
This may sound stupid I have a job lot of Mac mini 2012 at first I installed new hdd and new ram as the Mac mini started beeping when turned on. Once both of these were replaced the Mac minis now turn on but do not chime or display anything with high fan rpms. The PRAM batteries look blown on all of them could this potentially cause this any help will be appreciated

Jordan - 返信

Thats really interesting. I had put a SSD into my Mini a few weeks prior but I think what caused mine was a faulty USB device as the device at the time as the USB came up and then instantly failed taking the Mac with it. The new battery worked fine ever since. I did put a CR2032 in to confirm it resolved it before I put a BR2032 because I wanted to ensure it could tolerate the heat and sustain it long term (interesting article on the differences - https://electronicshacks.com/br2032-vs-c...). I was in a pinch at the time; BR2032's where I live are not common and I had to order it which took a while from memory. Hope that helps.

Tom -

コメントを追加

統計データ:

過去 24時間: 4

過去 7 日: 40

過去 30 日: 184

今までの合計 8,479