メインコンテンツにスキップ

MSI GT62VR 6RD Dominator Speaker Replacement

必要な工具と部品

  1. MSI GT62VR 6RD Dominator Speaker Replacement, Battery: 手順 1、 2の画像 1 MSI GT62VR 6RD Dominator Speaker Replacement, Battery: 手順 1、 2の画像 2
    • Be sure to power off and unplug your device before you begin your repair.

    • Remove the 6 screws on the bottom plate of the laptop using a Phillips driver.

  2. MSI GT62VR 6RD Dominator Speaker Replacement: 手順 2、 2の画像 1 MSI GT62VR 6RD Dominator Speaker Replacement: 手順 2、 2の画像 2
    • Insert the plastic opening tool into the back plate of the laptop and lightly pry it up.

    • The laptop cover will break if it is being handled roughly.

    • Slide the plastic opening tool around the laptop's edge gently, slowly popping off the clips securing it into the laptop.

    • Remove the back plate.

  3. MSI GT62VR 6RD Dominator Speaker Replacement: 手順 3、 3の画像 1 MSI GT62VR 6RD Dominator Speaker Replacement: 手順 3、 3の画像 2 MSI GT62VR 6RD Dominator Speaker Replacement: 手順 3、 3の画像 3
    • Locate the battery.

    • The wires are located at the back end of the battery and covered in tape.

    • Remove the tape covering the battery connector.

    • Place your hands at the corners of the wires.

    • Pull upward from the back end of the battery where the wires are located.

    • Remove the battery.

  4. MSI GT62VR 6RD Dominator Speaker Replacement, Hard Drive: 手順 4、 2の画像 1 MSI GT62VR 6RD Dominator Speaker Replacement, Hard Drive: 手順 4、 2の画像 2
    • Remove the six screws on the back plate of the laptop using a JIS #0 screwdriver.

  5. MSI GT62VR 6RD Dominator Speaker Replacement: 手順 5、 3の画像 1 MSI GT62VR 6RD Dominator Speaker Replacement: 手順 5、 3の画像 2 MSI GT62VR 6RD Dominator Speaker Replacement: 手順 5、 3の画像 3
    • Insert a plastic opening tool into the seam of the back cover

    • Pry the cover up until clips release.

    • Slide the plastic opening tool around the laptop until cover is fully removed.

  6. MSI GT62VR 6RD Dominator Speaker Replacement: 手順 6、 2の画像 1 MSI GT62VR 6RD Dominator Speaker Replacement: 手順 6、 2の画像 2
    • Remove the two screws securing the hard drive to the laptop.

    • Lightly lift the hard drive up by grasping the silver bracket that secures it to the laptop.

    • Wiggle it backwards slowly until it is unplugged.

    • Slide out from under the cover towards the battery.

  7. MSI GT62VR 6RD Dominator Speaker Replacement, Speaker: 手順 7、 2の画像 1 MSI GT62VR 6RD Dominator Speaker Replacement, Speaker: 手順 7、 2の画像 2
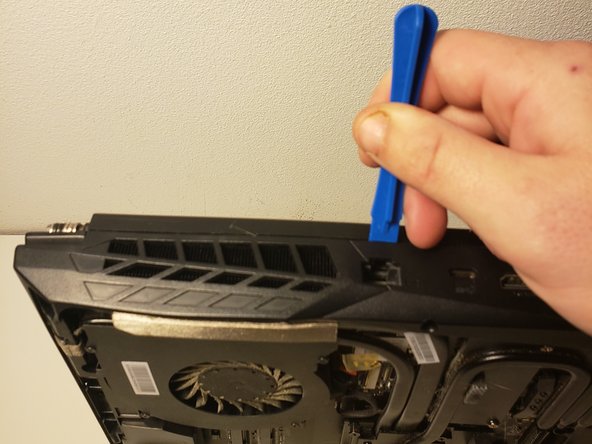
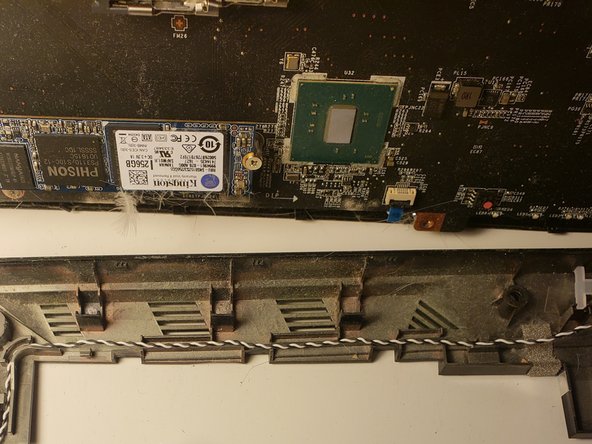
    • Insert the plastic opening tool into the side of the laptop above the fan, and lightly pry it up.

    • The laptop will break if it is being handle roughly.

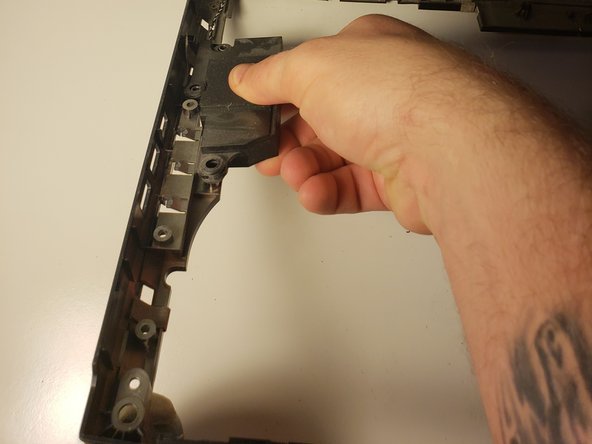
    • Slide the plastic opening tool around the laptop's edge gently, while slowly popping off the clips securing it into the laptop.

  8. MSI GT62VR 6RD Dominator Speaker Replacement: 手順 8、 2の画像 1 MSI GT62VR 6RD Dominator Speaker Replacement: 手順 8、 2の画像 2
    • Slowly pop off the clips securing the speaker to the laptop side frame.

  9. MSI GT62VR 6RD Dominator Speaker Replacement: 手順 9、 3の画像 1 MSI GT62VR 6RD Dominator Speaker Replacement: 手順 9、 3の画像 2 MSI GT62VR 6RD Dominator Speaker Replacement: 手順 9、 3の画像 3
    • Locate the speaker wires.

    • The speaker wires are attached to the speaker. By running your hand across the speaker wires, you can find its location on the motherboard.

    • Place your hands at the corners of the wires.

    • Pull upward from the motherboard where the wires are located.

終わりに

To reassemble your device, follow these instructions in reverse order.

作成者

2人の作成者と共同で作成されました。

emmanuel adgebnro

メンバー登録日: 09/18/18

147 ポイント

1ガイドが承認済み

チーム

University of North Texas, Team S4-G1, Raign Fall 2018 University of North Texas, Team S4-G1, Raign Fall 2018人のメンバー

UNT-RAIGN-F18S4G1

4 メンバー

5のガイドは作成済み

コメント 1 件

this is only for the sub, the other speaker is a nightmare to replace

Jeffrey Binns - 返信

コメントを追加

統計データ:

過去 24時間: 0

過去 7 日: 0

過去 30 日: 4

今までの合計 459