はじめに
If your MSI GS66 Stealth laptop (model 11UE-007) laptop is having problems with with the "blue screen of death", frequent freezes, and/or corrupted files, the random access memory stick (RAM) might be to blame. This can be attributed to many problems such as overheating, power faults, manufacturer defects or even physical damage to the laptop itself.
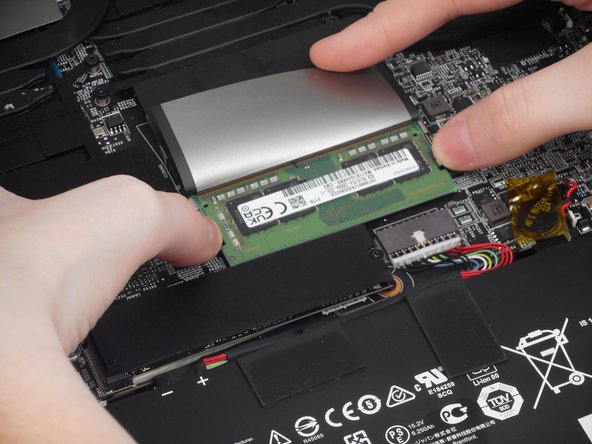
The RAM is an important part of any laptop what allows basically allows the applications to function. Luckily, this part is easy to spot and not very difficult to remove. However, this is a very delicate part and requires a light touch to replace. This guide will show the necessary steps of the location and replacement of the RAM drive.
必要な工具と部品


To reassemble your device, follow these instructions in reverse order.
To reassemble your device, follow these instructions in reverse order.
ある他の人がこのガイドを完成しました。
チーム

University of Memphis, Team 1-4, Sneed Fall 2023 University of Memphis, Team 1-4, Sneed Fall 2023人のメンバー
UM-SNEED-F23S1G4
4 メンバー
6のガイドは作成済み