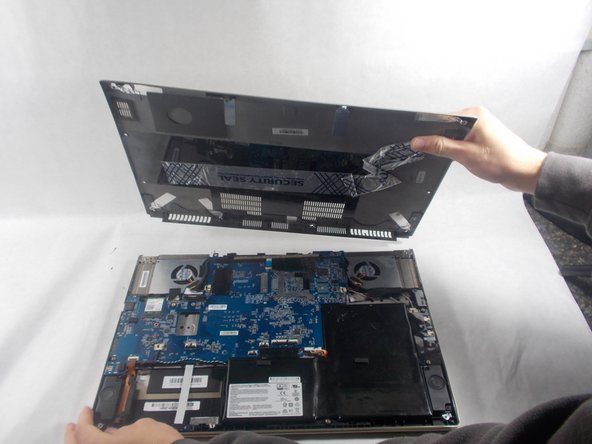
メインコンテンツにスキップ

MSI GS60 Ghost Pro 4K Gold Edition Speaker Replacement

必要な工具と部品

  1. MSI GS60 Ghost Pro 4K Gold Edition Speaker Replacement, Back Panel: 手順 1、 1の画像 1
    • Place this device back panel facing up.

  2. MSI GS60 Ghost Pro 4K Gold Edition Speaker Replacement: 手順 2、 1の画像 1
    • Using the screwdriver, unscrew the highlighted 1.2mm Phillips head #0 screws which secure the back panel into place.

  3. MSI GS60 Ghost Pro 4K Gold Edition Speaker Replacement: 手順 3、 2の画像 1 MSI GS60 Ghost Pro 4K Gold Edition Speaker Replacement: 手順 3、 2の画像 2
    • Using the plastic opening tools, separate the back panel from the rest of the device.

    • Do this by firmly pressing the head of the tool into the space between the back panel, and the rest of the device.

  4. MSI GS60 Ghost Pro 4K Gold Edition Speaker Replacement, Battery: 手順 4、 1の画像 1
    • Pull the back panel off.

  5. MSI GS60 Ghost Pro 4K Gold Edition Speaker Replacement: 手順 5、 1の画像 1
    • Notice the L-shaped battery in the lower right corner of the opened laptop.

    • Disconnect the battery from the slot it is connected to. You'll need to push on the sides of the clip and pull.

  6. MSI GS60 Ghost Pro 4K Gold Edition Speaker Replacement: 手順 6、 2の画像 1 MSI GS60 Ghost Pro 4K Gold Edition Speaker Replacement: 手順 6、 2の画像 2
    • Lift up the battery with your fingers and remove it from the laptop.

    • Place the battery away from the laptop in a safe spot and insert your new battery by hooking it up to the slot you previously disconnected the old battery from.

  7. MSI GS60 Ghost Pro 4K Gold Edition Speaker Replacement, Speaker: 手順 7、 2の画像 1 MSI GS60 Ghost Pro 4K Gold Edition Speaker Replacement, Speaker: 手順 7、 2の画像 2
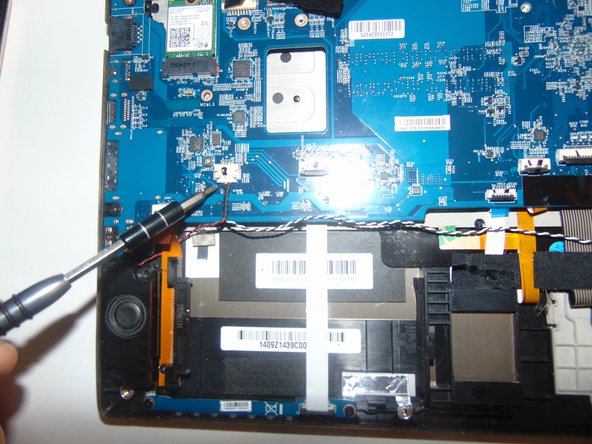
    • Disconnect the wires connnecting the speaker to the motherboard by grasping the portion of the cable covered in black shielding, and carefully pulling it horizontally away from the port it is connected to.

    • Be careful not to pull the cable too hard and bend the port on connecting the speakers to the motherboard.

  8. MSI GS60 Ghost Pro 4K Gold Edition Speaker Replacement: 手順 8、 2の画像 1 MSI GS60 Ghost Pro 4K Gold Edition Speaker Replacement: 手順 8、 2の画像 2
    • Use the screwdriver to unscrew the 4 1.5mm Phillips #0 screws connecting the speakers to the frame of the device.

    • There are 2 individual speaker modules, with 2 screws each.

  9. MSI GS60 Ghost Pro 4K Gold Edition Speaker Replacement: 手順 9、 2の画像 1 MSI GS60 Ghost Pro 4K Gold Edition Speaker Replacement: 手順 9、 2の画像 2
    • Carefully pull both the left and right speaker modules out of the computer.

終わりに

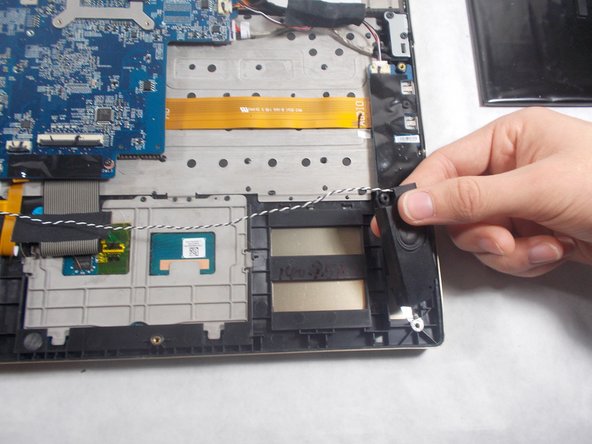
To reassemble your device, follow these instructions in reverse order.

作成者

2人の作成者と共同で作成されました。

nonEdward666

メンバー登録日: 10/18/17

340 ポイント

3のガイドは作成済み

チーム

UMass Dartmouth, Team S2-G2, Julie Fall 2017 UMass Dartmouth, Team S2-G2, Julie Fall 2017人のメンバー

UMASSD-JULIE-F17S2G2

4 メンバー

7のガイドは作成済み

0 件のコメント

コメントを追加

統計データ:

過去 24時間: 0

過去 7 日: 2

過去 30 日: 8

今までの合計 391