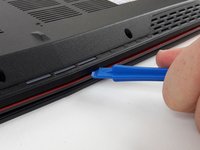
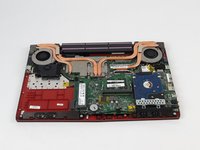
メインコンテンツにスキップ

MSI GE62 6QF Apache Pro Bottom Case Replacement

必要な工具と部品

  1. MSI GE62 6QF Apache Pro Bottom Case Replacement, Optical Drive: 手順 1、 1の画像 1
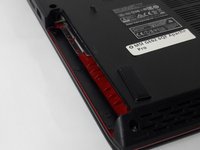
    • Use a Phillips screwdriver to remove the 5mm screw securing the optical drive to the bottom case.

  2. MSI GE62 6QF Apache Pro Bottom Case Replacement: 手順 2、 1の画像 1
    • Slide Optical Drive out of the computer.

  3. MSI GE62 6QF Apache Pro Bottom Case Replacement, Bottom Case: 手順 3、 1の画像 1
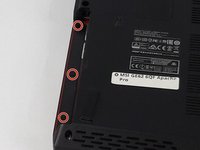
    • Use a Phillips screwdriver to remove the fourteen 5mm screws on the back of the laptop.

    • One of these screws is hidden under a sticker.

  4. MSI GE62 6QF Apache Pro Bottom Case Replacement: 手順 4、 3の画像 1 MSI GE62 6QF Apache Pro Bottom Case Replacement: 手順 4、 3の画像 2 MSI GE62 6QF Apache Pro Bottom Case Replacement: 手順 4、 3の画像 3
    • Remove the three PH #0 2mm screws that were hidden underneath the optical drive.

  5. MSI GE62 6QF Apache Pro Bottom Case Replacement: 手順 5、 2の画像 1 MSI GE62 6QF Apache Pro Bottom Case Replacement: 手順 5、 2の画像 2
    • Use an opening tool to run along the seam of the case where the upper and bottom case meet.

    • Pry the bottom case and remove from the upper part.

終わりに

To reassemble your device, follow these instructions in reverse order.

2 の人々がこのガイドを完成させました。

作成者

4人の作成者と共同で作成されました。

Justice Owens

メンバー登録日: 09/26/17

604 ポイント

4のガイドは作成済み

チーム

USF Tampa, Team S2-G3, Passmore Fall 2017 USF Tampa, Team S2-G3, Passmore Fall 2017人のメンバー

USFT-PASSMORE-F17S2G3

3 メンバー

5のガイドは作成済み

0件のガイドコメント

コメントを追加

統計データ:

過去 24時間: 0

過去 7 日: 13

過去 30 日: 28

今までの合計 5,289