メインコンテンツにスキップ

Lorex LW2742 Speaker Replacement

必要な工具と部品

  1. Lorex LW2742 Speaker Replacement, Back Panel: 手順 1、 3の画像 1 Lorex LW2742 Speaker Replacement, Back Panel: 手順 1、 3の画像 2 Lorex LW2742 Speaker Replacement, Back Panel: 手順 1、 3の画像 3
    • Remove the battery cover on the back of the LCD monitor by unscrewing one 5mm Phillips #1 screw.

    • Slide the battery out of the housing. Lightly tap the opposite end of the monitor if the battery does not come right out.

  2. Lorex LW2742 Speaker Replacement: 手順 2、 1の画像 1
    • Remove the four 6mm Phillips #1 screws on the back of the LCD monitor.

  3. Lorex LW2742 Speaker Replacement: 手順 3、 2の画像 1 Lorex LW2742 Speaker Replacement: 手順 3、 2の画像 2
    • Using a plastic opening tool, gently separate the back panel from the front panel, working the tool around the panel to disconnect it.

    • Carefully remove the back panel

    • The speaker wire is connected to the motherboard so DO NOT rip back panel away from the monitor.

  4. Lorex LW2742 Speaker Replacement, Speaker: 手順 4、 3の画像 1 Lorex LW2742 Speaker Replacement, Speaker: 手順 4、 3の画像 2 Lorex LW2742 Speaker Replacement, Speaker: 手順 4、 3の画像 3
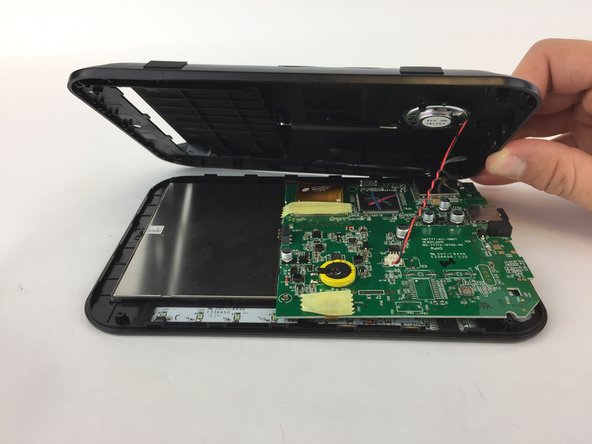
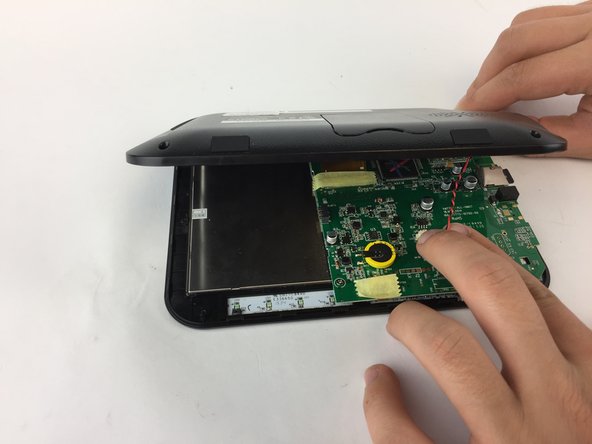
    • Locate the motherboard and carefully pull the red and black speaker wires out of their harness.

  5. Lorex LW2742 Speaker Replacement: 手順 5、 2の画像 1 Lorex LW2742 Speaker Replacement: 手順 5、 2の画像 2
    • Using a metal spudger, pry the melted black plastic away from the speaker.

    • Carefully pull the speaker out of its housing by the wires.

終わりに

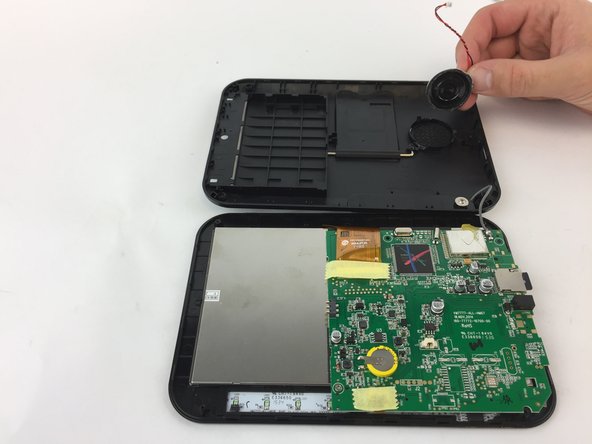
To reassemble your device, follow these instructions in reverse order.

ある他の人がこのガイドを完成しました。

作成者

2人の作成者と共同で作成されました。

Alex Kusmierz

メンバー登録日: 09/26/16

601 ポイント

5のガイドは作成済み

チーム

USF Tampa, Team 16-1, Eyestone Fall 2016 USF Tampa, Team 16-1, Eyestone Fall 2016人のメンバー

USFT-EYESTONE-F16S16G1

4 メンバー

12のガイドは作成済み

0 件のコメント

コメントを追加

統計データ:

過去 24時間: 0

過去 7 日: 0

過去 30 日: 2

今までの合計 188