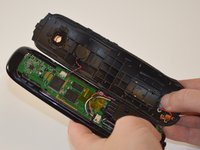
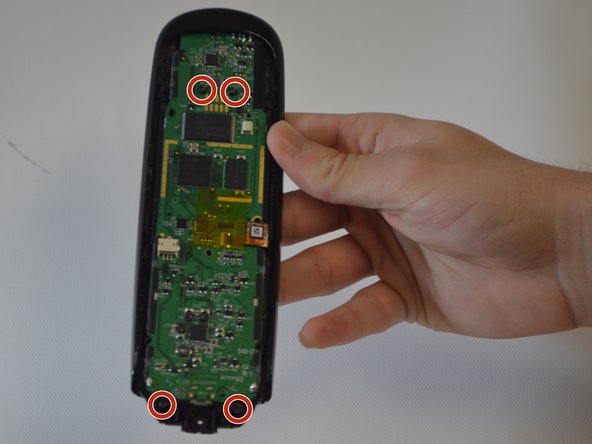
メインコンテンツにスキップ

Logitech Harmony Ultimate Motherboard Replacement

必要な工具と部品

  1. Logitech Harmony Ultimate Motherboard Replacement, Battery: 手順 1、 1の画像 1
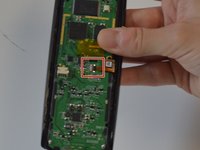
    • Remove the single 6 mm Phillips #0 screw located beneath the sticker near the USB charging port.

  2. Logitech Harmony Ultimate Motherboard Replacement: 手順 2、 1の画像 1
    • Use a plastic opening tool to release tabs that hold the front panel and back panel together. There are three tabs on each side of the device that need to separate for the device to open.

    • The use of a plastic opening tool is recommended to avoid damaging the remote. Use stronger tools as a last resort.

  3. Logitech Harmony Ultimate Motherboard Replacement: 手順 3、 2の画像 1 Logitech Harmony Ultimate Motherboard Replacement: 手順 3、 2の画像 2
    • Disconnect the wires running from the back cover to the motherboard.

  4. Logitech Harmony Ultimate Motherboard Replacement: 手順 4、 1の画像 1
    • Remove the four 6mm Phillips #0 screws from the battery case.

  5. Logitech Harmony Ultimate Motherboard Replacement: 手順 5、 1の画像 1
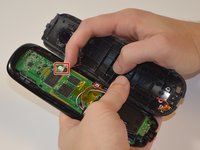
    • The battery is still connected to the device via wiring. To free the battery completely, remove the dark plastic piece from the slot with the plastic opening tool. Slowly rotate the dark plastic piece and the battery clockwise until then can be removed from underneath the small circuit board with the USB port.

    • Removing the dark plastic piece from the motherboard takes some patience, as the remote is designed so that the battery will not dislocate under extreme conditions. The small circuit board with the USB port remains connected to the motherboard by six 10 mm pins.

  6. Logitech Harmony Ultimate Motherboard Replacement: 手順 6、 1の画像 1
    • Lift the battery and its case out of the remote.

    • The battery should still be connected to the case with adhesive.

  7. Logitech Harmony Ultimate Motherboard Replacement: 手順 7、 2の画像 1 Logitech Harmony Ultimate Motherboard Replacement: 手順 7、 2の画像 2
    • Use the plastic opening tool to separate the battery from the case.

  8. Logitech Harmony Ultimate Motherboard Replacement, Motherboard: 手順 8、 2の画像 1 Logitech Harmony Ultimate Motherboard Replacement, Motherboard: 手順 8、 2の画像 2
    • Remove the four 6mm Phillips #0 screws from the motherboard.

  9. Logitech Harmony Ultimate Motherboard Replacement: 手順 9、 2の画像 1 Logitech Harmony Ultimate Motherboard Replacement: 手順 9、 2の画像 2
    • There is a flap that connects to the motherboard from the plastic casing. Use fingernails to safely release the flap by flipping the small black buckle upwards.

    • The flap and buckle are underneath the clear yellow piece of tape.

    • Be very careful as damaging this flap could permanently damage your controller.

  10. Logitech Harmony Ultimate Motherboard Replacement: 手順 10、 1の画像 1
    • The motherboard is now safe to remove by sliding and lifting it backwards out of place.

終わりに

To reassemble your device, follow these instructions in reverse order.

作成者

6人の作成者と共同で作成されました。

Aaron Diaz

メンバー登録日: 08/31/15

631 ポイント

3のガイドは作成済み

チーム

USF Tampa, Team 8-1, Eyestone Fall 2015 USF Tampa, Team 8-1, Eyestone Fall 2015人のメンバー

USFT-EYESTONE-F15S8G1

5 メンバー

6のガイドは作成済み

0 件のコメント

コメントを追加

統計データ:

過去 24時間: 1

過去 7 日: 3

過去 30 日: 13

今までの合計 2,252