メインコンテンツにスキップ

Logitech G400s Mouse Cable Replacement

必要な工具と部品

  1. Logitech G400s Mouse Cable Replacement, Mouse Cable: 手順 1、 1の画像 1
    • Use a Jimmy to remove the mouse feet.

    • Be careful to remove any film left by the mouse feet as well.

  2. Logitech G400s Mouse Cable Replacement: 手順 2、 1の画像 1
    • Remove the bottom mouse foot using a Jimmy and the same technique as in Step 1.

  3. Logitech G400s Mouse Cable Replacement: 手順 3、 1の画像 1
    • Use a Phillips #1 screwdriver to remove the three 5 mm Philips screws on the bottom surface.

  4. Logitech G400s Mouse Cable Replacement: 手順 4、 1の画像 1
    • Gently pull the upper shell away from the bottom platform.

  5. Logitech G400s Mouse Cable Replacement: 手順 5、 1の画像 1
    • This is what the G400s will look like when the top shell is taken off.

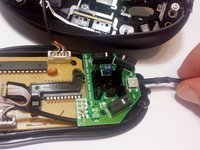
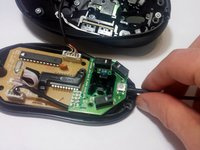
  6. Logitech G400s Mouse Cable Replacement: 手順 6、 2の画像 1 Logitech G400s Mouse Cable Replacement: 手順 6、 2の画像 2
    • Push the cable into its proper place inside the mouse shell.

終わりに

To reassemble your device, follow these instructions in reverse order.

作成者

1人の作成者と共同作成されました。

Max Evans

メンバー登録日: 09/28/16

403 ポイント

3のガイドは作成済み

チーム

USF Tampa, Team 16-7, Eyestone Fall 2016 USF Tampa, Team 16-7, Eyestone Fall 2016人のメンバー

USFT-EYESTONE-F16S16G7

1 メンバー

9のガイドは作成済み

0 件のコメント

コメントを追加

統計データ:

過去 24時間: 0

過去 7 日: 6

過去 30 日: 38

今までの合計 4,157