メインコンテンツにスキップ

Linksys WAP 11 Antenna Replacement

必要な工具と部品

  1. Linksys WAP 11 Antenna Replacement, Outer Case: 手順 1、 1の画像 1
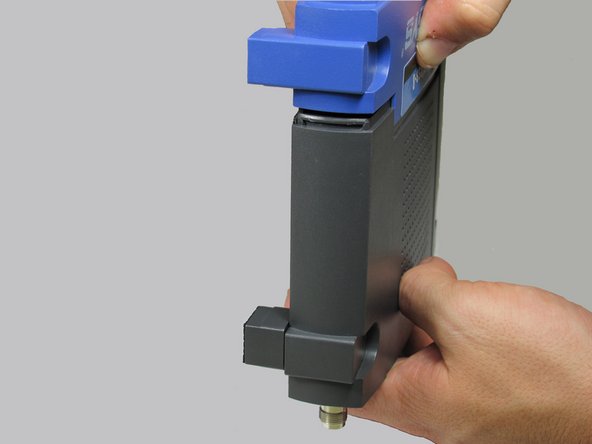
    • Be sure the ethernet and power cables are disconnected from the device.

    • You should also unscrew the external plastic antennas. There is one antenna on each side of the device.

  2. Linksys WAP 11 Antenna Replacement: 手順 2、 3の画像 1 Linksys WAP 11 Antenna Replacement: 手順 2、 3の画像 2 Linksys WAP 11 Antenna Replacement: 手順 2、 3の画像 3
    • To open the Linksys WAP11, you will need a Phillips #1 screwdriver and a pair of metal tweezers.

    • Use the tweezers to remove the two rubber boots on the front two legs. The easiest way to do this is to insert the tweezers into the hole in the face of the boot. Once you are hooked behind the boot, pull outwards.

    • This will reveal two small Phillips-head screws. Remove them.

    • Keep these two screws together.

  3. Linksys WAP 11 Antenna Replacement: 手順 3、 2の画像 1 Linksys WAP 11 Antenna Replacement: 手順 3、 2の画像 2
    • Using two hands (one on the front of the device and the other on the back) apply pressure to the top and bottom seal while pulling the front and back away from each other.

    • This requires significant amount of force.

    • The seal is located where the blue plastic meets the black plastic. This is where you will apply pressure.

  4. Linksys WAP 11 Antenna Replacement: 手順 4、 1の画像 1
    • After the face of the device has been removed, slide the base of the device off to reveal the motherboard and other internal components.

    • When removing the base, do not damage the wires that are attached to the device.

  5. Linksys WAP 11 Antenna Replacement: 手順 5、 1の画像 1
    • This is what the device looks like when it is fully opened.

  6. Linksys WAP 11 Antenna Replacement, Antenna: 手順 6、 1の画像 1
    • Using a Phillips screwdriver remove the the three screws that fasten the main circuit board to the chassis.

  7. Linksys WAP 11 Antenna Replacement: 手順 7、 1の画像 1
    • Using a pair of needle nose pliers, remove the nuts that secure the antenna ports to the rear panel.

  8. Linksys WAP 11 Antenna Replacement: 手順 8、 1の画像 1
    • Using a soldering iron and desoldering wick, desolder and remove the two antennas from the motherboard.

    • The antenna can now be replaced with a new one.

終わりに

To reassemble your device, follow these instructions in reverse order.

作成者

5人の作成者と共同で作成されました。

Joe M

メンバー登録日: 10/12/11

159 ポイント

3のガイドは作成済み

チーム

Cal Poly, Team 3-17, Regan Fall 2011 Cal Poly, Team 3-17, Regan Fall 2011人のメンバー

CPSU-REGAN-F11S3G17

5 メンバー

8のガイドは作成済み

0 件のコメント

コメントを追加

統計データ:

過去 24時間: 0

過去 7 日: 0

過去 30 日: 4

今までの合計 1,468